XPS (XML Paper Specification) files are Microsoft’s competitor to Adobe’s PDF files. Although the XPS file format is less popular than PDF, it’s still used today.
Since XPS was never a successful file format, Microsoft abandoned it and removed the default XPS file viewer from Windows in the April 2018 update.
However, if you still use the XPS format or have a file saved in XPS format, you can revive Windows’s default XPS file viewer.
1. Enable the XPS Viewer
In this method, we will revive the old Windows XPS file viewer. Follow some simple steps below to enable XPS viewer on Windows 10/11.
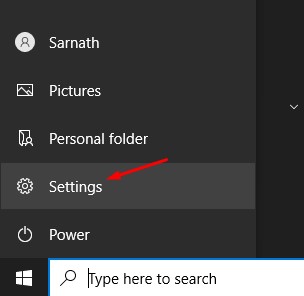
1. First, click on the Start button and select Settings.
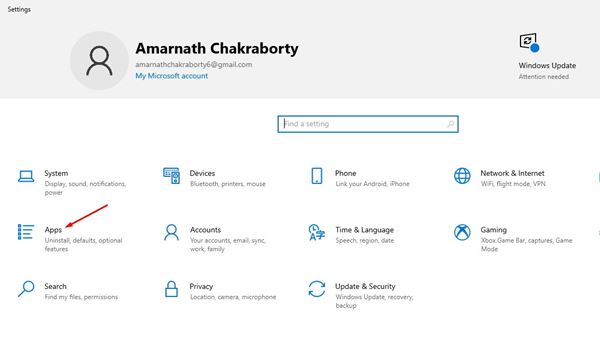
2. On the Settings page, click on the Apps option.
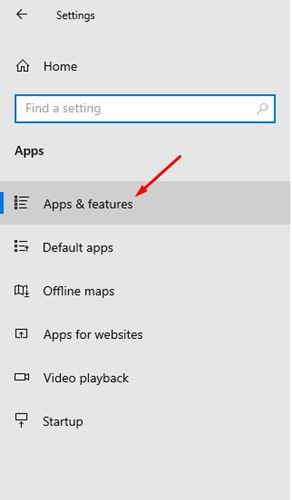
3. Click on the Apps & Features option on the left pane.
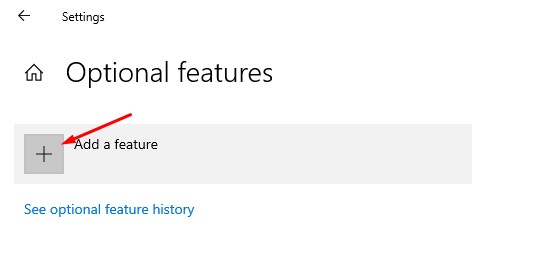
4. Now, click on the Optional Features on the right pane.

5. Click the (+) button behind the Add a Feature option.
6. On the Add, a feature screen, type in XPS Viewer.
7. Select the XPS viewer from the list and click the Install button.
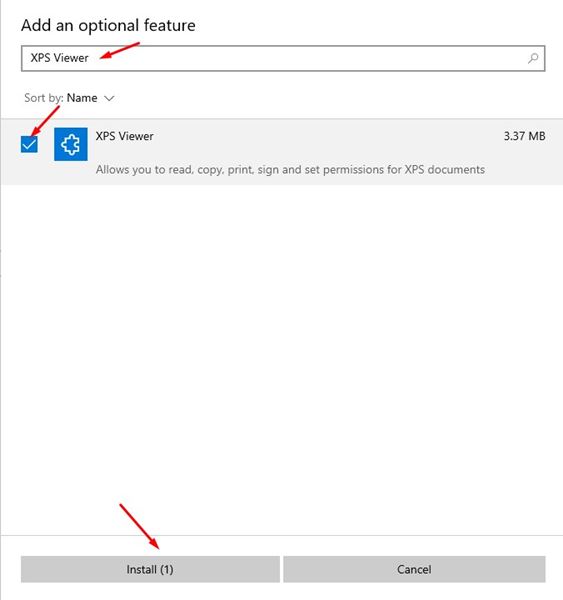
XPS Viewer will be installed on your PC. You can now open XPS documents directly on Windows 10.
2. Install XPS Viewer from RUN Command
If you cannot access the Windows settings page, you must implement this method. We will use the RUN Dialog box on Windows to install the XPS viewer application.
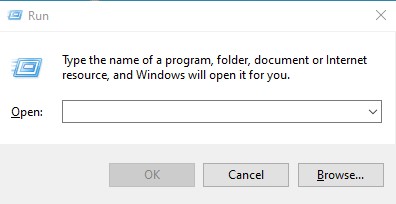
1. Open Windows Search and type in Run. Then, select Run from the list and open the Run dialog box.
2. On the Run dialog box, type in xpsrchvw and enter.
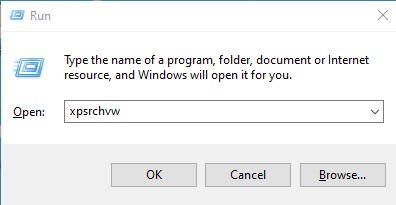
The above command will activate your Windows 10 PC’s XPS viewer. You can now open XPS files directly on your system.
3. Convert XPS files to PDF format
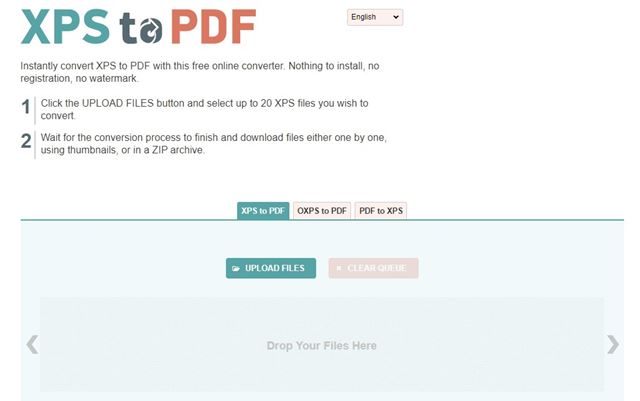
Another good method for opening an XPS file on an unsupported operating system is to convert it to PDF format. If you have Adobe Reader installed on your PC, you can convert XPS files into PDF format and open them with Adobe Reader.
You can use online PDF converter websites to convert XPS files into PDF format. Search for Convert XPS into PDF on Google, and you will find several websites.
Any website can convert your XPS files and documents into PDF format. Once converted, you can utilize Adobe Reader or any PDF viewer app to view the converted files.
4. Use XPS Viewer Online
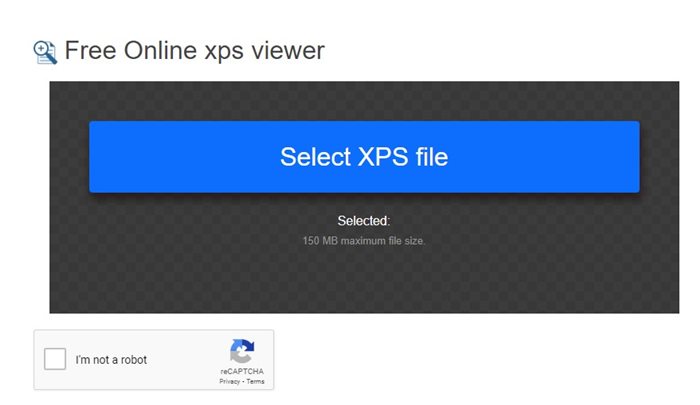
If you have access to the internet, you can use the XPS Viewer Online to open the XPS files. The good thing about online XPS viewers is that they work with every web browser and device.
Let’s say you have an XPS file on your mobile device. You can use your favorite web browser to access the online XPS viewer and then read your XPS Files.
There’s no shortage of Online XPS Viewers; you must pick the right web app. Then, you can search on Google ‘XPS Viewer Online’ and select the one that fits best for your purpose.
5. Open the XPS File in Windows using Google Drive
While Google Drive is a cloud storage service, you can still read an XPS file on Windows. Opening an XPS file with Google Drive is easy because the cloud storage readily supports the file format. Here’s how you can open an XPS file in Google Drive.
1. Open your favorite web browser and visit the Google Drive website. Next, log in with your Google Account.
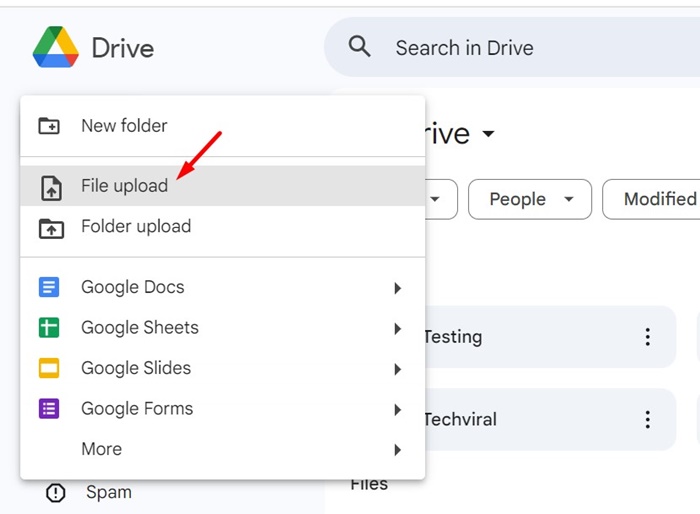
2. On the left side, click on the New button.
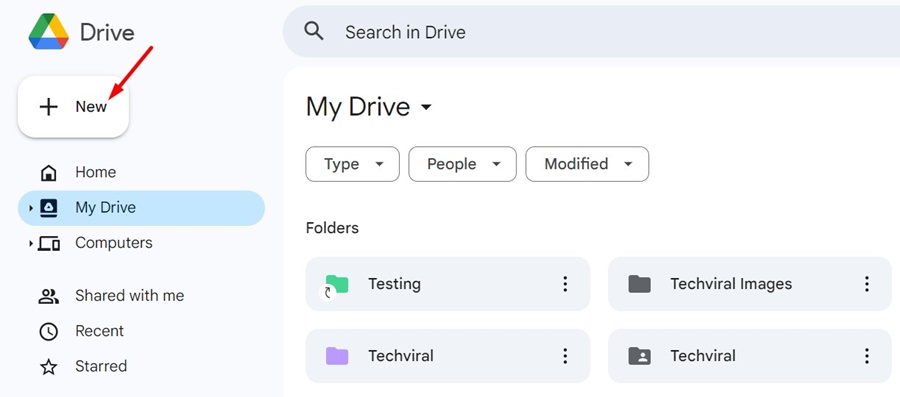
3. Next, select File Upload and pick the XPS file you want to open.
4. Once the XPS file is uploaded, open the file directly.
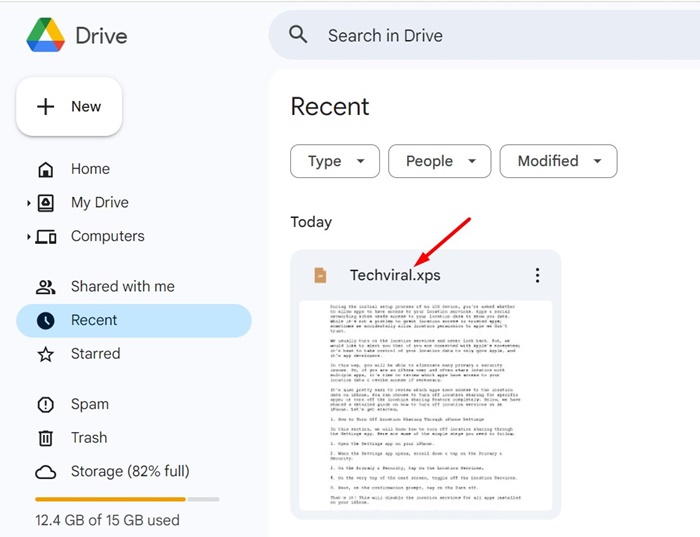
5. The XPS file will open within the Google Drive. You can now print, share, or leave comments on the file type.
This guide covers viewing XPS files in Windows. I hope this article helps you. Please share it with your friends. If you have any questions, let us know in the comment box below.


