Few apps were meant to run in the background, even if you are not using them. For example, the antivirus program runs in the background to protect your computer even if it’s idle.
Like that, some useless apps & processes also run in the background and consume RAM and CPU, affecting the performance of your device. Windows offers a feature that allows you to choose which apps and programs can run in the background to deal with such things.
It’s not an automatic setting; you must manually enable/disable background apps. So, if you want to know how to put programs to Sleep in Windows, here’s what you need to do.
Also Read: How to Uninstall a Program using CMD in Windows 10
1. Disable Background Apps
In this method, we will utilize the Windows 10 Settings app to put programs into sleep mode. Follow the steps given below.
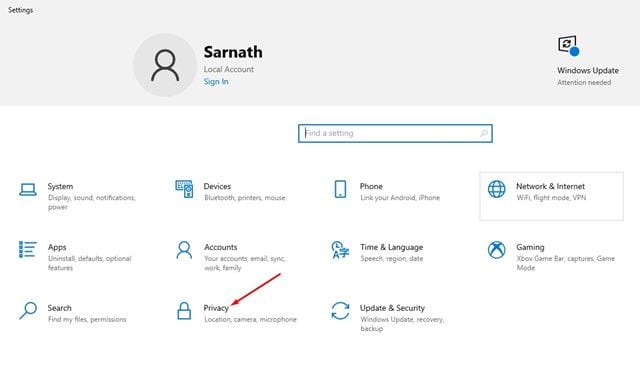
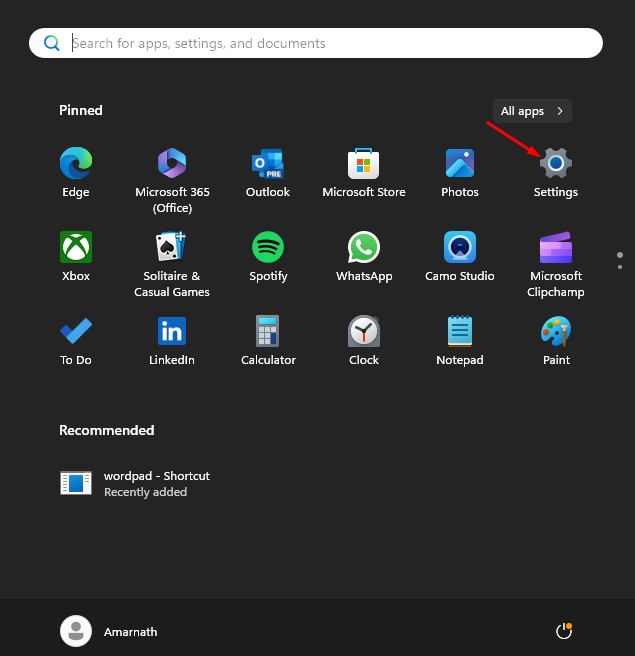
1. First, click on the Start button and select Settings.

2. On the Settings page, click on the Privacy option.
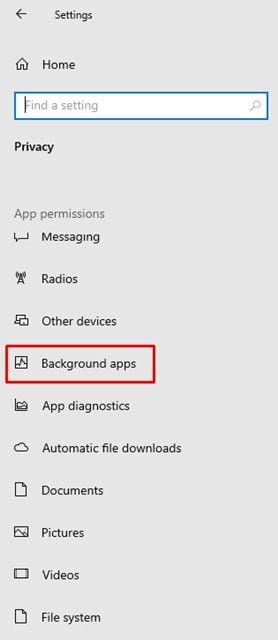
3. On the left pane, click on the Background Apps option.
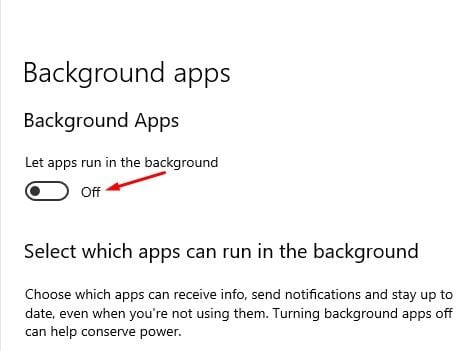
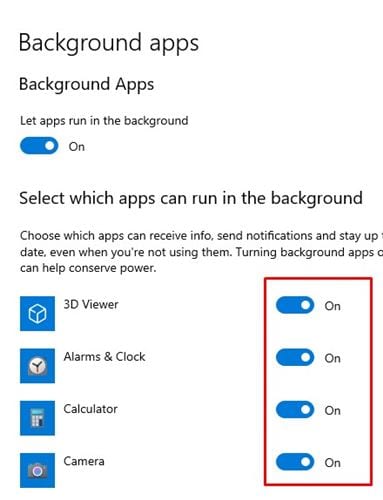
4. On the right pane, you will find two options:
Background Apps: If you disable this feature, no apps will run in the background. They will go to sleep mode once they are closed.
Choose Which apps can run in the background: If you have enabled the background apps, select which ones will run in the background.
5. Select the option that suits you best.
2. Disable Programs from the Startup Manager
The above method works only with universal apps. Some programs run at the startup, and they won’t show up in the app panel. So, in this method, we need to forcefully disable apps that run during the startup. Let’s check out
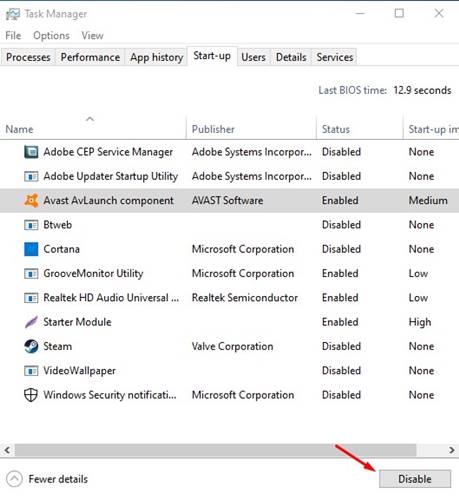
1. First, right-click on the Taskbar and select Task Manager.

2. On the Task Manager, click on the Startup tab.
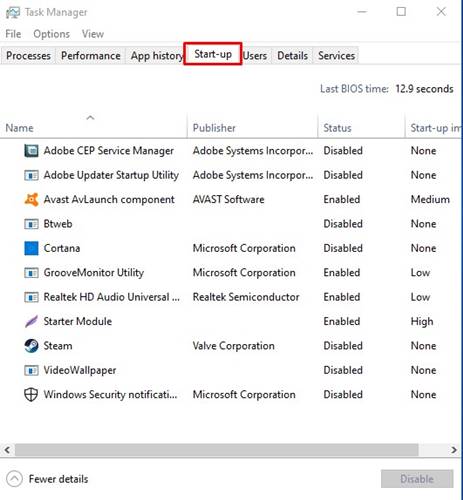
3. Select the apps you don’t want to run in the background and click the Disable option.
3. Make Changes to the System Configuration
This won’t put programs in sleep mode, but making changes to the System Configuration panel of Windows 11 will surely boost your PC’s performance. Basically, you need to select the Selective Startup option on System Configuration and uncheck the load startup items option.
This will prevent third-party apps from launching automatically at the Windows Startup. Here’s what you need to do.
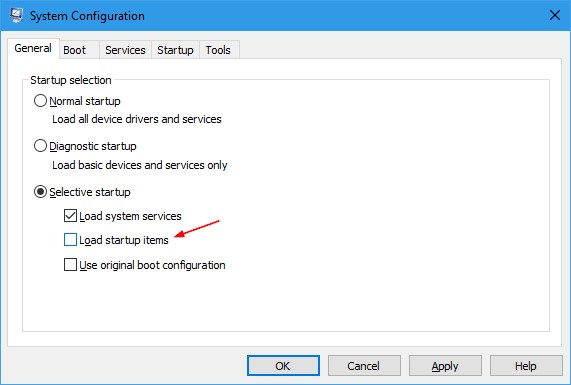
- Press the Windows Key + R button on your keyboard.
- This will open the RUN dialog box. Type in Msconfig and press Enter.
- On the System Configuration pane, select Selective Startup.
- Next, uncheck the Load Startup items option.
- After making the change, click on Apply, then on OK.
How to Put Apps to Sleep in Windows 11?
The steps to put apps to sleep in Windows 11 are a bit different. Also, you can only put the system apps to sleep mode; here’s what you need to do.
1. Launch the Settings app on your Windows 11.
2. When the Settings app opens, switch to the Apps tab.
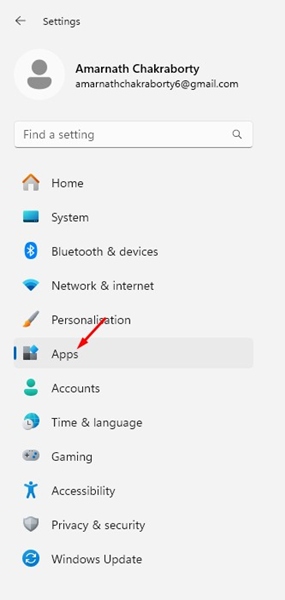
3. On the Apps, click on Installed Apps.

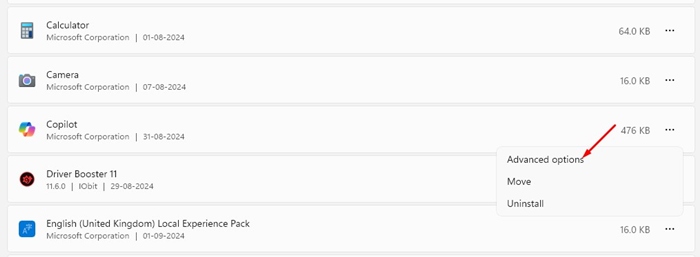
4. Now, pick the app that you want to put on Sleep. Click the three dots next to it.

5. On the options that appear, select Advanced Options.
6. On the Let this app run in the Background drop-down, select Never.
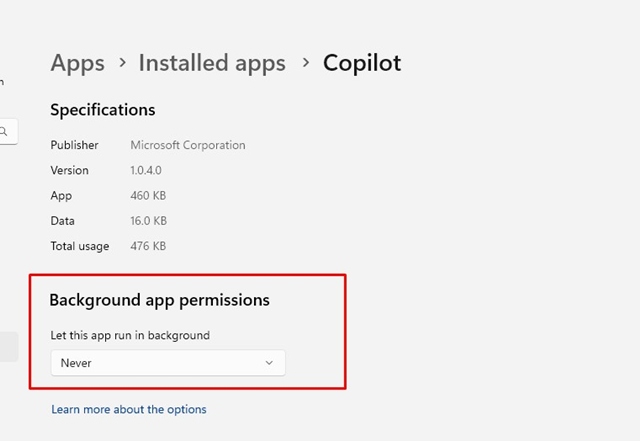
You need to repeat the same steps to put other apps to sleep.
This guide is about putting programs into sleep mode on Windows 10 computers. I hope this article helped you! Please share it with your friends, too. If you have any doubts, let us know in the comment box below.


