Let’s admit it, Microsoft has been quite aggressive in pushing its new Bing AI wherever possible. If you use Windows 11, you will find the new Bing AI on Windows Search.
While the new Bing search engine with AI feature is great, the appearance of it on Windows Search may hamper the entire search experience. The Bing services on Windows 11 slow down the Windows search experience and triggers high RAM and CPU Usage.
So, if you aren’t a fan of Bing Search and want to get rid of it from the Windows 11 search, continue reading the article. Below, we have shared different methods to remove Bing Search from Windows 11 and 10.
How to Remove Bing from Windows Search
Important: We have used Windows 11 to demonstrate the steps. Windows 10 users also need to follow the same steps.
Disable Bing Cloud Search from Search Settings
You can modify the search settings of Windows 11/10 to get rid of the Bing AI search. Here’s how to disable Bing Cloud Search in easy steps.
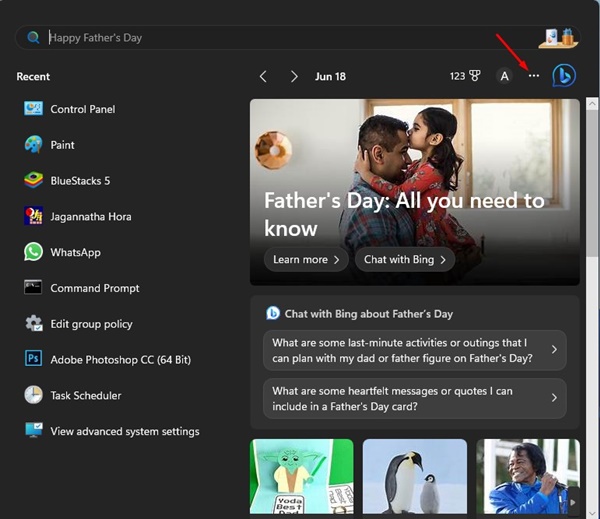
1. Open the Windows 11 search.
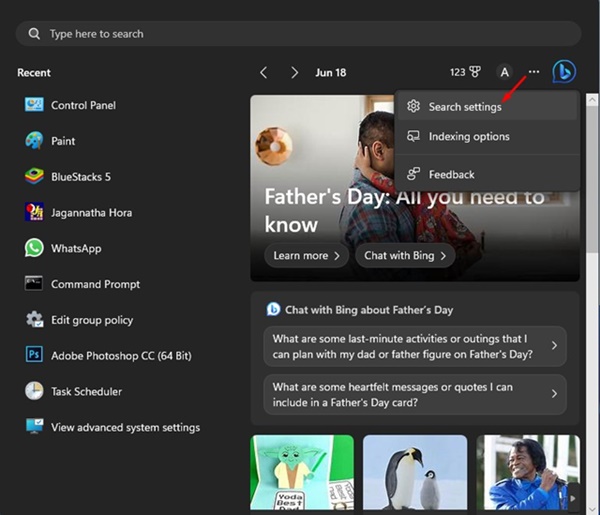
2. Now, click on the three dots beside the new Bing icon on the Windows search.
3. Select Search Settings from the list of options that appears.
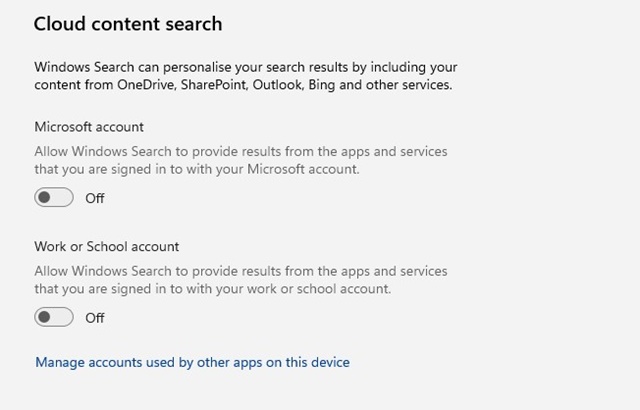
4. This will open the Search Permissions page. Scroll down to the Cloud Content Search and disable the Microsoft Account and Work or School Account toggle.
That’s it! This will disable the cloud content search on Windows 11 completely. From now on, Windows Search won’t personalize your search results. To bring back the Bing search, enable the two options again.
Remove Bing Search from Windows 11/10 Using Local Group Policy Editor
Editing the Group Policy is another way to remove Bing search from Windows 11 or 10. Here’s what you need to do.
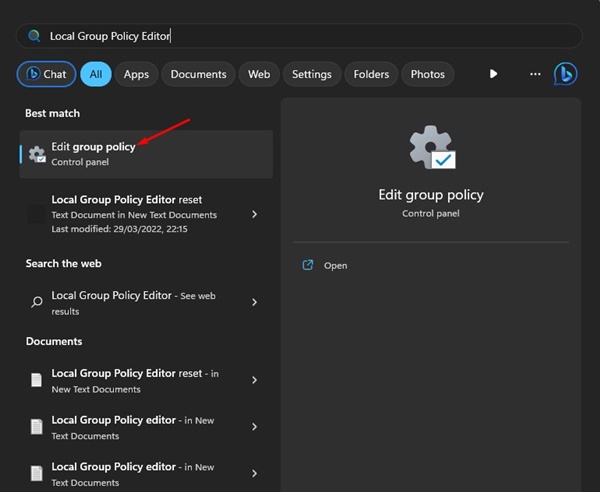
1. Click on Windows search and type Local Group Policy Editor.
2. Next, click on the Edit Group Policy app from the list.
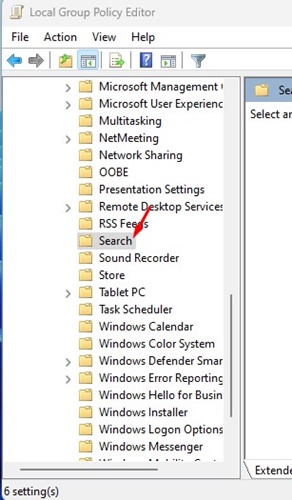
3. On the Local Group Policy Editor, navigate to Computer Configuration > Administrative Templates > Windows Components > Search.
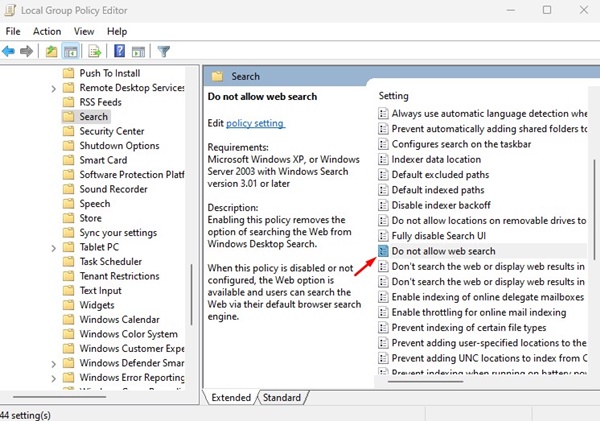
4. Find the Do Not Allow Web Search Policy and double-click on it.
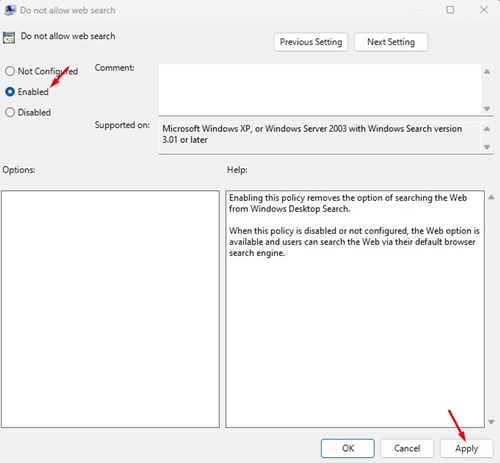
5. On the next screen, select Enabled and click the Apply button.
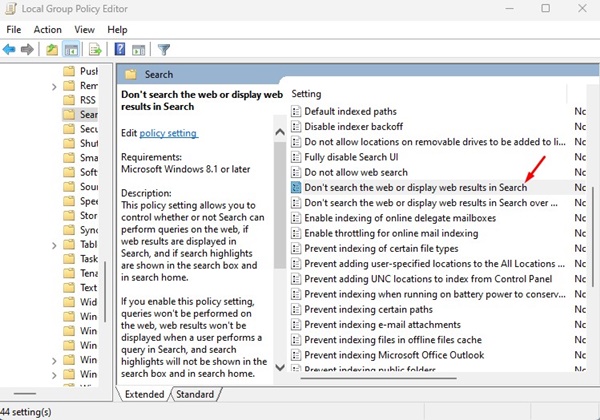
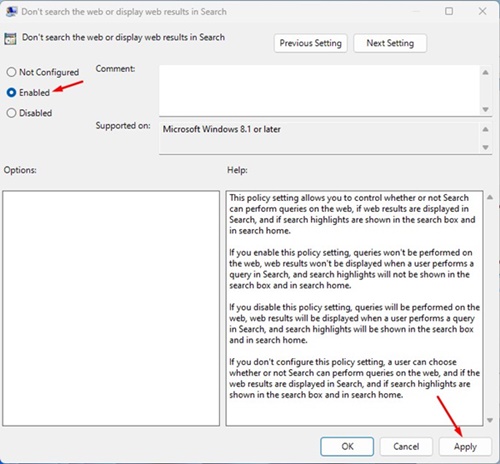
6. Now find Don’t search the web or display web results in Search policy and double-click on it.
7. On the Policy Settings page, select Enabled and click the Apply button.
That’s it! After making the changes, restart your Windows computer. After the restart, you won’t find the new Bing Search on Windows Search. If you want to bring back the Bing AI search again, you need to revert the changes you have made.
Remove Bing Search from Windows Using Registry Editor
Like the Local Group Policy Editor, you can also make some changes to the Windows Registry to get rid of Bing search on Windows 11. Here’s how to use Registry Editor to remove Bing search from Windows 11/10.
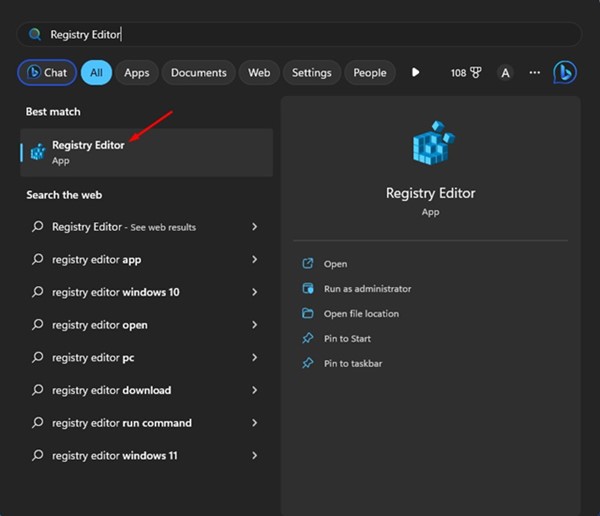
1. Click on Windows 11 search and type in Registry. Next, open the Registry Editor from the list of options.
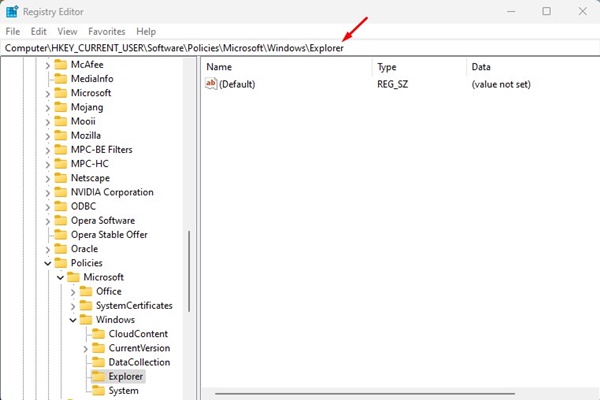
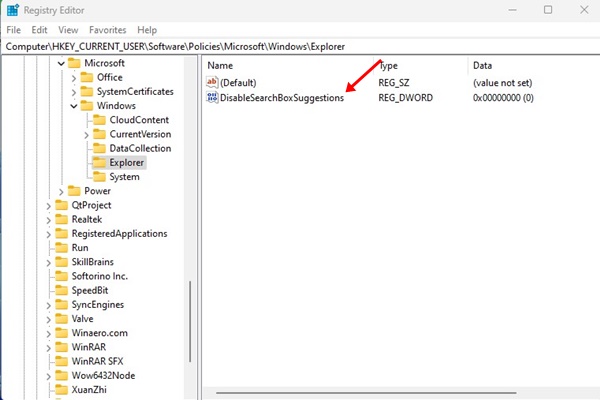
2. When the Registry Editor opens, navigate to this path:
Computer\HKEY_CURRENT_USER\Software\Policies\Microsoft\Windows\Explorer
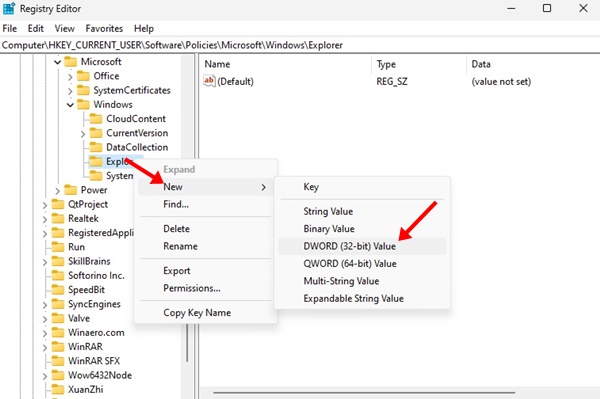
3. Right-click on Explorer and select New > DWORD (32-bit) Value.
4. Name the new value as DisableSearchBoxSuggestions.
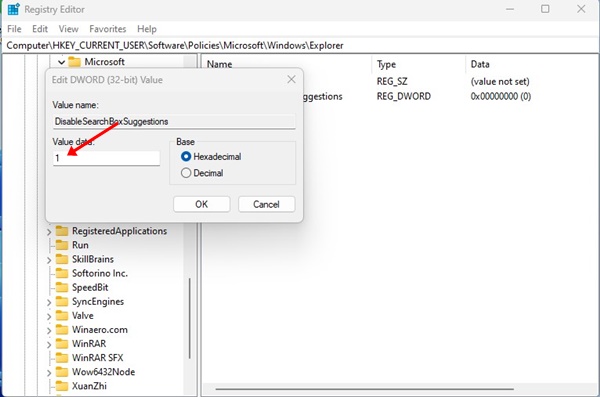
5. Double-click the DisableSearchBoxSuggestions and enter 1 on the Value Data field. Once done, click on the Ok button.
That’s it! After making the changes, restart your Windows 11 computer. You won’t see the Bing search on Windows 11/10 search anymore. to bring back the Bing AI search again, enter 0 on the Value data field in Step 5.
So, these are the three different ways to remove Bing Search from Windows 11/10. While we have used Windows 11 to demonstrate the steps, Windows 10 users can also follow the same steps to get rid of the new Bing Search. Removing Bing Search from Windows 11 will speed up the whole search experience and make the search less cluttered
