Let’s admit, there are times when we all have wanted to remove specific fonts from our computer. Maybe you don’t like the particular font to appear every time on your Photoshop font panel, or you think that specific font is raising some copyright issues.
If you have been using Windows 10 for a while, you might know that the operating system doesn’t provide any direct method to delete the font files. Every time you install a font on your computer, it gets installed on the default drive and doesn’t appear on the Control Panel.
Also, Microsoft’s Windows 10 supports only desktop fonts and not webfonts. So, if you want to uninstall fonts from the operating system, you need to find and remove them manually.
Also Read: How to Change the Default Font in Windows 10
Steps to Find & Remove Fonts on Windows 10 PC
In this article, we will share the two best methods to remove fonts from the Windows 10 operating system. Let’s check out.
1. Using the Windows Explorer
In this method, we will use Windows Explorer to find and remove fonts from the operating system. Let’s check out.
Step 1. First of all, open File Explorer on your Windows 10 PC.
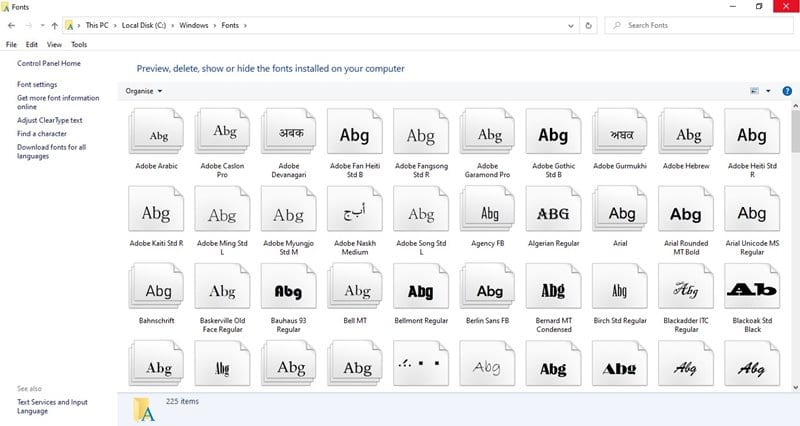
Step 2. Now, head to the patch – Windows 10 installation drive (usually C drive) > Windows > Fonts. The full path will be Local Disk (C) > Windows > Fonts.

Step 3. You will find all fonts installed on your operating system.
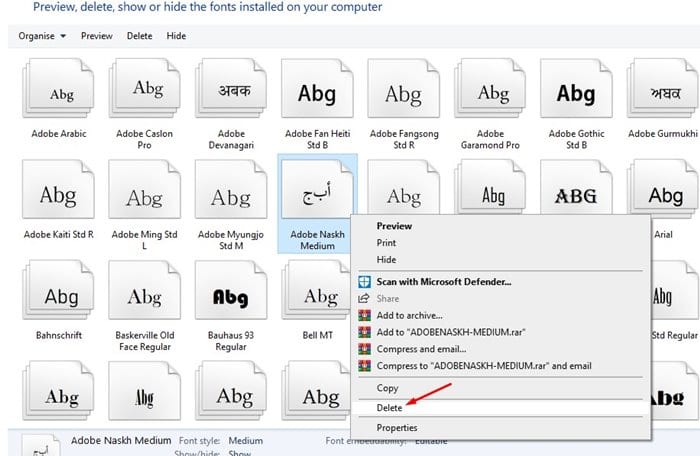
Step 4. To remove any particular font, right-click on the font and select ‘Delete.’
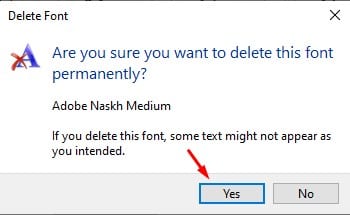
Step 5. On the confirmation pop-up, click on the ‘Yes‘ button.
That’s it! You are done. The font will be removed from your operating system.
2. Using Windows 10 Settings App
Well, you can even use the Windows 10 settings app to find and remove fonts from your operating system. Follow some of the simple steps given below.
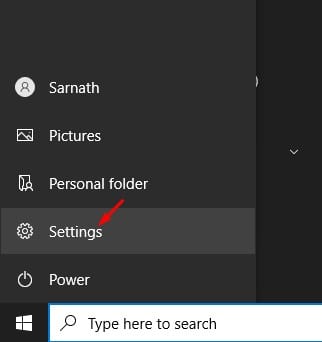
Step 1. First of all, click on the Start button and select ‘Settings.’
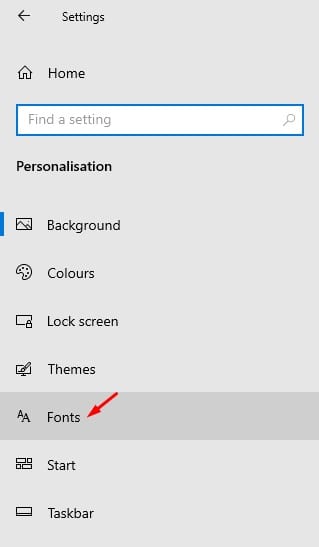
Step 2. On the Settings page, click on the ‘Personalization‘ option.

Step 3. From the left pane, click on the ‘Fonts‘ option.
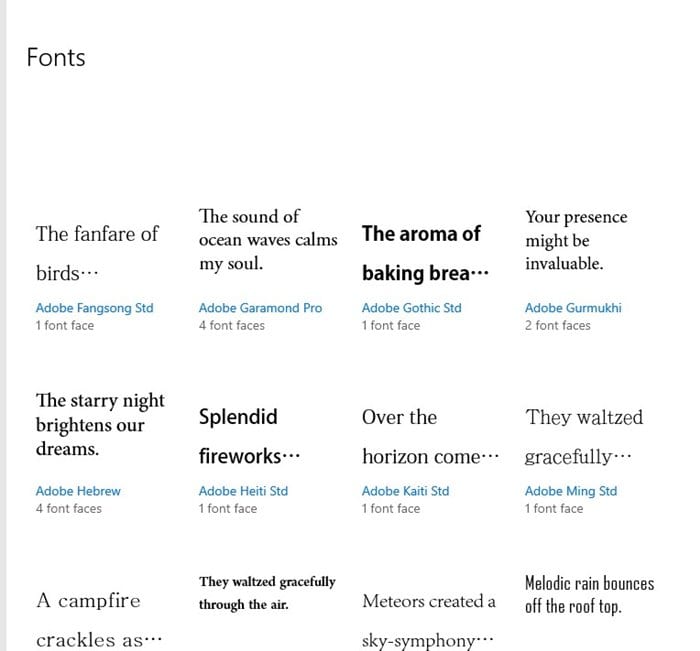
Step 4. On the Right pane, select the font that you wish to remove.
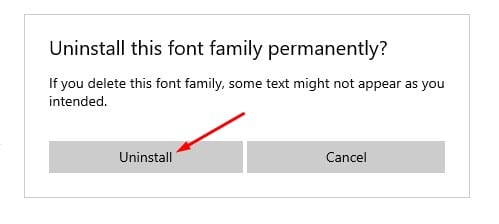
Step 5. Next, click on the ‘Uninstall‘ button.
Step 6. On the confirmation box, click on the ‘Uninstall‘ button again.
That’s it! You are done. This is how you can uninstall fonts via Windows 10 settings app.
So, this article is all about how to find and remove fonts from the Windows 10 computer. I hope this article helped you! Please share it with your friends also. If you have any doubts about this, let us know in the comment box below.


