Security is not a problem for users who don’t install third-party apps on their system, but if you use lots of them, you must protect your devices with an extra layer of security. If we talk about Windows 11, the operating system ships with a built-in security program called Windows Defender.
Windows Defender is indeed a great security program offered by Microsoft, and it comes for free. Also, it offers many features that users don’t know like Reputation-based Protection.
Reputation Based Protection is a very useful security feature introduced by Microsoft in its Windows defender app. This is a feature that protects your PC from unwanted software installation & hackers who might try to get into your PC without your consent.
If you do not use any third-party security program, the feature may already be enabled, but if not, it is easy to set up. Hence, in this article, we will share a step-by-step guide on setting up and enabling Reputation-based protection on Windows 11. But, first, let’s check out what Reputation-based protection does to protect your PC.
What does Reputation-based protection do?
Well, Reputation-based protection is basically a feature of Windows Security that brings many useful security features. Here’s what it does.
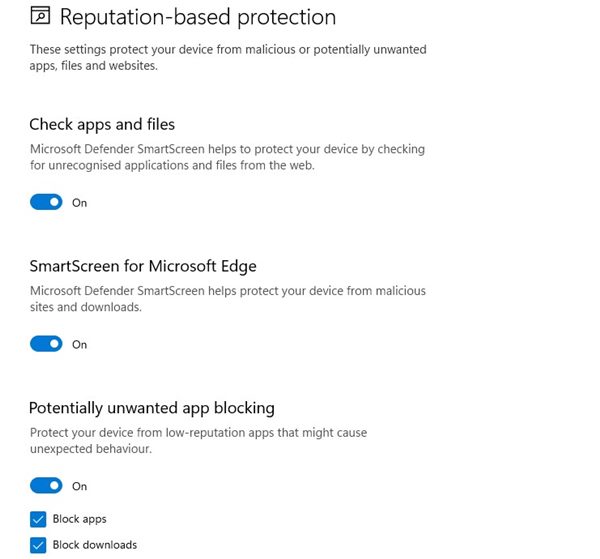
Check App and Files: This forces the Microsoft Defender SmartScreen feature to check for unrecognized apps and files from the web.
SmartScreen for Microsoft Edge: This one helps protect your device from malicious sites and downloads.
Potentially unwanted app blocking: This feature protect your device from low-reputation apps that might cause unexpected behavior.
SmartScreen for Microsoft Store Apps: This one protects your device by checking the web content that Microsoft Store apps use.
Steps to Enable Reputation-based protection in Windows 11
Well, you should enable Reputation-Based protection on Windows 11 to protect your device from malicious or potentially unwanted apps, files, and websites. Here’s what you need to do.
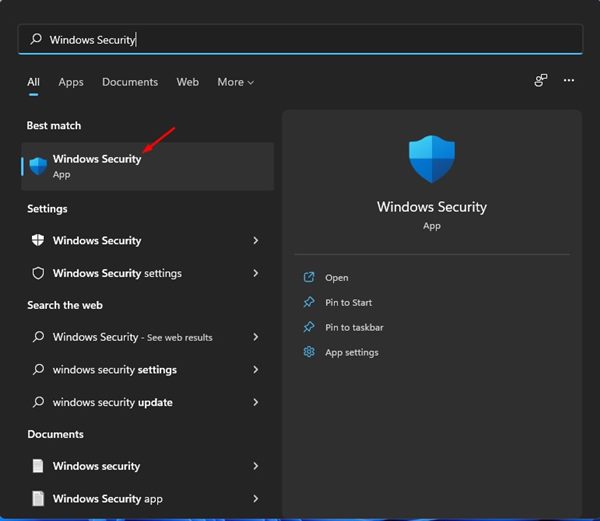
1. First of all, open the Windows 11 search and type in Windows Security. Next, open Windows Security from the search results.
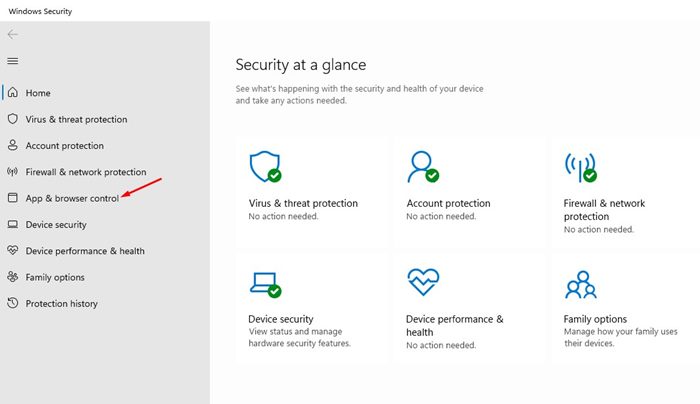
2. On Windows Security, click on the App & Browser Control option.
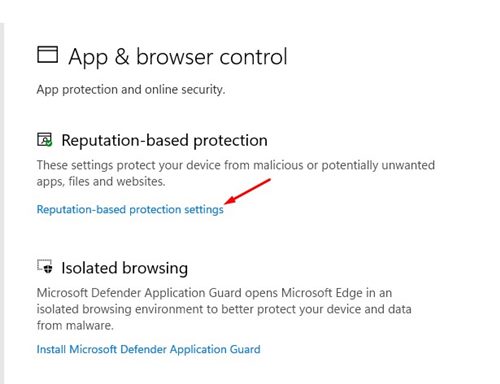
3. On the top, click on the Reputation-based protection Settings link as shown in the screenshot below.
4. You will find several options on the next screen. You need to turn on all options to enable Reputation-based protection.
That’s it! This is how you can enable Reputation-based protection on Windows 11 operating system.
Reputation-based protection is a handy feature of Windows Security. You can enable this feature to protect your device from various security threats. I hope this article helped you! Please share it with your friends also. If you have any doubts related to this, let us know in the comment box below.


