Windows 11 is out now, and it has introduced many new features, significant visual changes, and more. Unfortunately, Windows 11 is available only to users who have joined the Windows Insider Program.
If you are already running an Insider Preview build on your PC, you might face many issues. Windows 11 is still under testing, and hence it has lots of bugs and glitches.
If you are using Windows 11 and facing issues, you might want to take a fresh start. Therefore, this article has decided to share a step-by-step guide on resetting the Windows 11 operating system.
Also read: How to Reset Network Settings in Windows 11
Steps to Reset Windows 11 to Default Factory Settings
It’s pretty easy to reset Windows 11 via settings. But, for that, you need to implement some of the simple steps given below. So, let’s check out how to rest Windows 11 operating system.
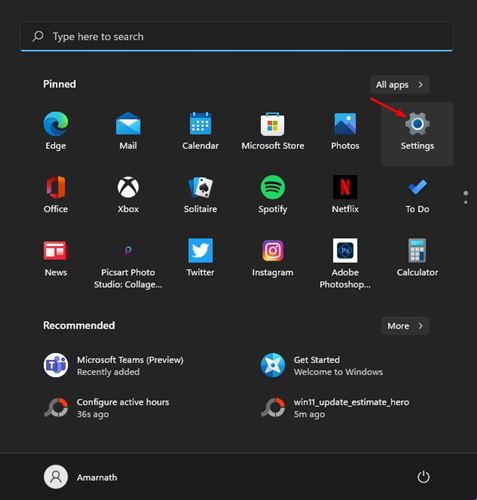
1. First of all, click on the Start button and select Settings.
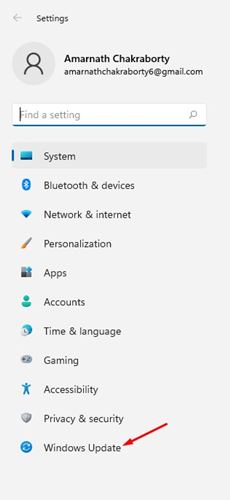
2. On the Settings app, click on the Windows Update option.
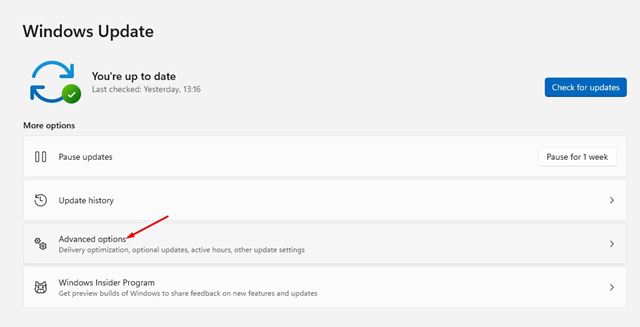
3. On the Right pane, click on the Advanced Options.
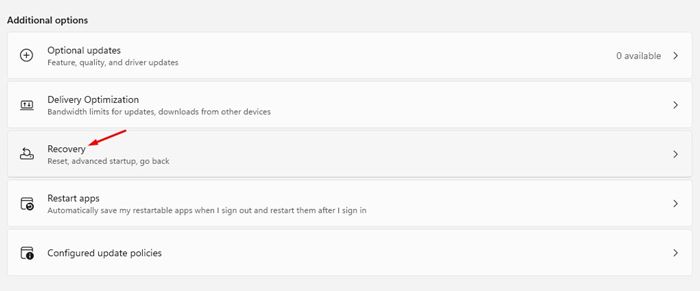
4. Now scroll down and click on the Recovery option.
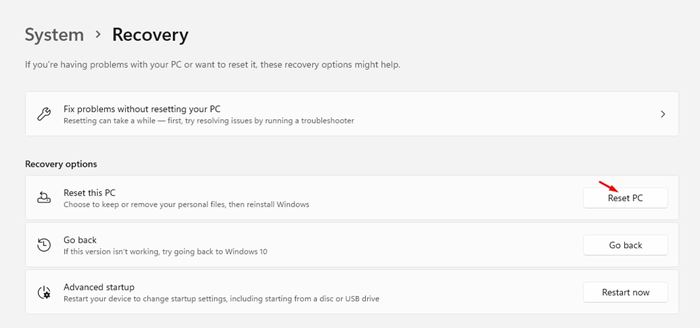
5. Under the Recovery options, click on the Reset PC option as shown below.
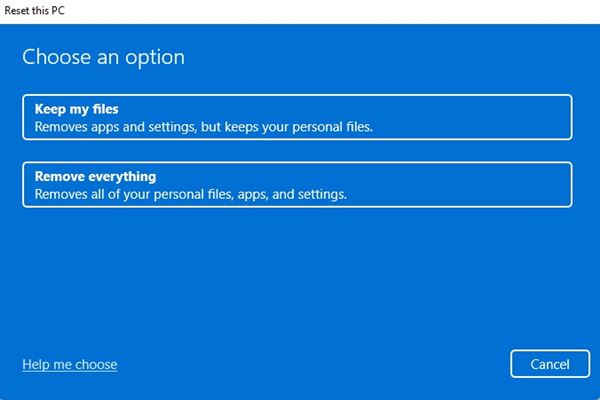
6. Now you will be given a choice to keep your files or erase everything. If you wish to keep your files, select the first option.
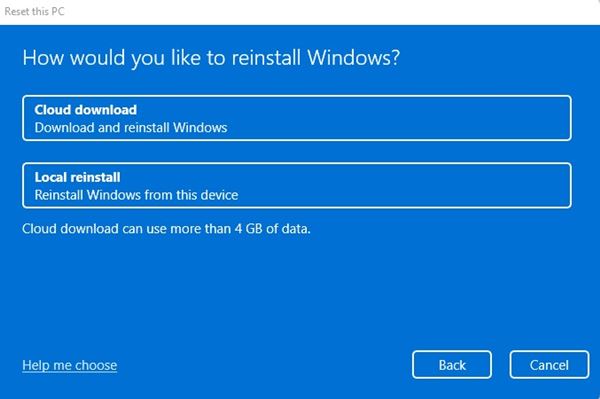
7. On the next page, you will be asked to select the way of Windows 11 re-installation. The cloud download will download a fresh copy, and the Local reinstall will reset the PC locally. Again, it’s best to pick the cloud download option.
8. On the next page, click on the Reset button.
That’s it! You are done. This will reset your Windows 11 PC. The process might take 30-60 minutes to complete.
So, this guide is all about how to reset Windows 11 PC. I hope this article helped you! Please share it with your friends also. If you have any doubts related to this, let us know in the comment box below.
