The previous year, Microsoft introduced a new Windows terminal. The Windows Terminal’s stable version is live, and lots of users were already using it.
The new modern terminal offers better features like tabs, split panes, multiple session times, and more.
The good thing about Windows Terminal is that it lets you customize many different options.
However, having so many options to customize can sometimes backfire. As a result, you might experience problems while using the new Windows terminal.
Steps to Reset Windows Terminal to Default Settings
So, if you are also experiencing some sorts of problems while using the Windows terminal, it’s best to reset it to its default settings. Resetting Windows’s new terminal is not a difficult task; it’s as easy as clicking a button.
So, in this article, we will share a detailed guide on how to reset Windows Terminal to the Factory Settings. So, let’s check out how to reset the new Windows Terminal.
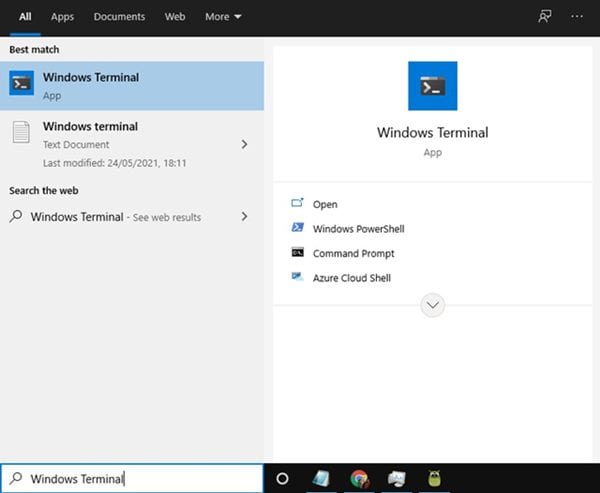
1. First of all, open Windows Search. Next, type in ‘Windows Terminal’, and open the Windows Terminal app.
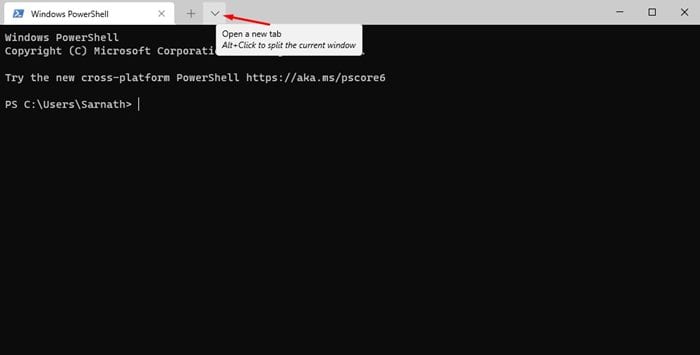
2. Now on the Windows terminal, click on the drop-down arrow as shown below.
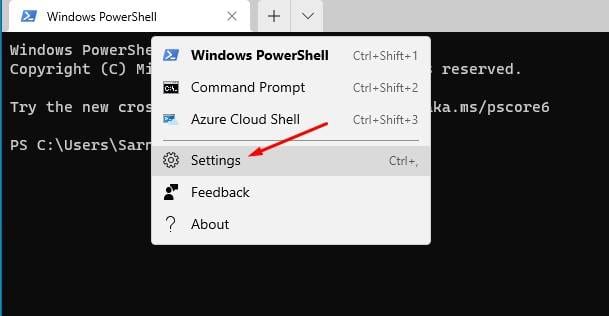
3. On the drop-down list, select ‘Settings‘.
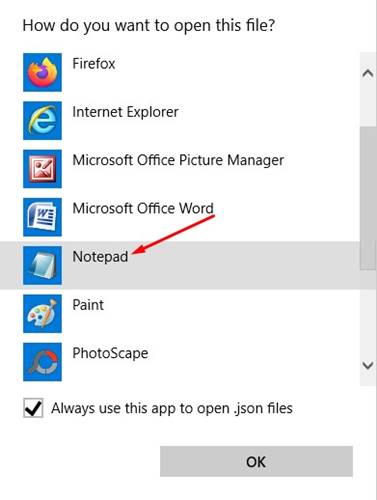
4. Now you will be asked to select an app to open the Settings file. Select ‘Notepad’ from the list.
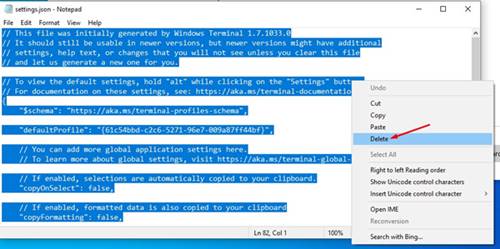
5. The settings.json file would like this. You need to remove everything from the file.
6. To remove everything, press the CTRL+A button on the keyboard and press the delete button.
Note: If you are using custom settings, make sure to copy the items to another text file before deleting it.
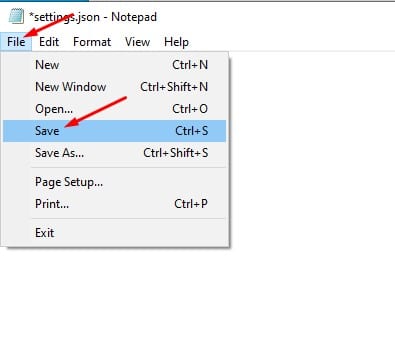
7. Once done, click on the ‘File‘ option and click on the ‘Save‘ option.
That’s it! You are done. This is how you can reset the all-new Windows terminal.
So, this article is all about how to reset the Windows terminal. I hope this article helped you! Please share it with your friends also. If you have any doubts related to this, let us know in the comment box below.
