If you have been using Windows 10 for a while, you might know that the operating system offers a built-in security tool known as Microsoft Defender or Windows Security.
The tool comes pre-built with the operating system, and it protects your computer against various security threats like viruses, malware, spyware, and more. Windows Security app or Windows Defender provides you multiple options to scan your system.
The Windows Security app provides you 4 different scan options to remove viruses/malware from your system. Here are the 4 different scanning modes:
- Quick Scan: This one checks the folders in your system where threats are commonly found.
- Full Scan: This one checks all files and folders stored on your hard disk.
- Custom Scan: This option allows you to choose which folders and locations you want to check.
- Microsoft Defender Offline Scan: This one finds and removes viruses and malware that were difficult to remove from your device.
In this article, we will talk about the Microsoft Defender Offline Scan option of Windows Security. So, let’s check out what Microsoft Defender Offline Scan does.
What is Microsoft Defender Offline Scan?
Microsoft Defender Offline Scan is pretty effective in removing persistent malware such as rootkits or especially stubborn malware.
Defender Offline Scan runs when Windows is not started, and this malware is not actively blocking the security program. This mode will restart your device and will take about 15 minutes.
Also read: How to Reset Network Settings in Windows 11
How to Run a Microsoft Defender Offline Scan
Well, it’s pretty easy to run a Microsoft Defender Offline Scan on Windows 10/11. However, you need to save all your active works as this mode will restart your device. Follow some of the simple steps given below.
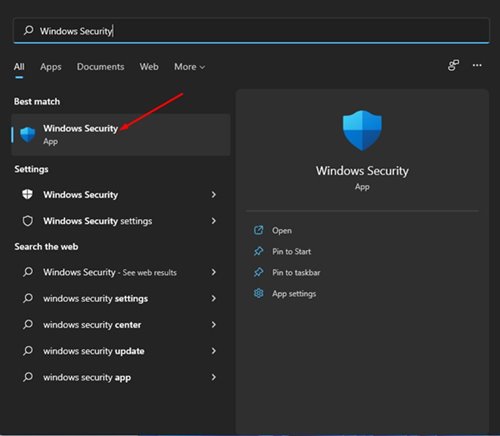
Step 1. First of all, open Windows search and type in Windows Security. Then, open the Windows Security option from the list.
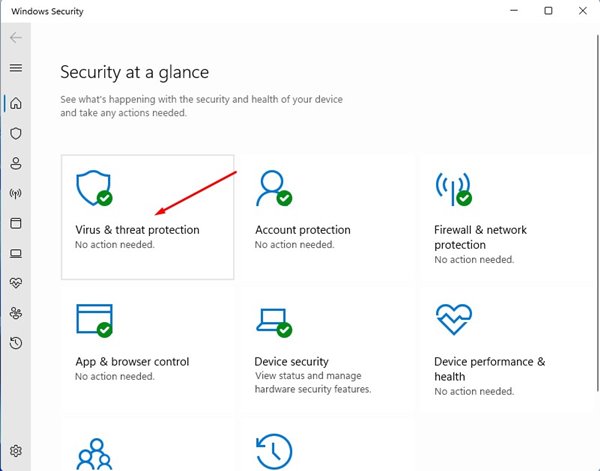
Step 2. On the Windows Security app, click on the ‘Virus & threat protection’ option.
Step 3. On the next page, click on the ‘Scan options.’

Step 4. You will find four different types of scan options on the next page.
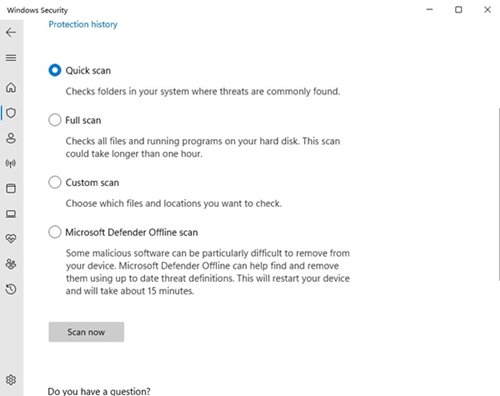
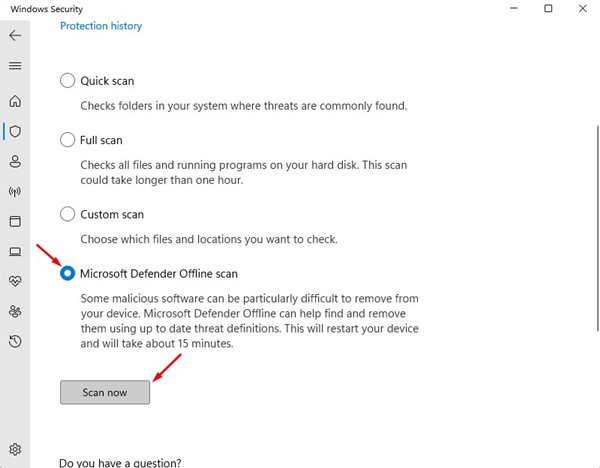
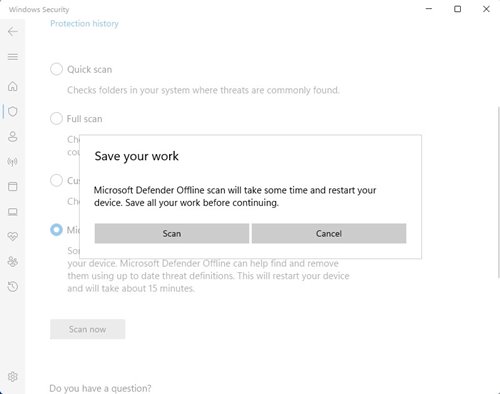
Step 5. Select Microsoft Defender Offline Scan and click on the ‘Scan Now’ button.
Step 6. Now you will be asked to save your work. Save your work and click on the ‘Scan’ button.
Step 7. On the User Account Control pop-up, click on the ‘Yes‘ button.
That’s it! You are done. Now your computer will restart, and you will see a command prompt window during the scan.
So, this is how you can run a Microsoft Defender Offline Scan on Windows 10/11. I hope this article helped you! Please share it with your friends also. If you have any doubts related to this, let us know in the comment box below.


