For those who don’t know, every program in Windows has a priority level that determines how much resources it will consume when more than one program is running. So, for example, if you are running two software simultaneously, Windows 10 will prioritize both. That means both of the software will use equal system resources.
Similarly, if you are playing a game without running any other program, then Windows will prioritize the game only. On the other hand, if you have a process running in the background, boosting the game’s priority ensures better gaming performance, even if it means slowing down other work.
Windows 10 lets you change the process priorities. Changing a process priority determines how much of your computer’s resources are devoted to that process. So, in this article, we have decided to share a working method to change process priority in Windows 10 computers.
Also read: Best Ways To Free Up Hard Disk Space On Windows 10
Run Windows Program at Higher Priority
Changing process priority on Windows 10 is an easy process. It would be best if. First, you utilized the task manager to manage the priority levels. So, let’s check out how to change process priorities in Windows Task Manager.
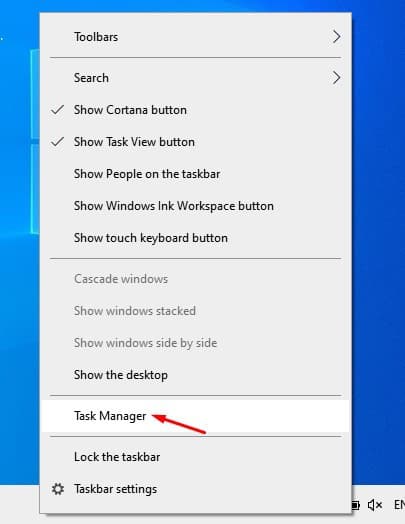
1. First, right-click on the taskbar and select Task Manager.
2. On the Task Manager, clickk on the process whose priority you want to change and click on the Go to details.
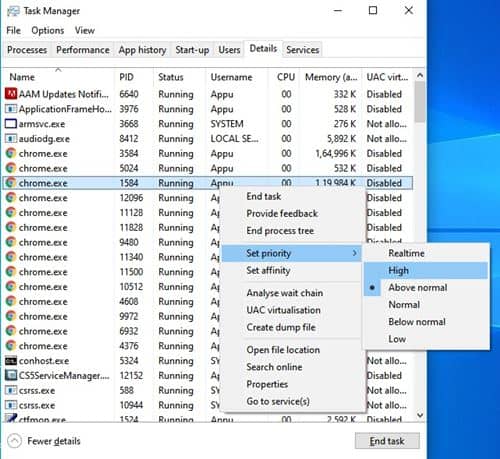
3. You will now see the details tab. Right-click on the selected process and select Set Priority.
4. You will now see 6 Options – real-time-, High, Above Normal, Normal, Below Normal, and Low.
5. Realtime is the Highest Priority, and Low is the Lowest Priority. From there, you can set the priority of each process, depending on your needs.
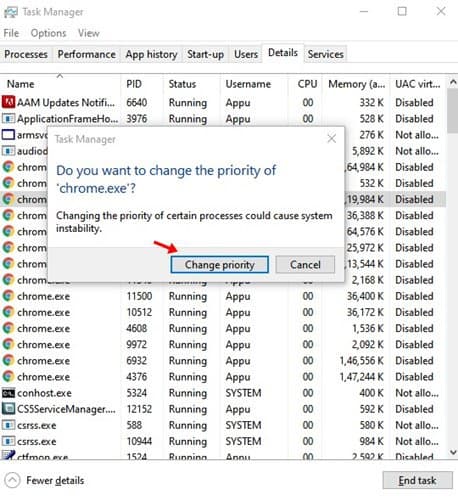
6. Once done, click on the Change Priority when prompted.
That’s it! You are done. This is how you can change process priorities in Windows 10 computers.
So, this article is about running an application at a Higher priority in Windows 10. I hope this article helped you! Please share it with your friends also.


