Well, it’s no doubt that Microsoft’s Windows 10 is right now the most used desktop operating system. Compared to every other desktop operating system, Windows 10 offers more features and options. However, the operating system is not without its downside. One of the major downsides of Windows 10 is its automatic updates.
Every week there are updates available for Windows 10. The updates not only consume your internet bandwidth, but they also take lots of time to install. Windows 10 automatically downloads the updates in the background and installs it at a random time. Also, the update often takes a few hours to install.
To deal with such issues, Microsoft introduced an ‘Active Hour’ feature. Once you set the Active hour, Windows will only install the updates outside the active hours. For example, if you have set active hours from 7 AM to 10 PM, Windows will not install the update at that time. It will only install the updates before 7 AM or after 10 PM.
[alert-announce]Also Read: Best Websites to Download Windows Software for Free[/alert-announce]
Set ‘Active Hours’ On Windows 10 Computer
So, in this article, we have decided to share a working method to enable active hours in Windows 10 operating system. So, let’s check out how to enable active hours in Windows 10 computers in 2020.
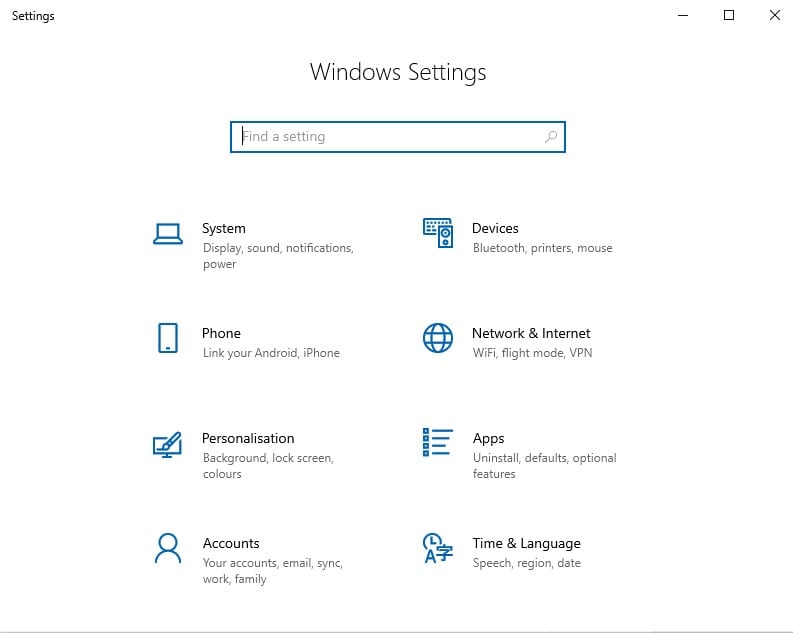
Step 1. First of all, open the Settings app on your Windows 10 PC.
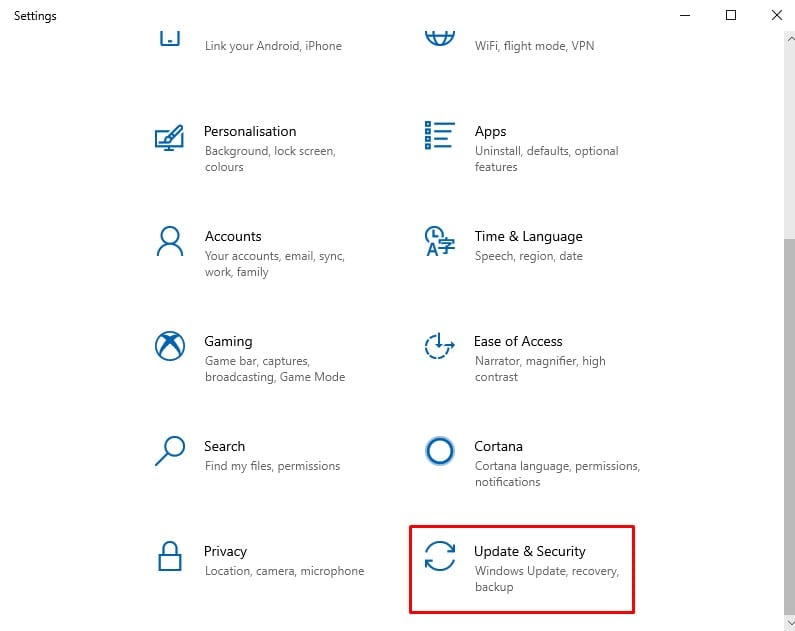
Step 2. On the Settings app, click on ‘Update & Security’.
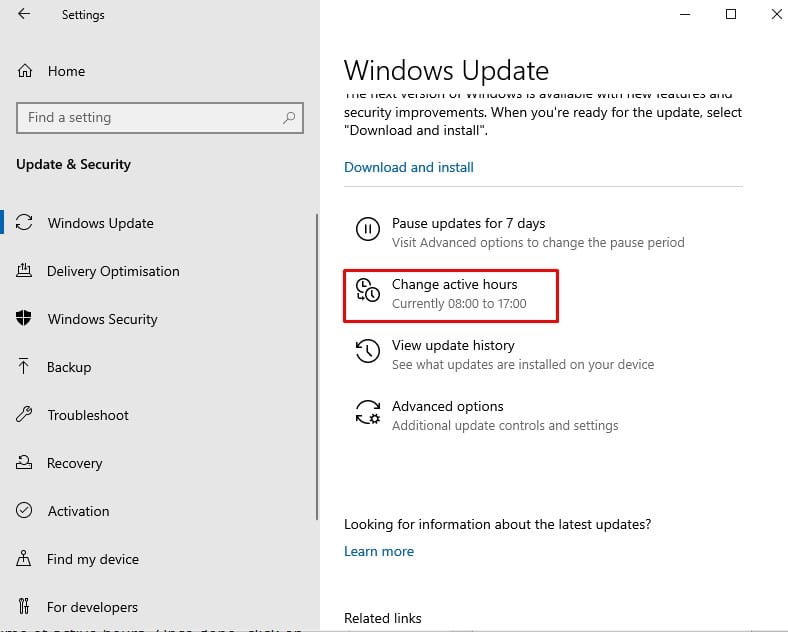
Step 3. In the next page, select ‘Windows update’

Step 4. There you need to find and click on the ‘Change active hours’ option.
Step 5. Now click on the ‘Change’ button, as shown in the screenshot below.
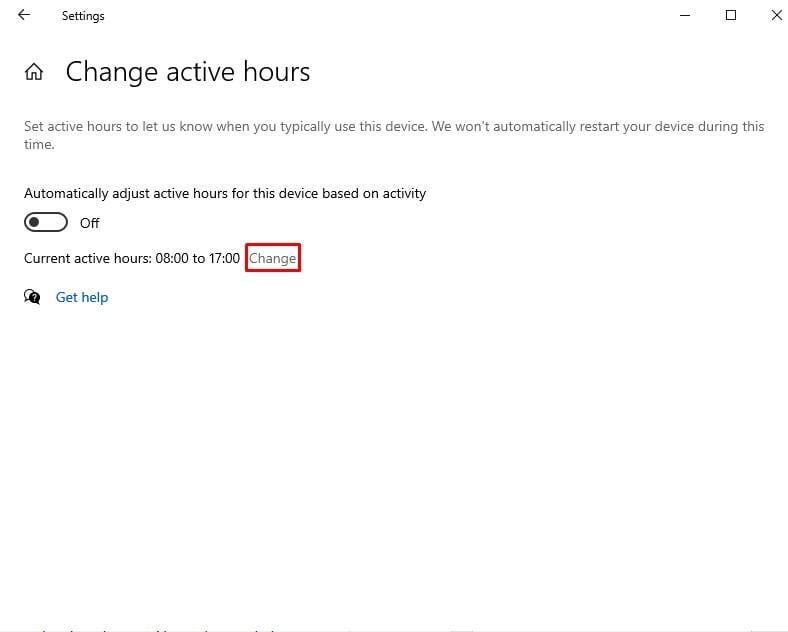
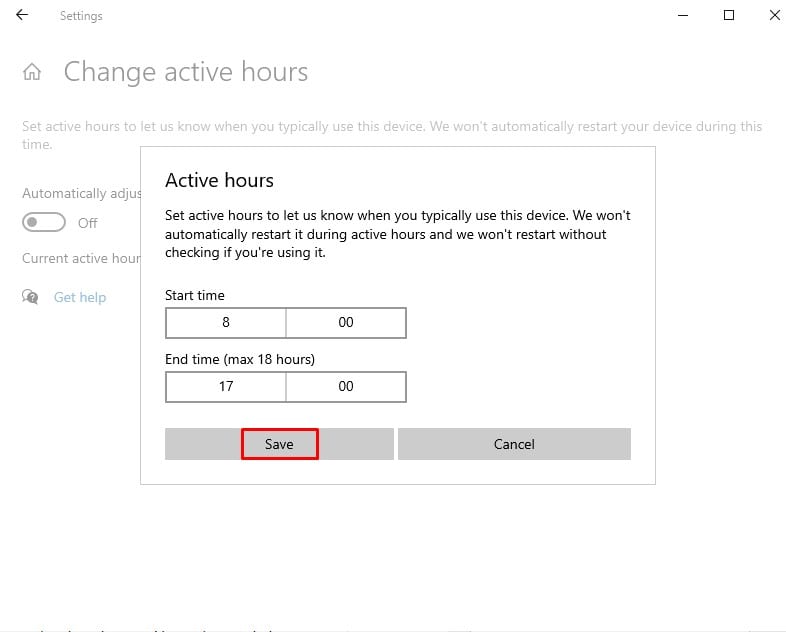
Step 6. Now you need to set the Start and End time of active hours. Once done, click on the ‘Save’ button.
That’s it! You are done. This is how you can enable active hours in Windows 10 computers.
So, this article is all about how to enable active hours in Windows 10 computers. I hope this article helped you! Share it with your friends also.


