Recently, Microsoft introduced its new desktop operating system – Windows 11. Compared to Windows 10, Windows 11 has more features and customization options. If you are using the preview build of Windows 11, you might have noticed higher data usage on your computer.
It is because Windows 11 constantly looks for updates in the background. Although you can control the Windows 11 updates, it’s always best to set the data limit. Just like Windows 10, Windows 11 also allows you to set data limits.
So, if you are looking for ways to set an internet data limit on your Windows 11 PC, you are reading the right article. In this article, we will share a detailed guide on setting a data limit on your Windows 11 PC. Let’s check out.
Also read: Download Windows 11 ISO File
Steps to Set Data Usage Limit in Windows 11
Before following the steps, please note that your internet will be stopped once it hits the data limit. Therefore, you need to remove the data limit to resume the internet connection after hitting the data limit.
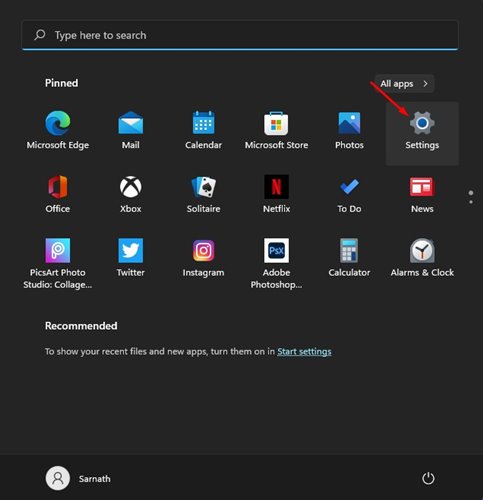
Step 1. First of all, open Windows 10 search and type in ‘Settings‘. Then, open the Settings app from the list.
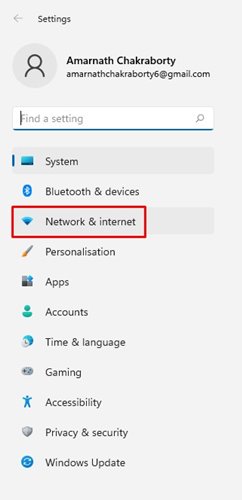
Step 2. On the left pane, click on the ‘Network & Internet’ option.
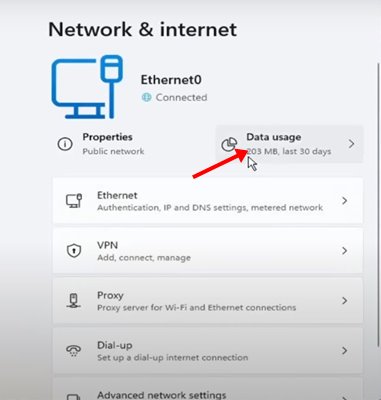
Step 3. On the right pane, scroll down and click on the ‘Advanced Network Settings’ option.
Step 4. On the next page, scroll down and click on the ‘Data Usage.‘
Step 5. On the top-right corner, click on the ‘Enter limit’ button.

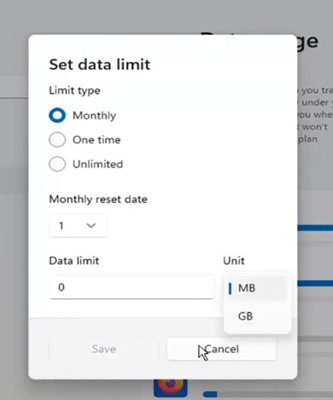
Step 6. On the next pop-up, set the data limit option. You can set limit types based on ‘Monthly,’ ‘One Time,’ and ‘Unlimited.’
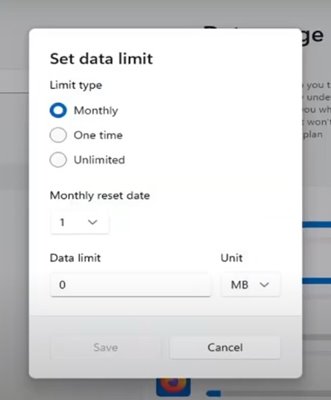
Step 7. Next, set the Monthly reset data. On this date, your data cap will expire.
Step 8. Next, set the Data Limit and set the Unit to ‘GB‘. Once done, click on the ‘Save‘ button.
That’s it! You are done. This is how you can limit data usage in Windows 11.
If you wish to remove the data limit in Windows 11, head to the Settings > Network & Internet > Advanced network settings > Data Usage. Next, click on the ‘Remove Limit’ button next to your network connection.
So, this guide is all about how to set Data Usage Limit in Windows 11. I hope this article helped you! Please share it with your friends also. If you have any doubts related to this, let us know in the comment box below.


