To solve the sharing issue between the different OS, some apps and tools have been created to transfer your files wirelessly between PC and Mac.
In this article, we have written about the best method to share your files between PC and Mac and hence do that all at high speeds. Go through the article below to learn more about the method.
Share Files Between Mac and Windows PC
1. The first thing you must do while sharing files between Mac and PC is hold down the command key on your Mac and simultaneously press the space bar to open up the spotlight.
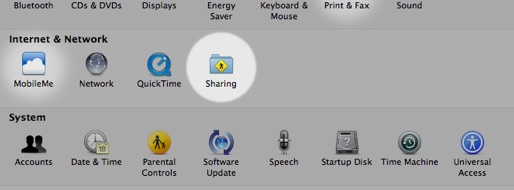
2. Now, you have to type in “Sharing” in the search box, find the sharing system preferences, and click on it.
3. Here, you can see an option named “File sharing” clipped with a checkbox that enables or disables it. Check that checkbox to enable the File Sharing feature. Using the + sign under the shared folder box, choose the folders you wish to share with the PC or the Windows Computer.
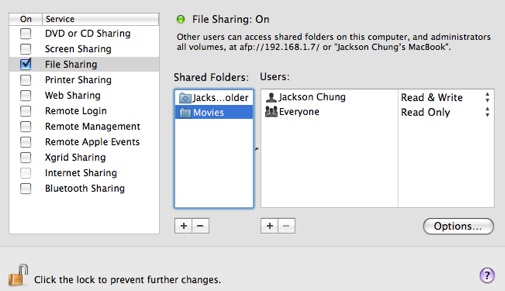
4. Set the permissions for the shared files on your Mac in the next panel, and after that, check the user account that you would like to share with the Windows computers where it says Windows File sharing. You shall be asked to fill up your password for the selected account, and that’s all you will have to do with the settings.
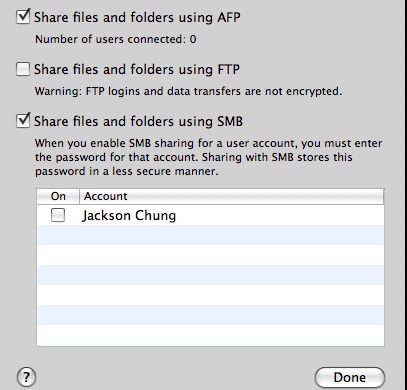
5. Finally, select the type of sharing between Mac and PC and then click on the “Done” button, which will save all your settings that you have made using the above steps. You can see your shared directory of the Mac on the Windows computer that you can access if both the PC and Mac are connected to the same local network.

So the above discussion is all about sharing files between Mac and Windows PC. So that was the easy method that can be used whenever you want to share your files between PC and Mac and at high speeds through wireless transfers.


