Windows 11 is the new desktop operating system from Microsoft that introduced many new features and options. The new operating system ships with a more refined look and icon set.
While users will accept most of the visual changes introduced by Microsoft, few users feel the design change is unnecessary and a complete mess.
Users who have switched to Windows 11 from Windows 10 might find it hard to adjust to the new design changes, and hence, they might look for ways to bring back the classic Start menu & Quick Settings.
Below, we have shared the two best methods to enable Simplified Quick Settings in Windows 11. So, if you also fall from the same category, you might find this guide very helpful. Let’s get started.
Also read: How to Add Windows Security Exclusions in Windows 11
Steps to Turn On Simplified Quick Settings in Windows 11
The Simplified Quick Settings will only have the WiFi, BlueTooth, Accessibility, and VPN buttons, the brightness and volume sliders, and battery indicator, and link to the Settings app. Here’s how to enable Simplified Quick Settings in Windows 11.
1) Enable Simplified Quick Settings via Local Group Policy Editor
This method will use the Local Group Policy Editor to enable the Simplified Quick Settings in Windows 11. Follow some of the simple steps we have shared below.
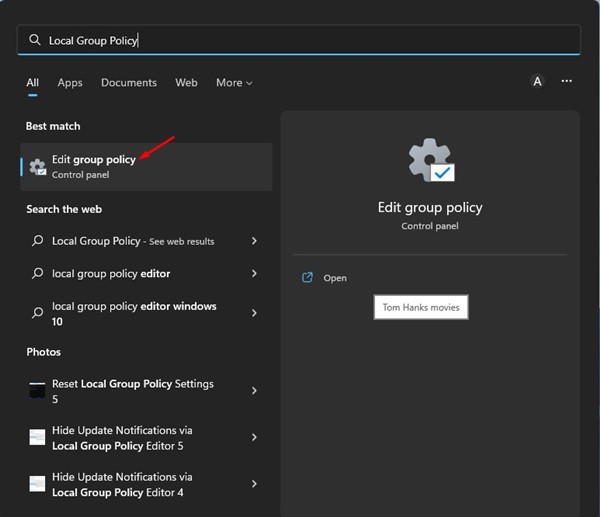
1. First, click on the Windows 11 search and type in Local Group Policy Editor. Next, open the Group Policy Editor from the list of matching results.
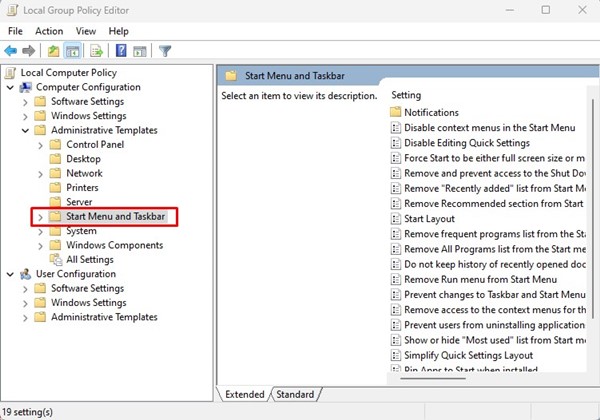
2. On the Local Group Policy Editor, navigate to the following path:
Computer Configuration > Administrator Templates > Start Menu and Taskbar
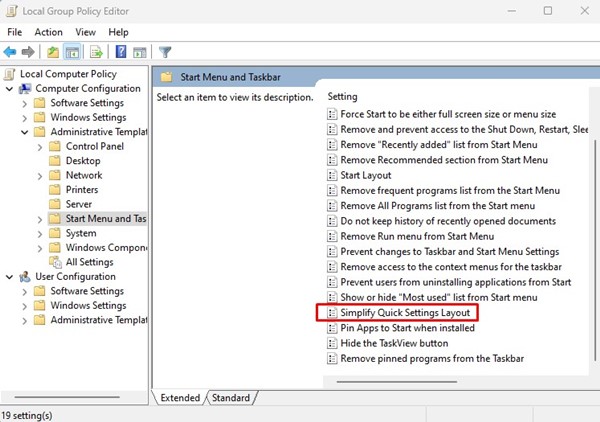
3. On the right pane, find and double click on the Simplify Quick Settings layout.
4. On the Simplify Quick Settings layout Window, select Enabled and click on the Apply button.
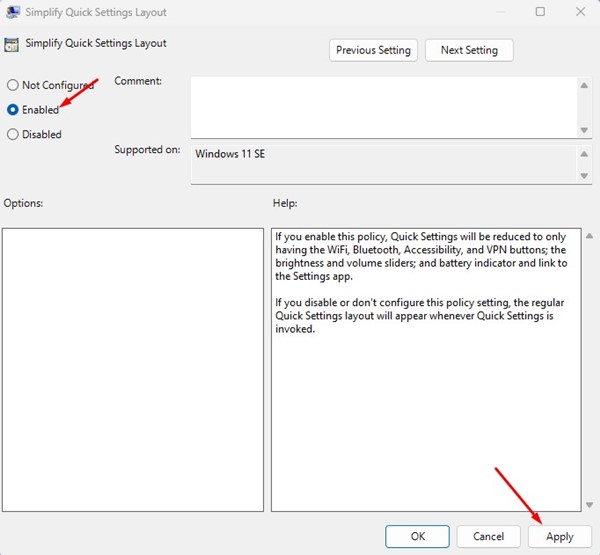
5. If you want to disable Simplified Quick Settings, select ‘Not Configured‘ in the above step and click on the Apply button.
That’s it! This is how you can enable Simplified Quick Settings in Windows 11.
2) Enable Simplified Quick Settings via Registry Editor
You can also use the Registry Editor to enable the Simplified Quick Settings on your Windows 11. For that, follow some of the simple steps we have shared below.
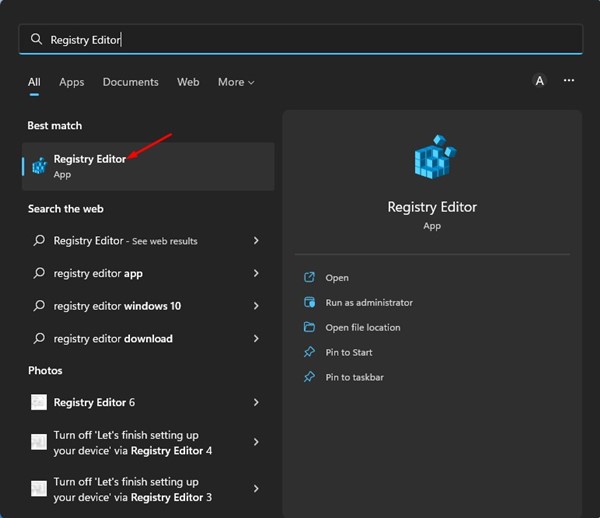
1. First, click on the Windows 11 Search and type Registry Editor. Next, open the Registry Editor app from the list of matching results.
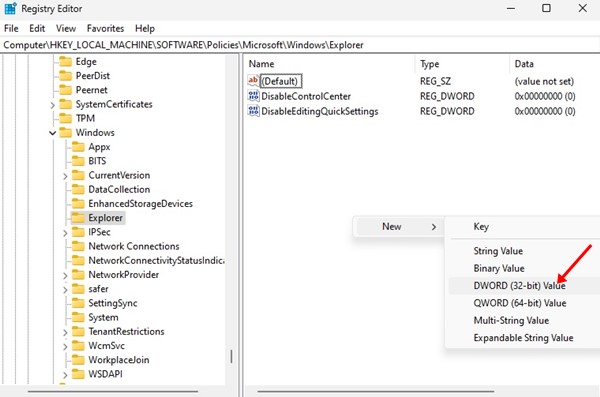
2. On the Registry Editor, navigate to the following path:
HKEY_LOCAL_MACHINE\SOFTWARE\Policies\Microsoft\Windows\Explorer

3. On the right pane, right-click on a blank space and select New > DWORD (32-bit) Value.
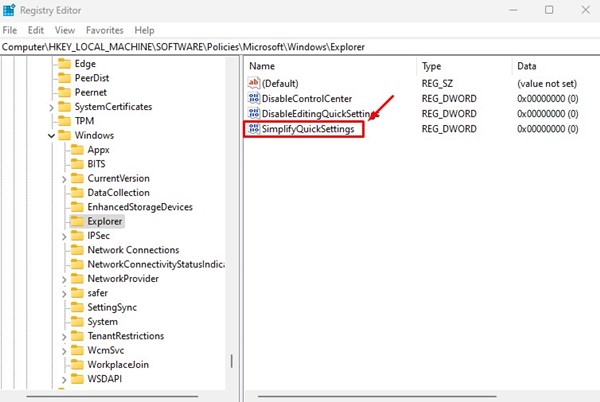
4. Name the new DWORD (32-bit) Value as SimplifyQuickSettings.
5. Double click on the SimplifyQuickSettings and type 1 on the Value Data field. Once done, click on the Ok button.
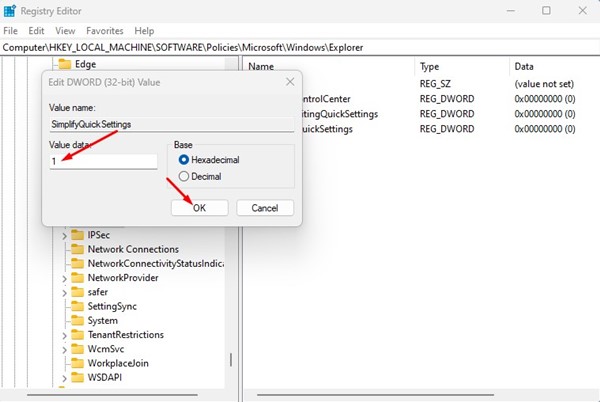
6. If you want to turn off Simplified Quick Settings, enter 0 on the Value Data field. Alternatively, you can also delete the SimplifyQuickSettings key.
That’s it! This is how you can enable Simplified Quick Settings on Windows 11 via Registry Editor.
Also read: 10 Best Free MKV Players for Windows 11
So, that’s all about how to enable simplified Quick Settings on Windows 11 computers. The simplified quick settings look clean and only have essential options. If you change your mind and wish to return to the regular Quick Settings, revert your changes.


