Although Spotify is mainly used on mobile devices, many users prefer the music streaming service on their PC/Laptop. On Spotify for desktop, you get the same feature and audio quality.
However, the problem that users often face after installing Spotify on their PC is that the app opens itself automatically. By default, the Spotify desktop app is set to open at startup. That means even if you are not using Spotify, it will start & run in the background all the time.
If you have a low-end PC, you might like to disable Spotify’s automatic startup option. Preventing Spotify from starting up automatically at startup might even decrease the bootup time and increase the system’s performance.
How to Stop Spotify From Opening on Startup (4 Methods)
Hence, this article will share a few of the best methods to stop Spotify from opening automatically at Startup. Let’s check out.
1. Change the Startup Behaviour
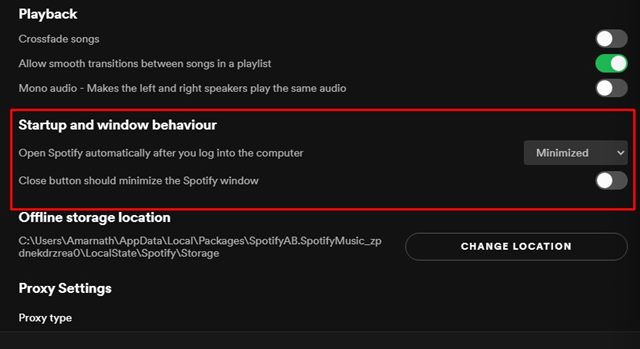
On the Spotify app, you need to change the Startup and window behavior options to prevent Spotify from opening on startup. Here’s what you need to do.
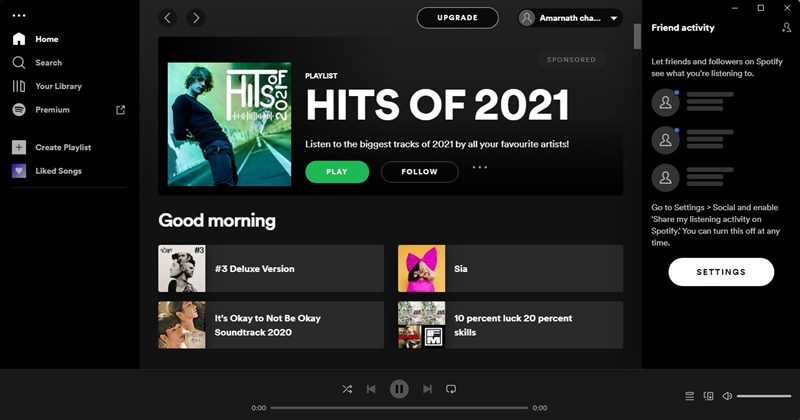
1. First of all, launch the Spotify app on your desktop/laptop.
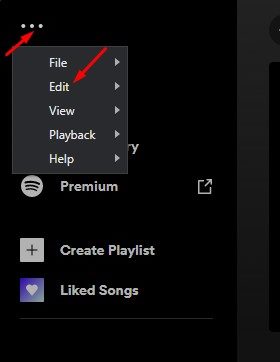
2. Next, click on the three dots as shown below and select the Edit option.
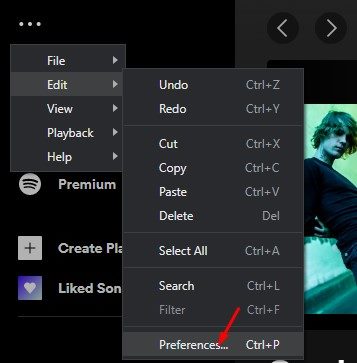
3. On the Edit option, click on the Preferences.
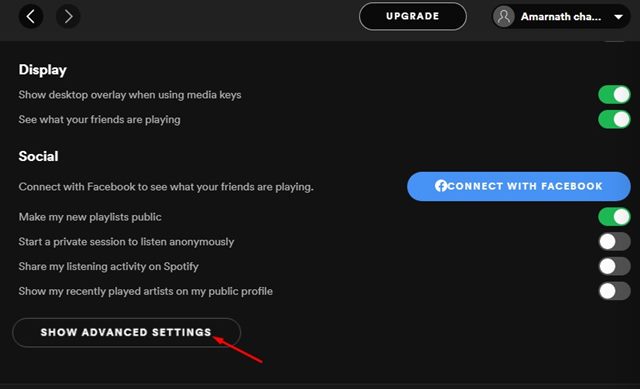
4. On the Preferences page, scroll down and click on the Show Advanced Settings option.
5. On the next page, scroll down and find the Startup and Window Behaviour section.
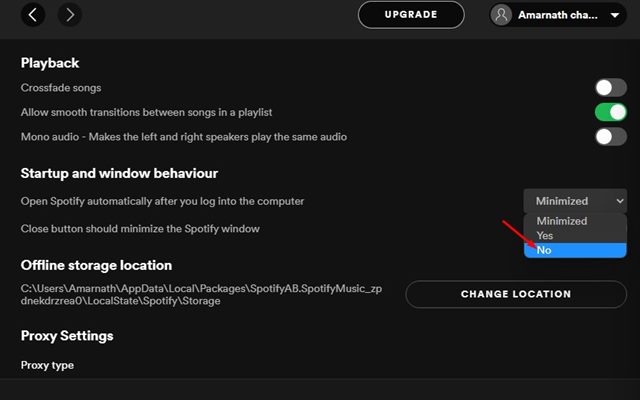
6. You need to click on the drop-down menu for Open Spotify automatically… and select No.
That’s it! You are done. This will stop Spotify from running automatically during the Startup.
2. Disable Spotify via Task Manager
In this method, we will use the Windows 11 Task Manager to stop Spotify from opening automatically. Here are some of the simple steps you need to follow.
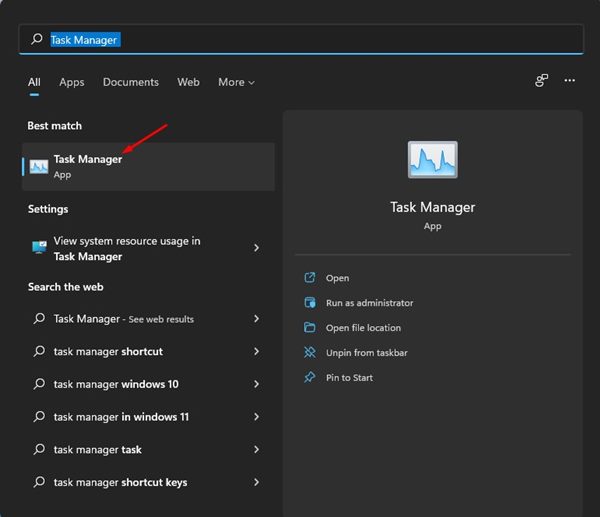
1. First, click on Windows 11 search and type in Task Manager. Open Task Manager from the list.
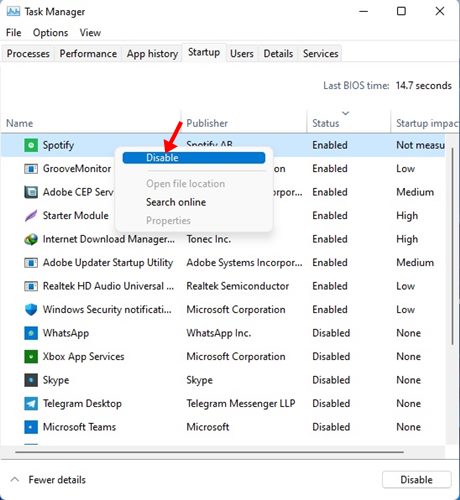
2. On the Task Manager, switch to the Startup tab as shown below.
3. Now, you will see a list of all apps that run on the Startup. Right-click on Spotify and select Disable.
That’s it! You are done. This will prevent Spotify from running automatically during startup.
3. Stop Spotify from running in Startup via Settings
In this method, we will utilize Windows 11’s Settings app to prevent Spotify from running automatically at the Startup. Here’s what you need to do.
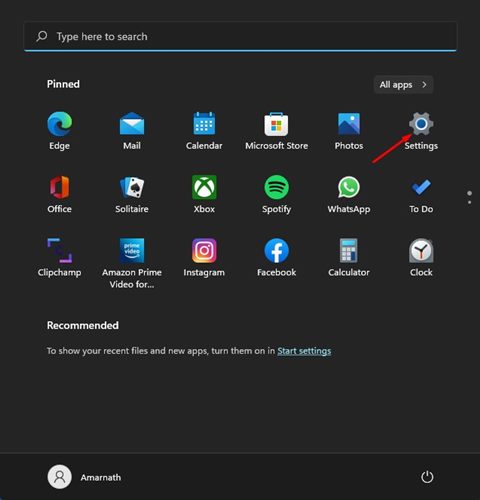
1. First of all, click on the Windows 11 Start menu and select Settings.
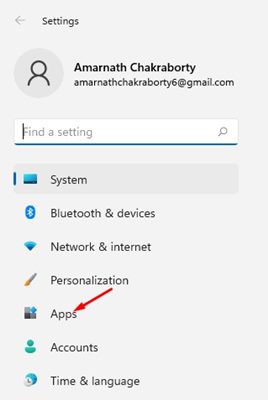
2. On the Settings page, click on the Apps option.
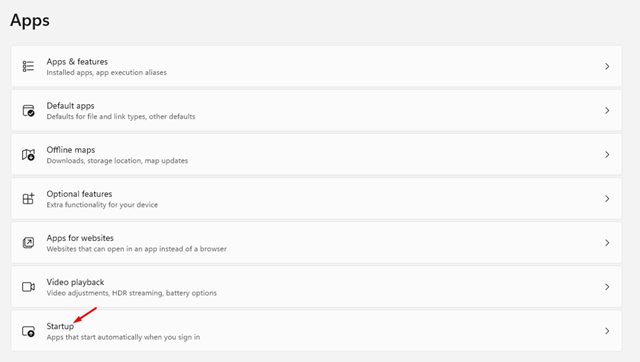
3. On the right pane, click on the Startup.
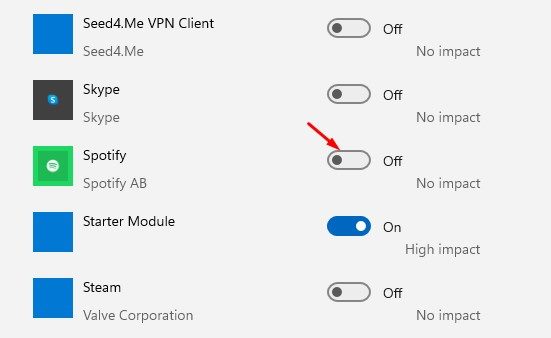
4. Now, you will see all Startup apps. You must find the Spotify app on the list and toggle the switch Off.
That’s it! This will disable Spotify’s Automatic Startup on Windows 11.
4. Delete the Spotify App from the Startup Folder
Another best way to prevent Spotify from opening automatically at startup is to make changes to the Windows Startup folder.
Basically, you need to Spotify app from the Startup folder of Windows to prevent it from running automatically. Follow the steps below to delete the Spotify app from the Windows Startup folder.
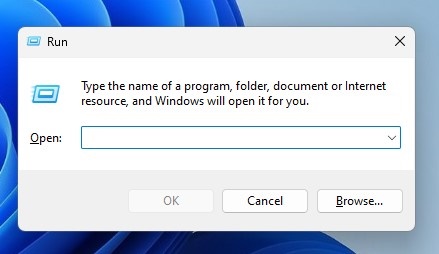
1. Press the Windows Key + R button to open the RUN dialog box.
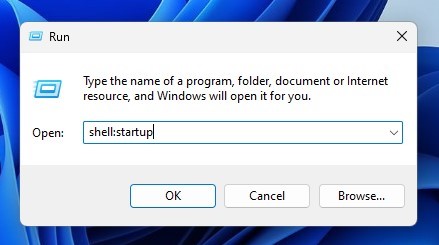
2. On the RUN dialog box, type shell:startup and press Enter.
3. This will open the Startup folder. You can also manually navigate to this location:
Windows > Start Menu > Programs > Startup
4. If Spotify starts automatically, you will find it in the Startup folder. Simply delete the Spotify app.
That’s it. This is how you can delete the Spotify app from the Startup folder. This will stop Spotify from opening on Startup automatically.
It’s pretty easy to disable Spotify’s Automatic Startup on Windows 11. We have shared three methods; you can use any of them to prevent Spotify from starting automatically. I hope this article helped you! Please share it with your friends also. If you have any doubts, let us know in the comment box below.
