If your PC has an SSD and an HDD, you can turn off the hard disk after a set time to preserve battery life. Here’s how you can do it.
1. Turn off the Hard Disk after an idle time
You can use the RUN command to automatically turn the hard disk off after idle time in Windows 11.
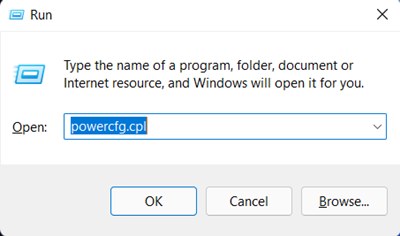
1. Press the Windows Key + R button on your keyboard. This will open the RUN dialog box on your computer.
2. On the RUN dialog box, enter powercfg.cpl and press Enter.
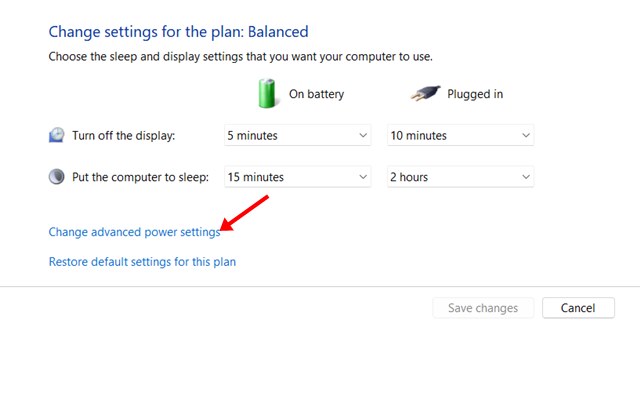
3. This will open the Power Options on your PC. Click on Change Plan Settings.

4. Click the Change advanced power settings.
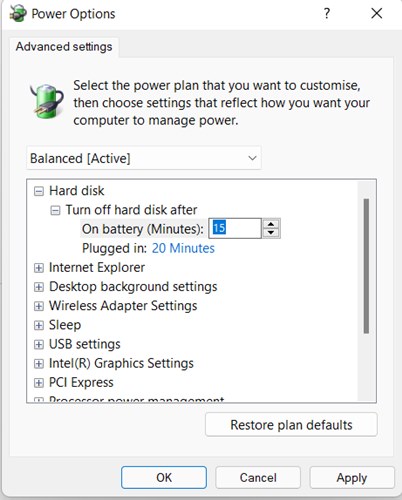
5. Expand the Hard Disk option. The default On Battery time is set to 10 Minutes.

6. On the Turn off hard disk menu, set the new time limit for both On Battery and Plugged in. Make sure to enter the time in Minutes.
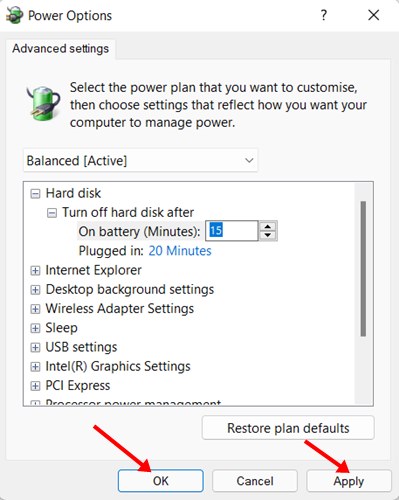
7. Click Apply and Ok.
2. Turn off the hard disk via the Command Prompt
You can even use the Command Prompt utility to turn off the Hard disk after a set time.
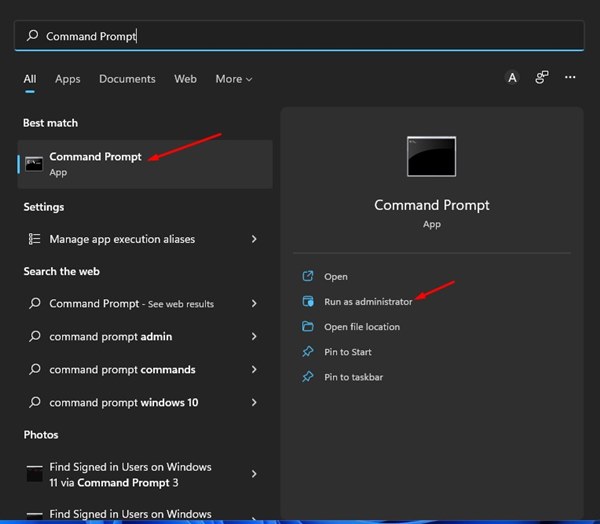
1. Open the Windows 11 search and type in Command Prompt. Next, right-click on the Command Prompt and select the Run as administrator.
2. Execute the command shared below and press Enter.
powercfg -change -disk-timeout-dc 0
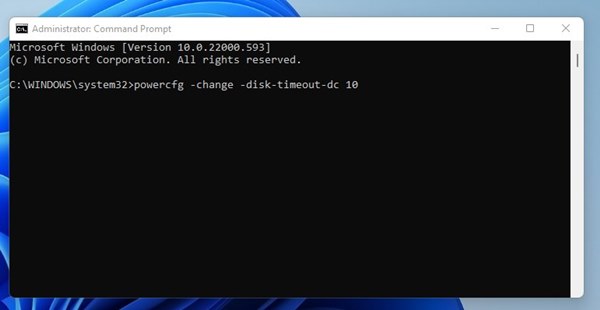
Important: Replace the 0 with the amount of time (in minutes) you like to disable the hard disk after idle time.
3. Copy & paste another command shared below and hit the Enter button.
powercfg -change-disk-timeout-ac-0
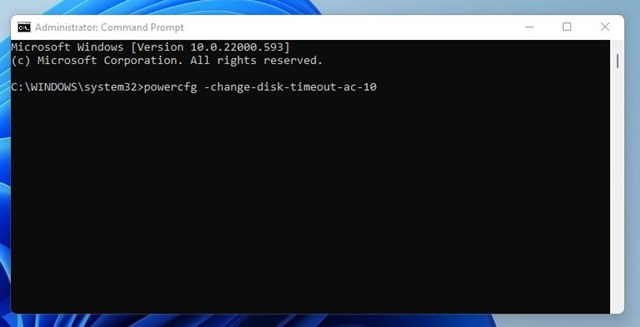
Important: Replace the 0 with the amount of time (in minutes) you like to disable the hard disk after idle time.
After implementing the above steps, restart your Windows 11 computer. If you have any doubts related to this, let us know in the comment box below.


