If you are operating Windows 11 on a laptop, you may already know the importance of Power Mode. Power Mode Settings in Windows 11 lets you control your laptop’s power consumption. The power mode option is created for laptop users, but PC users can also take advantage of the feature to enhance performance.
Windows 11 provides you with three different Power plans – Balanced, Power Saver, and High Performance. Each three of those power plans have different settings. The High-Performance plan of Windows favors performance but uses more energy.
Even though the High-Performance plan delivers the best performance, many users were still unsatisfied with it. Many users believe that the High-Performance plan doesn’t unlock the full potential of their laptop, and it’s ineffective.
Ultimate Performance Power Plan of Windows 11
After considering the feedback of Windows 11 users, Microsoft introduced a new power plan in Windows 11. The new power plan is named ‘Ultimate Performance’ and is designed for high-end systems.
The Ultimate Performance plan is perfect for workstations and servers were a little bit of increase in performance matters. Hence, if you are interested in enabling the Ultimate Performance plan on your Windows 11 computer, you have landed on the right page.
Steps to Enable Ultimate Performance Power Plan in Windows 11
In this article, we will share a step-by-step guide on enabling the hidden Ultimate Performance Plan in Windows 11. The steps will be straightforward; follow them as we have mentioned.
1) Add the Ultimate Performance Plan to Power Options
The Ultimate Performance plan is kept hidden from Windows 11 users. So, it needs to be added to the Power Options manually. Here’s how you can add an Ultimate Performance Plan to Power Options.
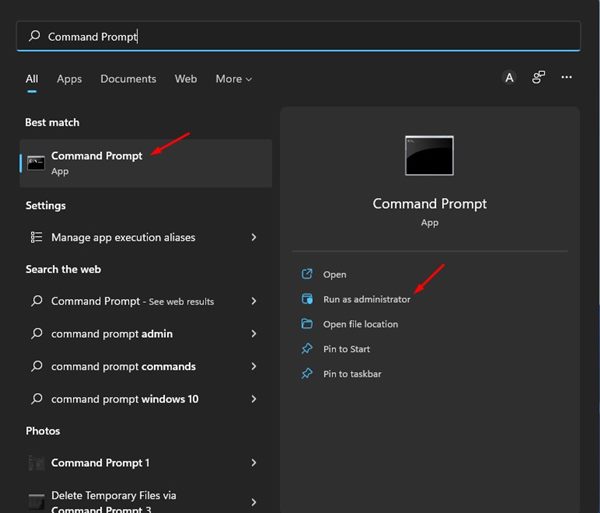
1. First, click on the Windows 11 search and type in Command Prompt. Next, right-click on the Command Prompt and select Run as administrator.
2. On the Command Prompt, execute the command we have shared:
powercfg -duplicatescheme e9a42b02-d5df-448d-aa00-03f14749eb61
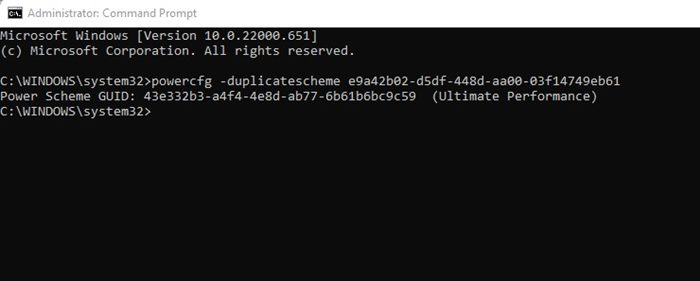
That’s it! This will add the Ultimate Performance option to the Power Options.
2) How to Enable Ultimate Performance Plan in Windows 11
After adding the ultimate performance plan to the Power Options in Windows 11, you need to enable it manually. Here’s how to enable the Ultimate Performance Plan in Windows 11.
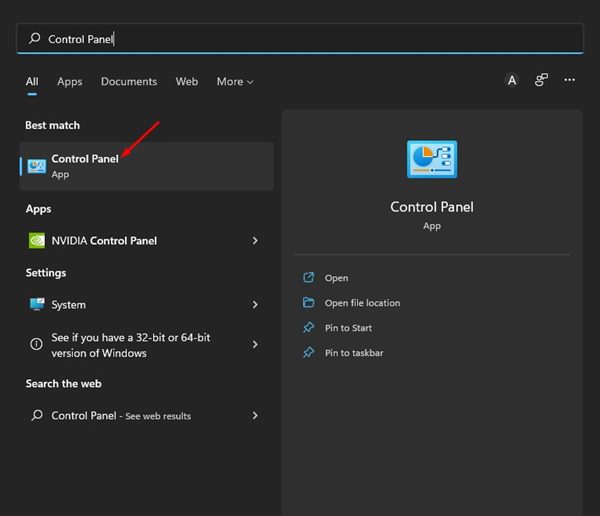
1. First, click on the Windows 11 search and type in Control Panel. Next, open the Control Panel app from the list.
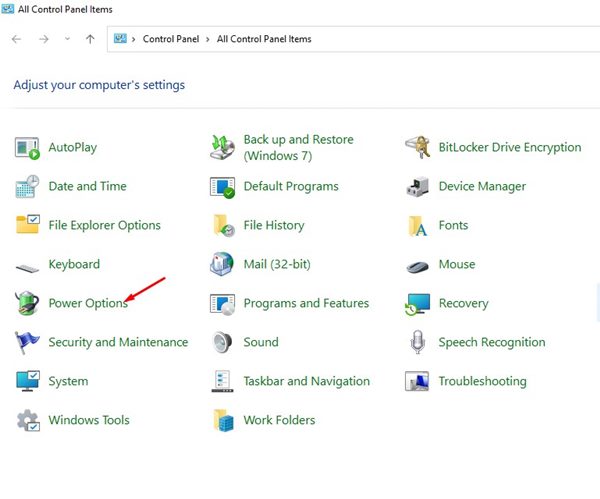
2. On the Control Panel, click on the Power Options as shown below.
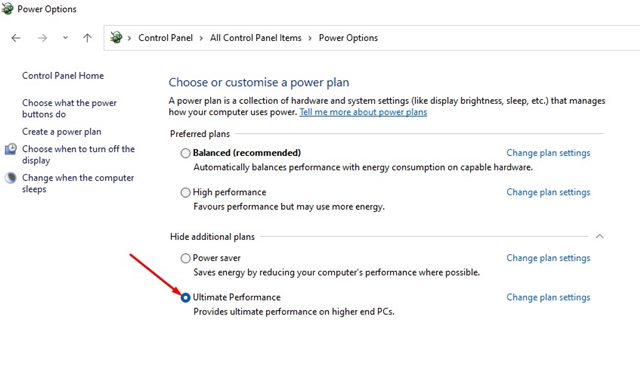
3. Next, on the Choose or customize a power plan page, click on the Show additional plans section.

4. You will find a new power plan named Ultimate Performance. Select the plan to use it.
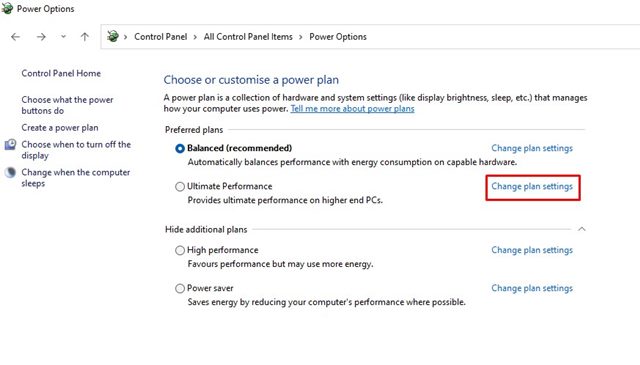
5. If you want to delete the plan, click on the Change plan settings link.
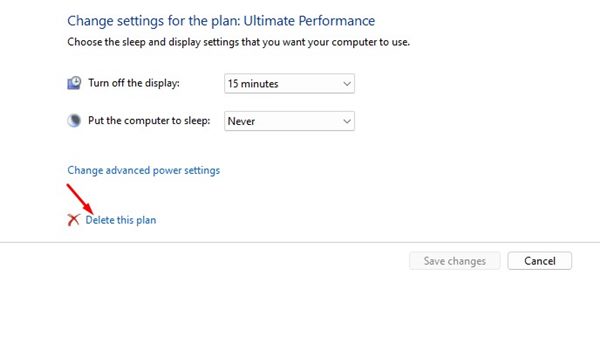
6. On the next screen, click on the Delete this plan link to remove the Ultimate Performance Power Plan.
That’s it! This is how you can enable the ultimate performance power plan on your Windows 11 computer.
So, that’s all about how to enable the Ultimate Performance Power Plan in Windows 11. If you have a high-end PC, you should enable and use this power plan to enhance the performance of your PC.


