Learn to Use 4K and 5K displays with your Apple Mac with the help of the guide that we are going to discuss right below, in which you will get details about the requirements and the things you will need to set up.
Setting up 4K displays is not as easy compared to current 1080p displays. Moreover, Mac machines do not go hand in hand with 4K displays easily. If a display is not calibrated automatically, you will come across UI elements appearing in different sizes (generally smaller). But don’t worry, as you are techviral users, and we are always up with great ideas to make the tech easier for you. And in this article, we will be doing the same thing.
In this article, we will be covering how to set up high-resolution displays (4K and 5K) with our Mac and adjust colors. Moreover, we will be covering different refresh rates that they can follow.
Also Read: How to Share Files Between Mac and Windows PC
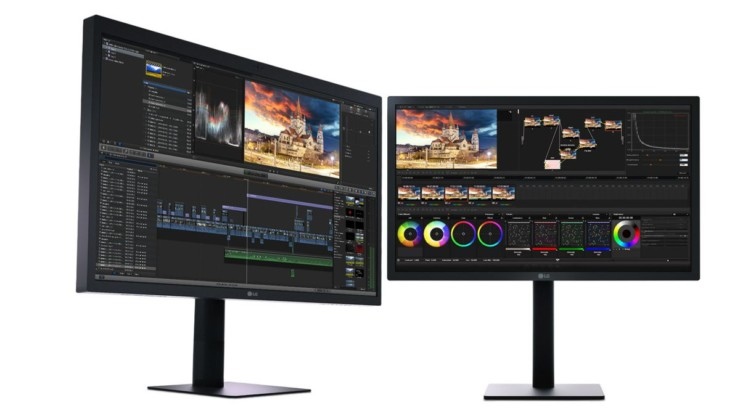
Use 4K and 5K displays with your Apple MAC
Let’s proceed with the step-by-step guide to implementing this 4K or 5K Display on your Mac. Steps might seem to be complicated but don’t worry; you can easily implement them rather you are a tech guy or not, as we simply explained them. So follow the steps below to proceed.
Also Read: How to Fix Youtube Videos not Playing on Android, iPhone, PC, or MAC
Determining if our Mac is compatible with 4K and 5K displays:
Macs produced since 2013 are compatible with 4K displays, mostly with varying refresh rates. And all Macs produced after 2016 are certainly compatible with it, but all of them might not be able to handle the same refresh rate configuration. Checking for compatibility of your respective model number with 4K displays online might help.
Also, most of them might be compatible with 5K displays with a lowered refresh rate (24Hz) with a resolution of 4096 X 2160.
Cable selection for your display
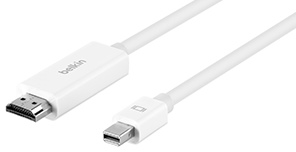
The best option here is to use an HDMI cable, as other ports are common to be used for other purposes. Now here, the refresh rate of your display will depend on the version number of the HDMI cable.
However, there are other options also that you may explore.
For displaying 60Hz on a Mac that supports 60Hz, using a cable of up to 30Hz support would not work. Similarly, you’ll need a 30Hz supporting cable for a 30Hz display on a Mac, supporting up to 30Hz. Hence, it is important to check for compatibility among the configurations of your cable and hardware.
Also Read: Best Security Implementations To Do On MAC
Configuring UI elements (Scaling)

After connecting your 4K display to your Mac with a cable of your choice, just power on the display. As stated earlier, UI elements scaling might not be automatic, but it can be fixed easily.
Launch “System Preferences” and select “Displays.” Now change from “Default for Display” to “Scaled.”The different refresh rates will be set automatically if graphical scaling is displayed, and manual scaling will be available if you wish to do so. Just move the slider across to make changes in
The different refresh rates will be set automatically if graphical scaling is displayed, and manual scaling will be available if you wish to do so. Just move the slider across to make changes in the appearance of UI elements.
Now if scaling is unavailable, the different refresh rates will need to be adjusted, and resolution scaling will need to be done for the optimal appearance of UI elements. Mostly with most displays, the option with 1920 Xx 1080 proves to be best.
For instance, by choosing 1920 X 1080, the resolution will be changed to 1920 X 1080. The elements will be visible on a 1920 X 1080 display. This makes the icons and UI elements to be of the same configuration as they were on display with the selected resolution.
Also Read: How to Fix Youtube Videos not Playing on Android, iPhone, PC, or MAC
Color adjustment on the Display
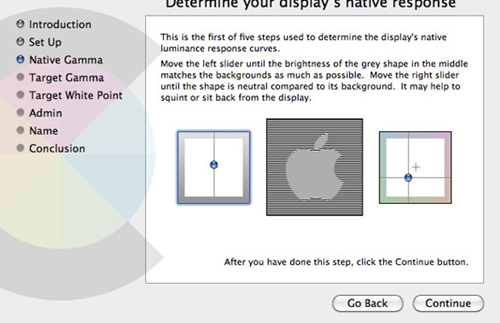
Checking that colors on display appear accurately as they would-would appear on the display of any other device is important. To adjust the colors of your display, click on “Displays” in “System Preferences” and click on “Color” from the menu bar.
Click on “Calibrate” and go with the on-screen options to create a calibration profile.
You make also like to use the tools already present in the monitor or make use of pre-installed features and profiles to make adjustments in contrast and brightness, which goes as follows.
Also Read: How To Turn Your Android Device Just Like Mac OS
With the advancing technologies and prices of high-resolution displays coming down, it’s time to upgrade your old displays to 4K displays now. Perhaps 4K and 5K displays might not be readily compatible with the present Mac machines, but with a few technical changes, there is always a way out.
Hope you like the tutorial, keep on sharing with others too. Leave a comment below if you have any related queries with this tutorial, as we will always be here for all our techviral users to assist.


