If you’ve been using Windows 11 for some time, you are likely to be familiar with the Windows security application. It’s a free antivirus software suite that comes with the Windows operating system. Both Windows 10 and Windows 11 ship with the Windows Security app built-in.
Windows security is a great security suite as it protects your computer from various threats such as viruses, malware, adware, PUPs, and even Ransomware. Thanks to Windows Security, users no longer need to invest in premium security apps to safeguard their devices from security threats.
Although the security suite is mostly free from bugs, sometimes it blocks legitimate and safe apps from accessing your storage. If this often happens to you, you need to view the Protection history page of Windows security and manually undo the actions.
With the Protection history page, you can easily view the latest protection actions & recommendations and revert the actions taken by the Windows Security application.
Steps to View Threat Protection History on Windows 11
Hence, in this article, we will share a step-by-step guide on how to view the Protection history of the Windows security app on Windows 11. The steps will be very easy; just follow them as we have directed.
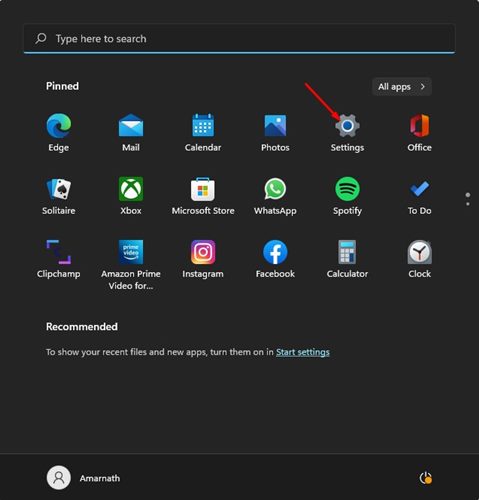
1. First of all, click on the Windows 11 Start button and select Settings.
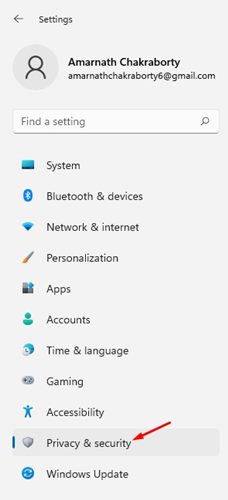
2. On the Settings app, click on the Privacy & Security option on the left pane.
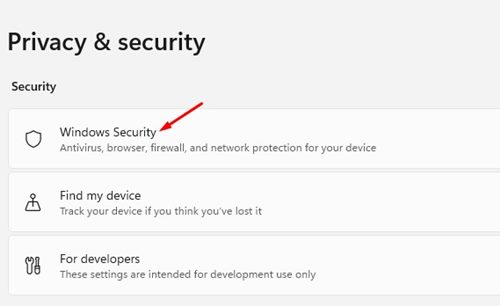
3. On the right pane, click on the Windows Security option as shown below.
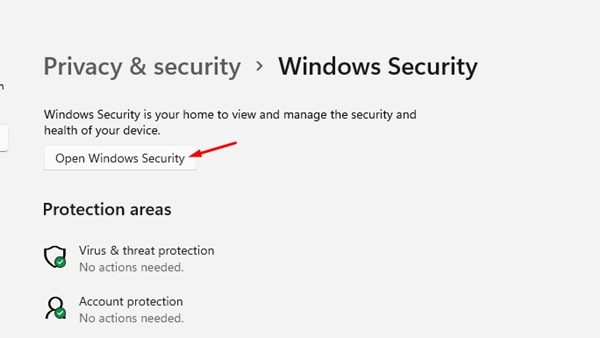
4. On the next page, click on the Open Windows Security button, as shown in the screenshot below.
5. This will open the Windows Security app. Now click on the Protection history option.

6. Now, you will be able to see the latest protection actions and recommendations from Windows Security.
How to Use the Protection History Page
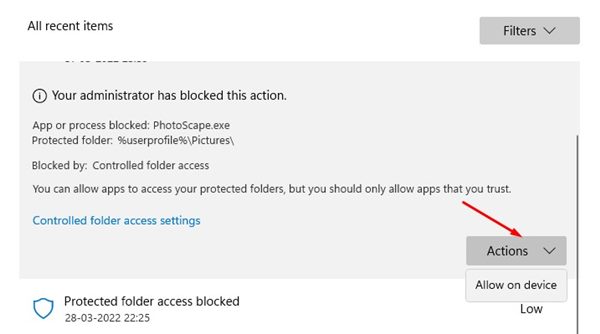
Well, the Protection history page will display all actions taken by the Windows Security app. You can use the Filter to select the threat type.

If you want to revert any action, select the detection type and select the appropriate action from the Actions drop-down.
Also, you can use the Protection history page to remove files stored in the Quarantine folder. You just need to explore the Windows security’s protection history page and go through all options.
So, this guide is all about how to view the Protection history page of Windows Security. I hope this article helped you! Please share it with your friends also. If you have any doubts related to this, let us know in the comment box below.