
Isn’t the Snipping Tool working on Windows 11? There could be various reasons for this. It may be due to a corrupted Snipping Tool installation, corrupted system files, conflicts with background software, etc.
Whatever the reason is, you can do a few things to fix the Snipping Tool not working on Windows 11 problem. Here’s what you should do.
1. Restart your PC
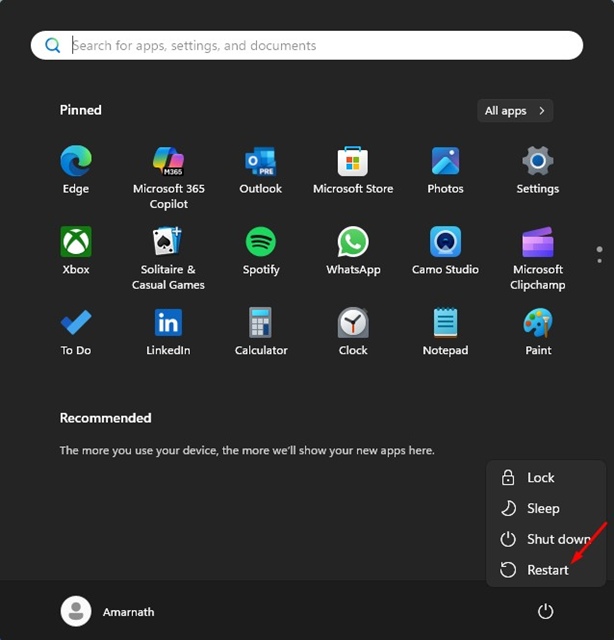
First, restart your PC. A normal restart can clear temporary Windows processes that have become stuck.
If Snipping Tool works after the restart, the problem was likely caused by a Windows app or process. To restart Windows 11, click on the Start button > Power Menu and select Restart.
2. Update Snipping Tool from the Microsoft Store
An outdated Snipping Tool version may also be the reason for occasional crashes or unexpected behavior. So, you should update the app from the Microsoft Store.
- Open the Microsoft Store on your PC.
- Select Library > Get Updates.
- Allow Windows to install the available updates for Snipping Tool.
After the update, restart your PC.
3. Repair or Reset the Snipping Tool
The next best thing you can do to fix Snipping Tool isn’t working is to repair or reset the app. Here’s what you need to do.
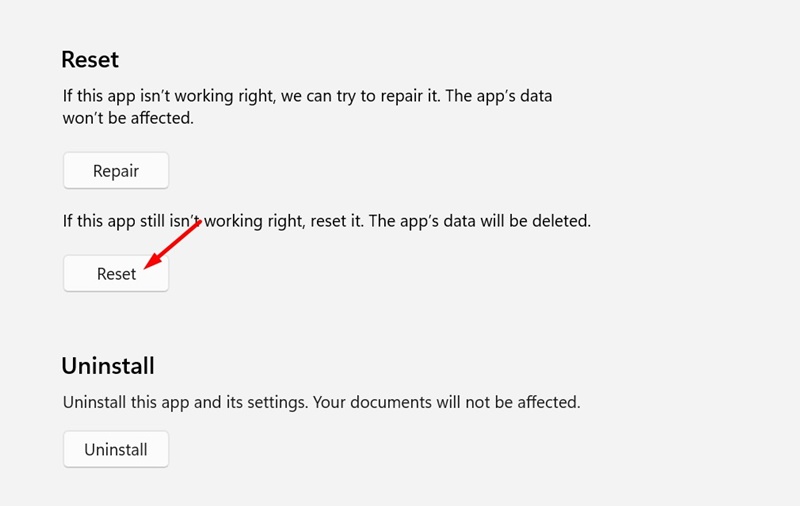
- Open Windows 11 Settings and switch to Apps.
- Click on Installed Apps and find Snipping Tool.
- Click the three dots next to it.
- Select Advanced Options.
- Then, click Repair.
Now, use the Snipping Tool. If it still lags or shows unusual behavior, return to the Advanced options screen for Snipping Tool and select Reset.
4. Reinstall the Snipping Tool
If you’re still facing the problem, you should reinstall the Snipping Tool app. Here’s how to reinstall it.
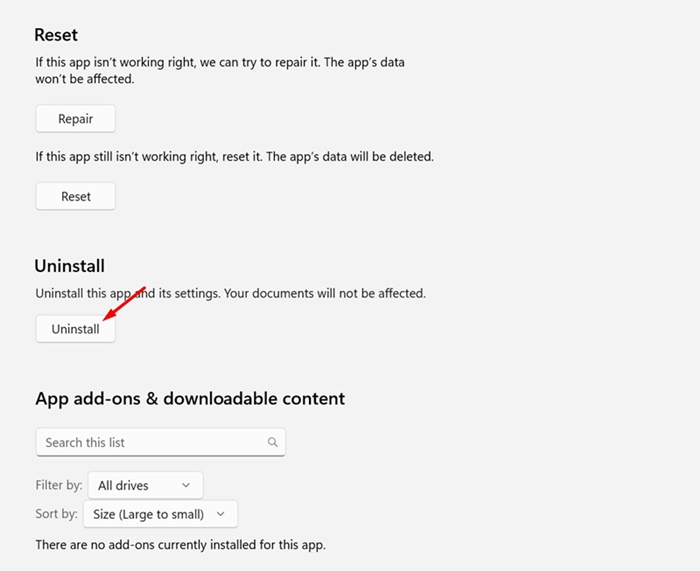
- Type Snipping Tool in Windows Search.
- Right-click on the app and select App Settings.
- In App Settings, click Uninstall.
- Then, open the Microsoft Store and install Snipping Tool again.
5. Install Windows Updates
Even if you’ve managed to fix the problem, it’s still important to keep Windows up to date. Updating Windows 11 will also help if the Snipping Tool problem hasn’t been fixed yet.
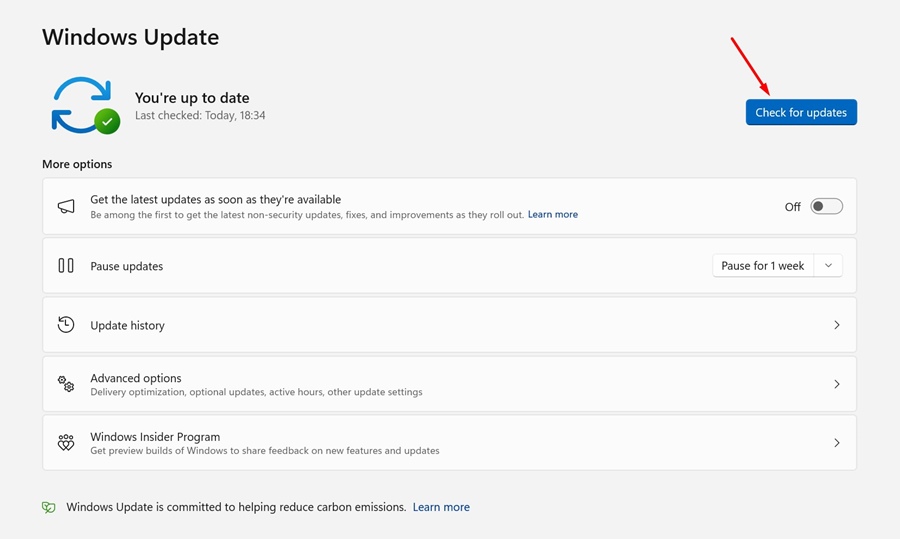
To update Windows 11, open Settings and go to the Windows Update tab. On the right side, click on the Check for Updates button.
If any updates are available, make sure to download and install them.
These are a few of the best methods to fix the Snipping Tool not working on Windows 11. If you need more help on this topic, let us know in the comments.