If you use a Hard drive, you might know that deleted data can be recovered using a third-party app. This happens because when you delete a file, the file is marked as deleted on an additional magnet drive, not actually deleted.
However, this doesn’t happen with modern solid-state drives, which use TRIM by default. This ensures that deleted files are deleted immediately. External storage devices, such as USB flash drives, also don’t support TRIM, which means deleted files can be recovered. To prevent file recovery, you must wipe a drive; a simple format will not work.
1. Using the Format option
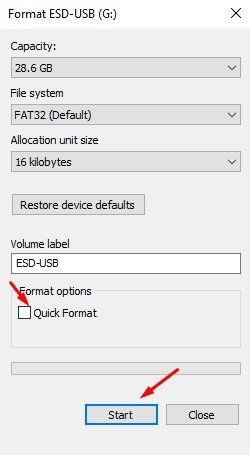
To wipe an entire drive, you must perform a full format instead of a Quick format.
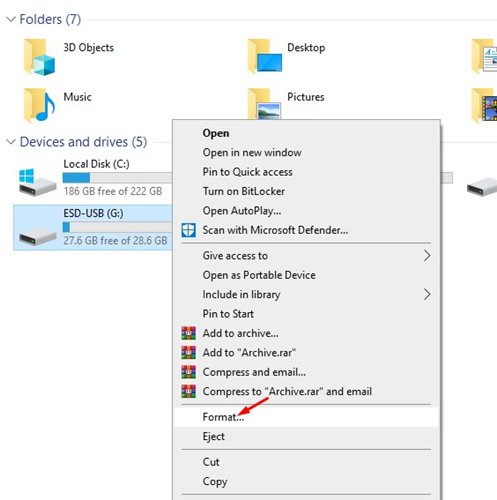
1. Open File Explorer and right-click on the Drive you want to wipe.
2. Select Format
3. Uncheck the ‘Quick Format’ option and click Start.
This will take a bit of time to complete. Once completed, the Drive will be wiped.
2. How to Wipe only Free Space
If you don’t want to remove the content, you can wipe only the free space. This will wipe only the free space, overwriting it with zeros.
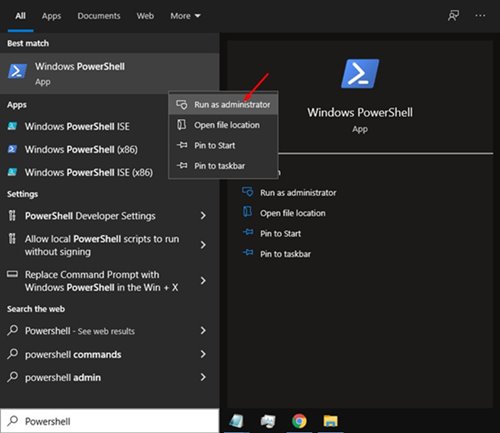
1. Open Windows search and type in PowerShell.
2. Right-click PowerShell and select Run as administrator.
3. Execute the given command. Replace the X with the drive letter you want to wipe.
cipher /w:X:\
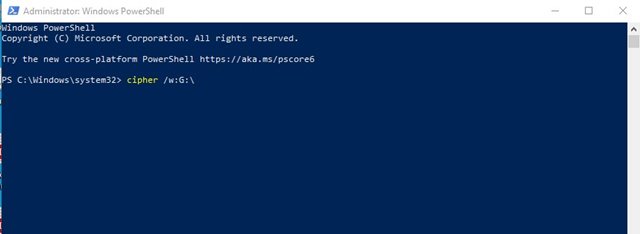
For example: cipher /w:G:\
3. Wipe Your System Drive
You can use the built-in Reset this PC option to wipe your Windows system drive. Here’s how.
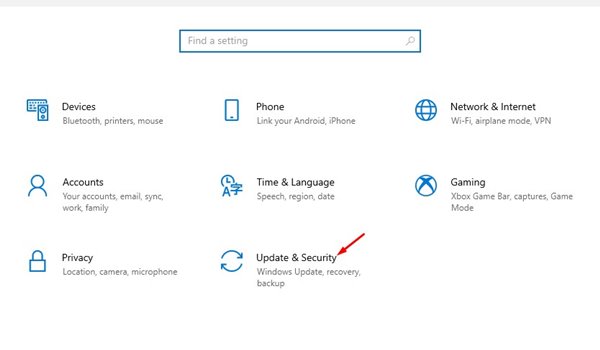
1. Open Windows settings and click Update & Security.
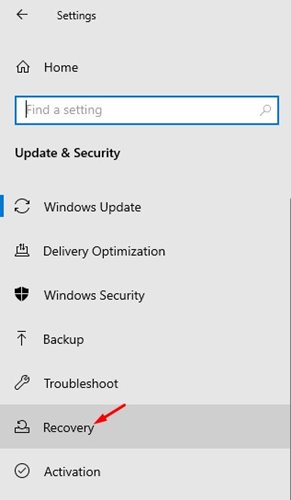
2. Click on Recovery.
3. Click the Get Started button behind Reset this PC.

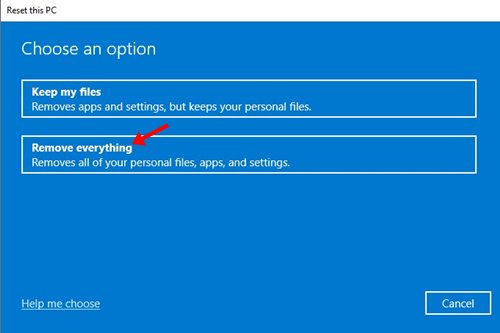
4. On the Reset this PC dialog box, select ‘Remove Everything’
5. Follow the on-screen instructions to complete the reset process.
This will remove everything stored on your System Drive. So, ensure a proper backup file is ready before performing the System reset.
4. Wipe a drive on Windows via Command Prompt
You can even use the Command Prompt utility to clean a hard drive on the Windows operating system.
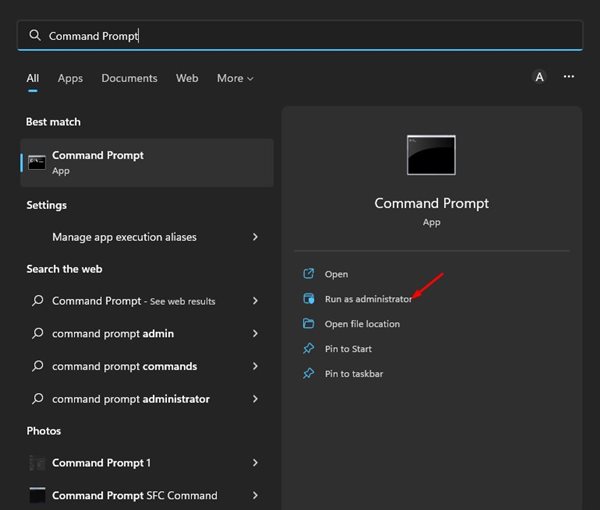
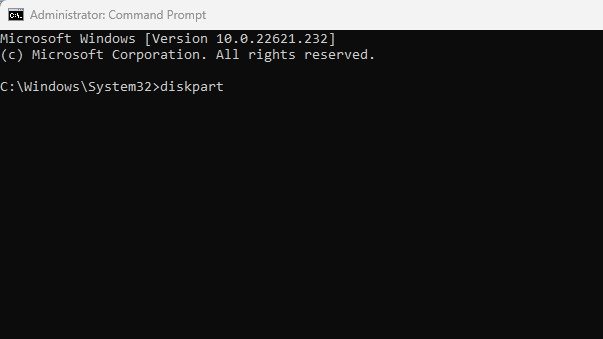
1. Type the command prompt on the Windows 11 Search. Right-click on the CMD and select Run as administrator.
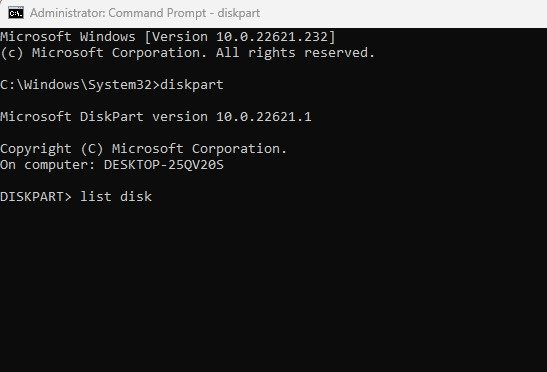
2. Execute the command: diskpart
3. Execute the command: list disk
4. This will list all drives you have. Note down the Disk number.
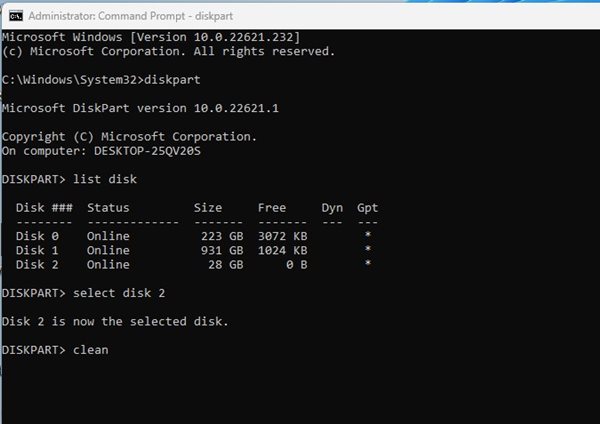
5. Select the disk drive you want to wipe. For the selection, execute this command: select disk X
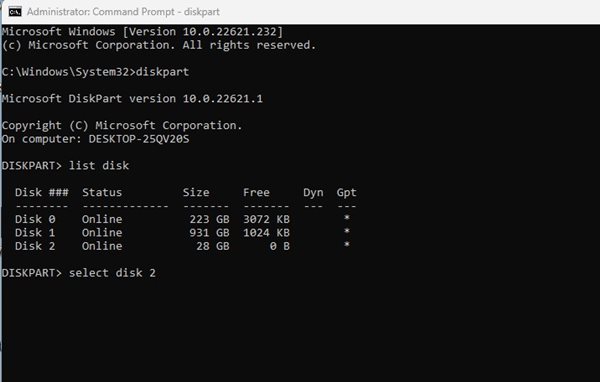
Note: Replace X with the disk number you want to wipe. For example, select disk 2.
6. Type clean and press Enter.
7. This will format your disk. Now you need to format the disk in NTFS file format & assign it a drive letter to make it usable. For that, execute these commands one by one:
create partition primary

select partition 2

active

format FS=NTFS quick

assign letter=X

exit
Important: In the 5th command, replace the X with the drive letter you want to assign to your drive.
Wiping a drive is very different from formatting it. If you have any doubts, let us know in the comment box below.


