After the sun has set and city lights come to life, you have two choices – put your smartphone aside until the next day commence, or take on the challenge to capture amazing camera shots in the dark.
Using an Android smartphone with a capable camera, you can capture amazing shots even in low light conditions. Depending on the smartphone you are using, it might have pro camera controls.
Take Better Photos at Night with an Android Device
Even if the camera app doesn’t have manual camera options, you can follow a few tips shared below to capture amazing photos at night.
Below, we have listed some essential tips to capture unique shots at night or in low-light conditions. Let’s check out.
1. Try To Keep The Camera Steady
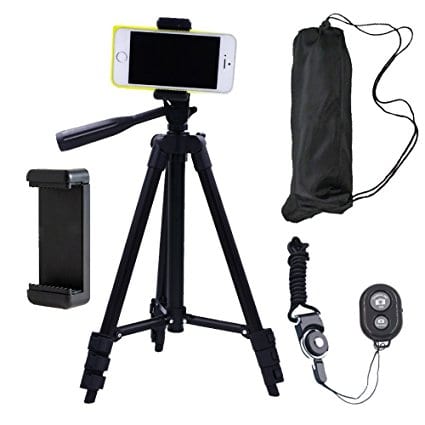
Well, we are all aware that while shooting at night, it’s common to end up with blurred shots. This is because of the low light and shaky camera. So try to keep the camera as steady as possible.
You can even go for a tripod which is the best option to click perfectly sharp shots. If you don’t have a tripod, you can try placing your phone on a wall or any other solid surface and using the timer button on the Camera interface.
2. Choose the area which has good lights

Well-Lit areas like street lights are great for drawing attention to the subject in a dark environment. Make sure the subject is getting enough light to draw attention.
Smartphone flash often becomes handy. However, the camera flash doesn’t work in some cases. It is easy to assume that there’s something between artificial and natural light.
So, make sure to choose the location which has good lights.
3. Use The Night Mode
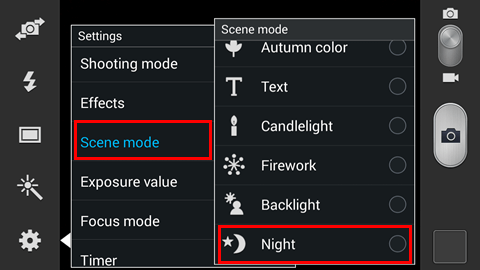
Nowadays, every smartphone offers a night mode which is extremely useful when it comes to night photography. For example, the night mode on Android usually adjusts the exposure and increases the shutter speed to capture more lights.
However, the night mode can ruin the photography experience if you have a shaky hand. But, if you have a tripod, then the night mode on Android will make Night photography easier.
4. Learn To Go, Manual,
If you want to click better images, you need to learn how to adjust settings manually. The default camera app for Android comes with many advanced options that can only be helpful if you know how to use it. Therefore, learn to play with your camera settings.
5. Make Use Of Black and White
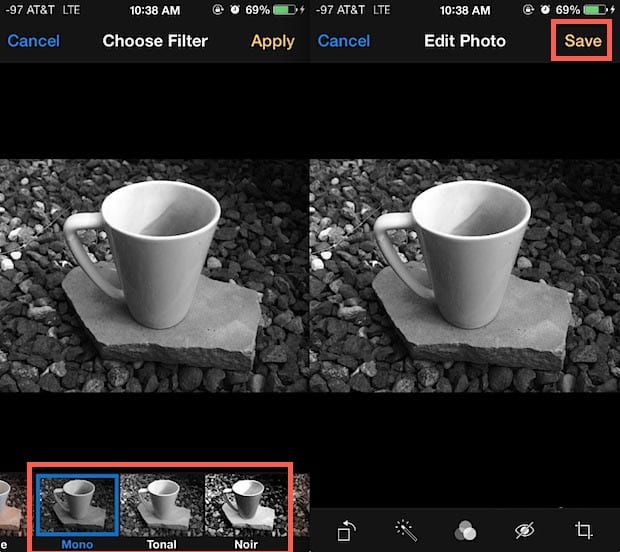
One of the biggest struggles in low-light photography is to catch accurate colors. Due to the lack of lights, our smartphone’s camera struggles to pick the appropriate color. So, the Black and white filter becomes very useful.
If you’re not happy with how the colors look in your images, you can convert them to Black and white.
6. Turn On HDR
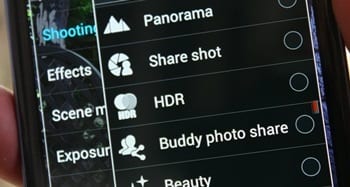
The high dynamic range or the HDR feature recognizes the different light intensities inside the frame and balances the output dynamically. In low light scenes, these features competitively help to take better clicks!
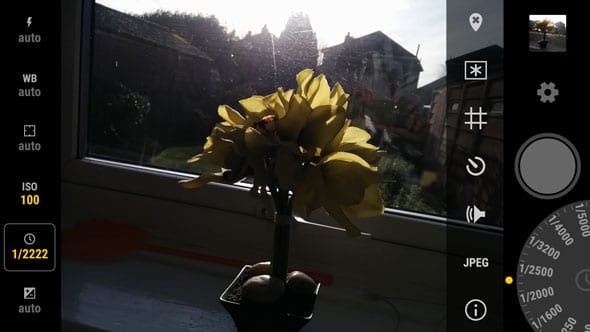
7. Play with the ISO Levels
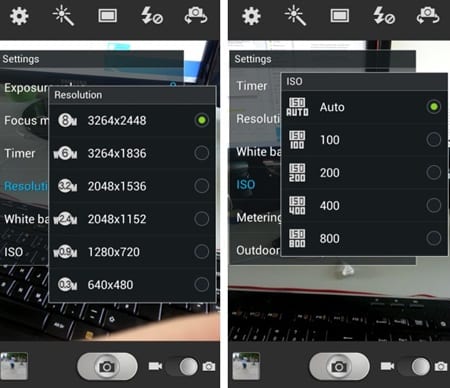
You possibly might have seen this feature that is present in most of the camera apps. By setting the level of this feature, the camera sensor’s sensibility or sensitivity increases or decreases; hence, it opts to capture more or less light.
Try to increase the value of ISO to increase the amount of light capture and details in low light conditions.
8. Use the Flash Light
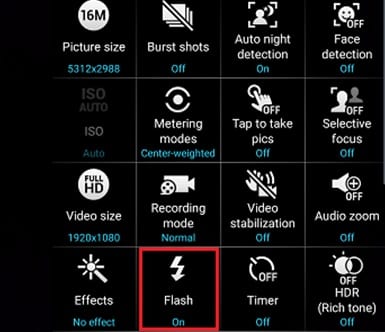
This is the hardware that is made to support the camera in low light conditions. But the thing here is that the light from the lousy camera flashes of smartphones interacts with the photo clarity. So keeping it turned off should produce better results.
9. Adjust the Shutter Speed
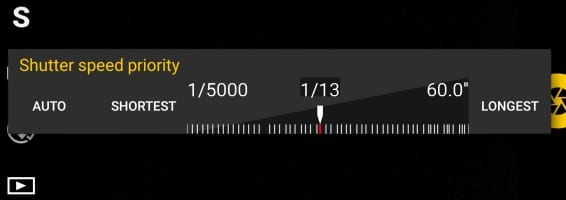
The speed at which the camera takes the picture is a crucial factor. The more time the camera takes to capture the images, the more details will be captured, and the light intensity will also be generally good.
10. Use a Better Camera App

The different camera apps process the images differently, and also they detect the images in varying ways. Try to utilize the best camera app for night photography, and it could help you transform your clicks into great ones.
11. Use Black & White Filter
As we all know, our smartphone camera struggles in the low-light condition. Just go through the gallery, and you will find lots of photos full of grains. Well, you can use Black & white filters to fix those grainy images.
Look, the filters won’t clear the noise from the images, but the black and white filters will make the noise less visible. Later you can adjust the brightness, contrast, and other aspects to make the images look more classy.
12. Use Additional Gadgets

The add-on lights and small OTG flashes could help to intensify the quality of the default camera hardware and produce excellent image results.
There are portable flashes, lights, otg dispersers, etc., types of accessories or gadgets available for smartphones!
13. Don’t Zoom
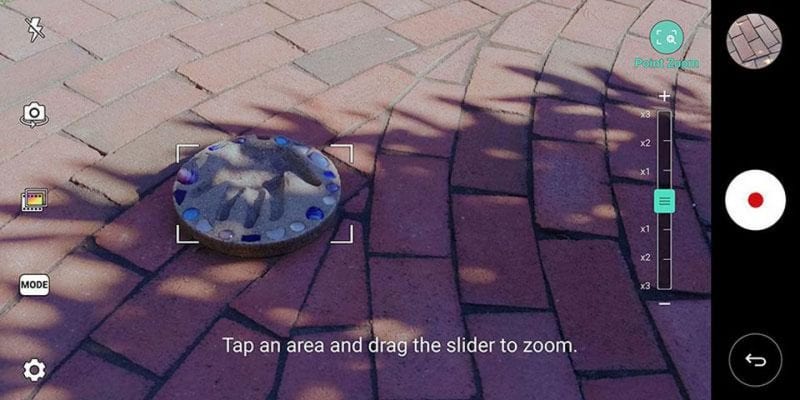
Well, you will hear most of the street photographers saying ‘Zoom with your fee.’ First, however, you need to consider the potential of your phone’s camera.
Digital zoom on smartphones is usually useless and only ruins the photography experience. Therefore, if you need to zoom, you can try to move closer to the subject.
However, if you still need to highlight a particular object in the photo, you can crop it.
14. Make use of Filters
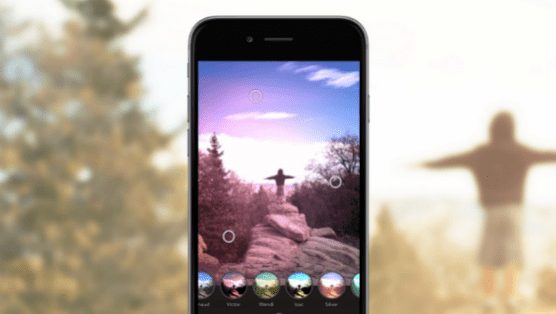
You will find many apps on the Google Play Store, allowing users to apply filters on the image. Image filters can transform your photo completely.
However, the proper selection of filters is the key here. Filters are something that can eventually transform or ruin your photography experience.
15. Use Image Editing Apps

Sometimes the camera of devices captures good details in low light conditions, but those details don’t come above as sharp images due to insufficient image processing technology.
The image editing here helps a lot to process the details from the images clicked in low light conditions!
So, these are the few best tips to capture better photos at night. I hope this article helped you! Please share it with your friends also. If you want to share any more tips, drop them in the comment section below.


