Let’s admit it, at some point, we all have wanted to cast the screen of smartphones to our PC’s display. On Android, it is possible through the Chromecast feature that allows users to cast content on any Chromecast-supported display.
On Windows 11, you need to use the Wireless Display app to mirror the Android display to the computer screen. Basically, the Wireless Display app of Windows 11 allows other devices to connect to the computer and cast their screens.
How to Cast Android Screen to Windows 11 PC
So, if you are interested in casting an Android display on your Windows 11 PC, you are reading the right guide. This article will share a step-by-step guide on how to cast Android Display on a Windows 11 PC. Let’s check out.
1) Install the Wireless Display app on Windows 11
Before casting our Android screen to Windows 11 PC, we need to enable the Wireless Display app on our PC. It’s pretty easy to enable the Wireless Display app on Windows 11; follow some of the simple steps we have shared below.
1. First of all, click on the Windows 11 Start button and select Settings.
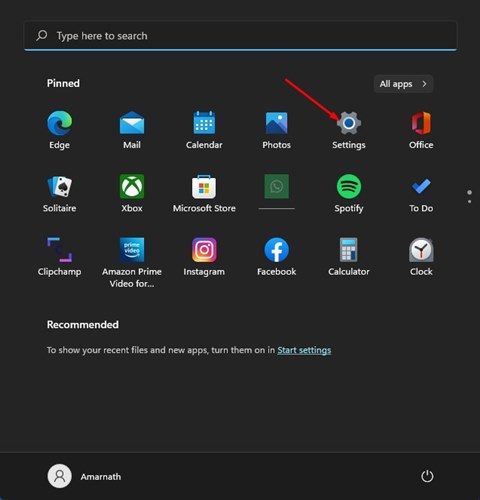
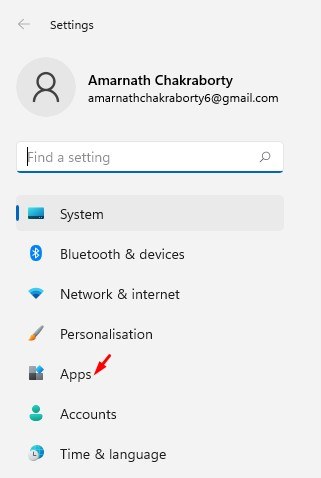
2. On the Settings app, click on the Apps option on the left pane.
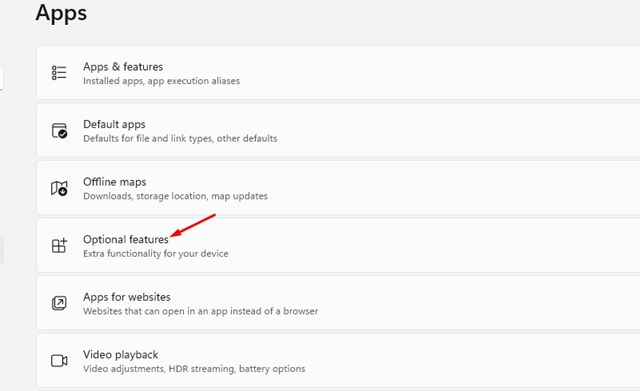
3. On the right pane, click on the Optional features option, as shown below.
4. On the next screen, click on the View features button, as shown in the screenshot below.

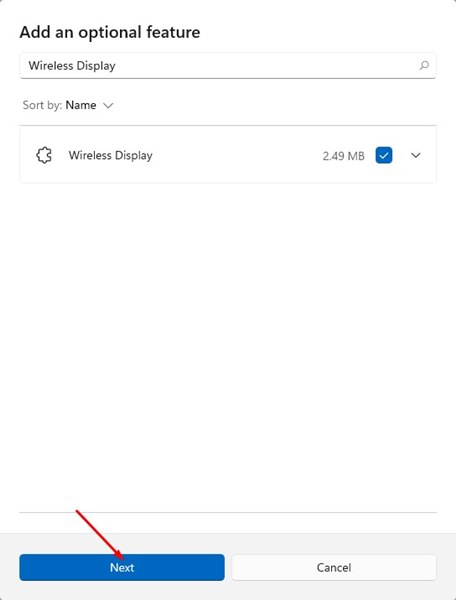
5. On the Add an optional feature prompt, search for Wireless Display. Next, select the Wireless Display app from the list of results and click on the Next button.
6. On the next screen, click on the Install button as shown below.
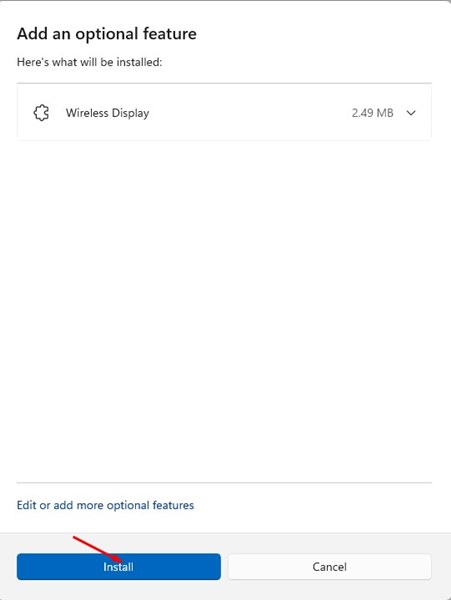
That’s it! You are done. This is how you can install the Wireless Display app on your Windows 11 PC.
2) How to Cast Android display to Windows 11 PC
After installing the Wireless Display app, your Windows 11 PC is ready to cast the Android screen. Follow some of the simple steps shared below to cast Android display to Windows 11 PC.
Important: Make sure that both Windows 11 and Android smartphone is connected to the same WiFi network.
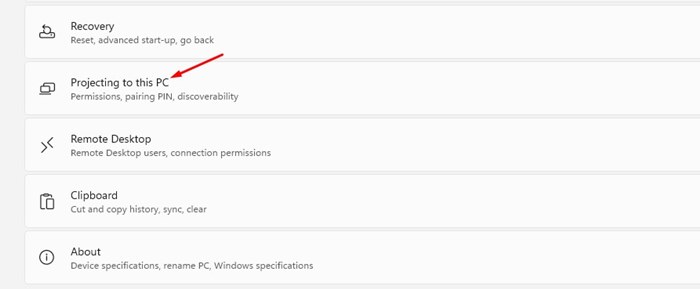
1. First of all, open your Windows 11 Settings and navigate to the System > Projecting to this PC option.
2. Now, on the top drop-down menu, select ‘Available everywhere’ or ‘Available everywhere on secure networks’.
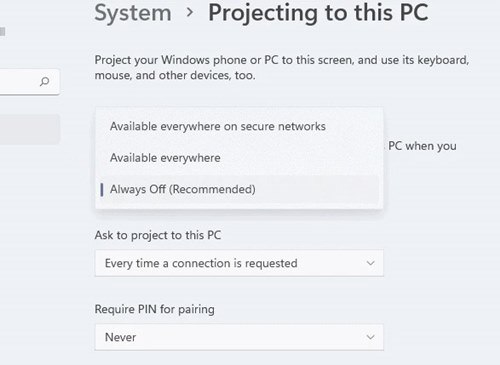
3. On the second drop-down menu, choose the ‘First time only’, or ‘Every time a connection is required’ option.
4. Open your Windows 11 search and type in Wireless Display. Next, open the Wireless Display app from the list.
5. Now, on your Android device, head to the Settings > Connection & Sharing. Next, enable the Screencast feature.
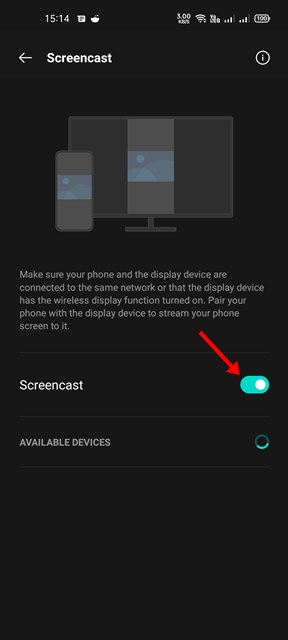
Note: Depending on your smartphone manufacturer, you might see other names for screencasting. On Samsung devices, you need to enable the Smart View options. You just need to find and enable the screencast feature of your smartphone.
6. Once enabled, you will now see your Windows 11 PC listed as one of the available cast options. Simply tap on your device to cast the Android screen to Windows 11.
That’s it! You are done. This is how you can cast your Android display to Windows 11 PC.
So, this guide is all about how to cast Android displays to Windows 11 PC. I hope this article helped you! Please share it with your friends also. If you have any doubts related to this, let us know in the comment box below.


