If you just purchased a new computer or laptop and want to create a new partition by shrinking space on other drives, here’s what you need to do.
Shrink Volume of Existing Partition
We will use the Disk Management utility of Windows 11 to create a new disk partition without formatting existing drives.
1. Open the Disk Management utility from the Windows Search.

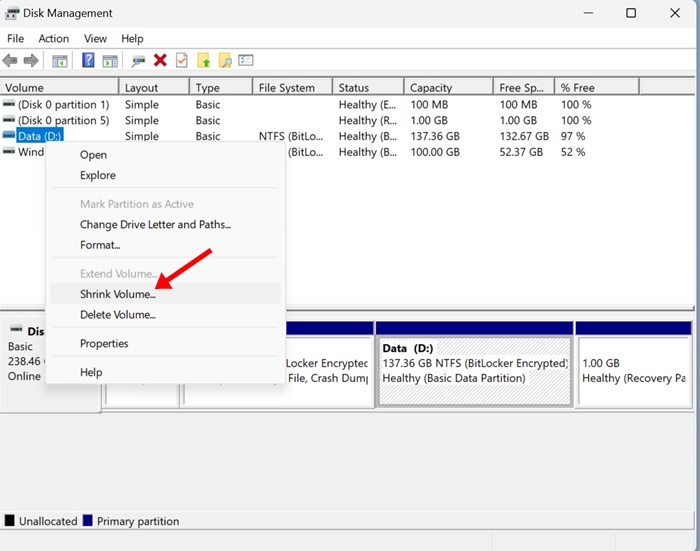
2. Right-click on the drive whose size you want to reduce. The size you will reduce here will be used to create a new partition. Right-click on the existing drive and select Shrink Volume.
3. You will see the current size, the size available to shrink, and the total size after shrinking. Carefully evaluate the size you want to shrink in MB and enter it on the third option (Enter the amount of space to shrink in MB:)
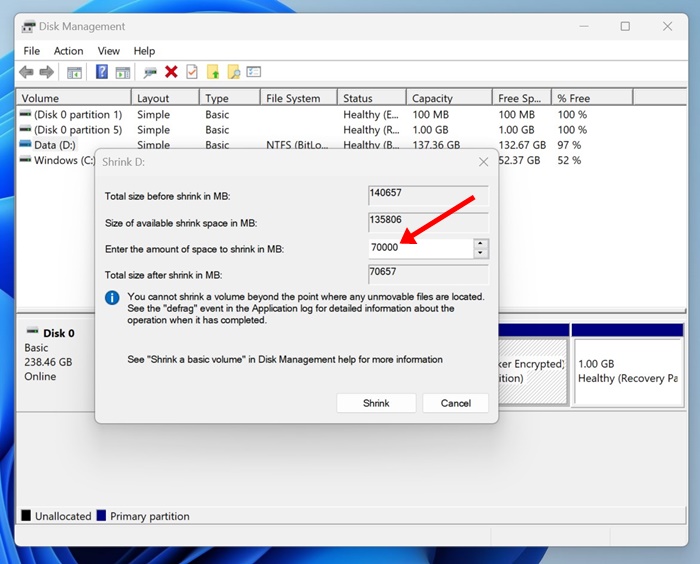
Important: You will have to enter the amount of space in MB. For example, to reduce 1GB, you must enter 1024 MB.
4. Once you have done this, you will see the total size of your selected drive after shrinking. If you are satisfied with the space, click Shrink.
How to Create a New Partition?
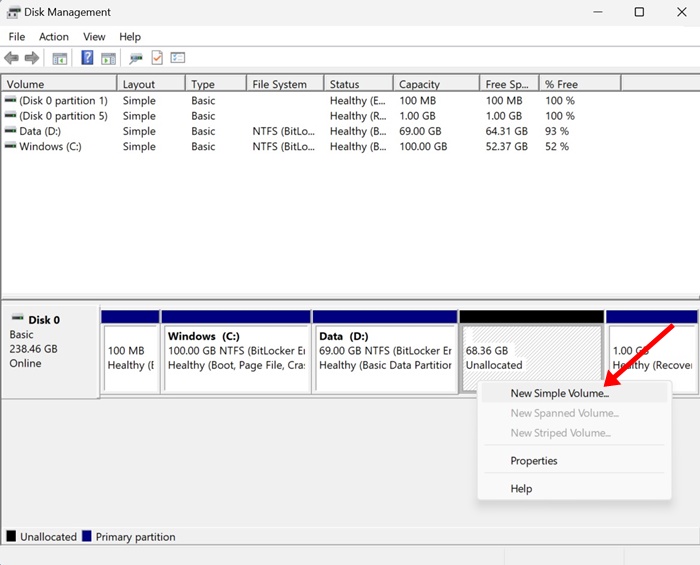
Once you shrink an existing drive, the space will appear as ‘Unallocated’ in Device Manager.
1. Open the Disk Management utility. Now, right-click on the Unallocated space and select New Simple Volume.
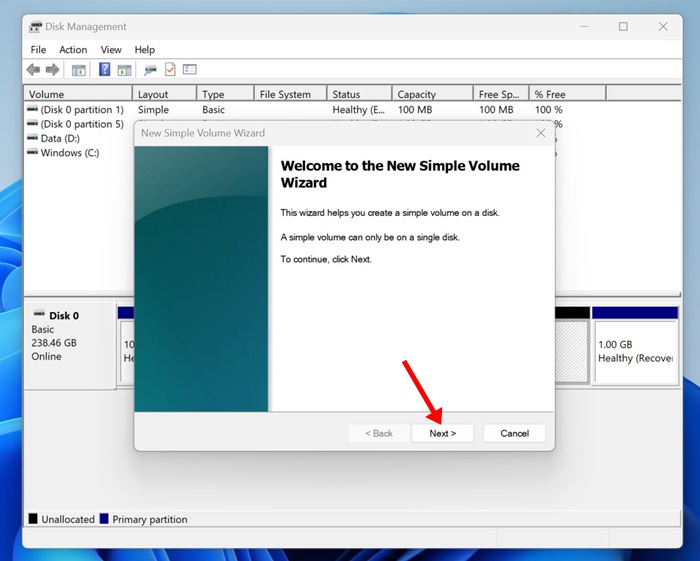
2. On the New Simple Volume Wizard, click Next.
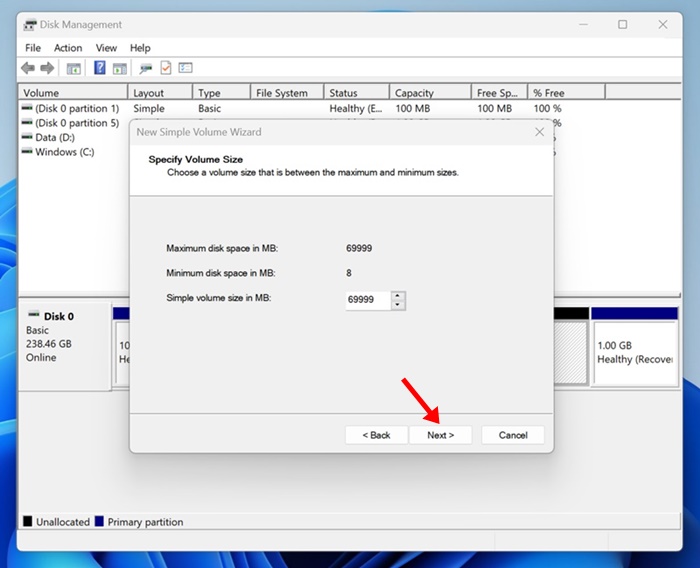
3. Enter the amount of storage space you want to assign. If you will use all unallocated space, use the default option. Click Next.
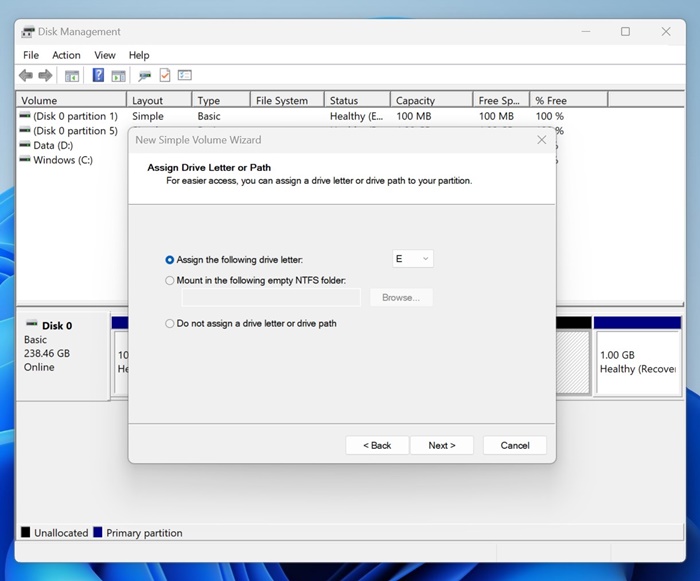
4. On the Assign Drive Letter or Path screen, assign a drive letter and click Next.
5. On the Format Partition screen, select Format this volume with the following settings. Select ‘NTFS‘ as the File system and enter the volume name. Once done, check the Perform a quick format option and click Next.
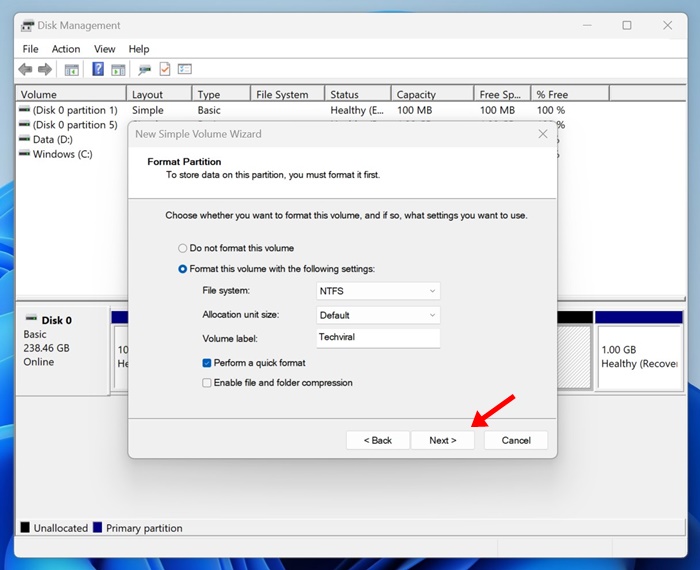
This will immediately format your new disk drive. Open File Explorer on your Windows 11, and you will find the new partition.
Other Ways to Create a New Partition on an Existing Disk Partition?
Disk Management utility is not the only tool for shrinking existing partitions and creating new ones on Windows 11. Many third-party tools also do the same thing and are easier to control.
Third-party partition management tools can ease the entire process of disk management on Windows 11, but they are often very expensive. We recommend using third-party disk management tools for Windows only if you often need to modify the existing partitions.
That said, Windows’s built-in partition management tool is powerful and can do everything a premium app can.
This guide explains how to create a new partition on Windows 11 by shrinking the volume of the existing one. Please let us know if you need more help creating new disk partitions on Windows 11.


