If you have been using Windows 10 for a while, you might know that the operating system allows you to change the default font. In addition, you can easily download fonts from third-party websites and apply them to your system.
However, what if the font you have downloaded appears small in size, and if it’s difficult to read? In this case, you can make your system fonts larger on Windows 10. Apart from changing fonts, Windows 10 also allows you to change the font size.
You can adjust the font size manually from the Windows 10 settings, and the new text size will be applied system-wide. Unfortunately, that means increasing the font size will also enlarge the texts on apps and web browsers.
Steps to Change the Font Size on Windows 10 PC
So, if you are looking for ways to change the font size on Windows 10, you are reading the right article. In this article, we will share the best method to change Font Size on Windows 10. Let’s check out.
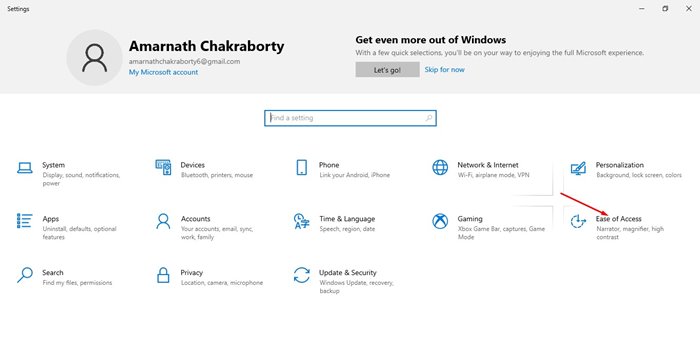
1. First of all, click on the Start button and select Settings.

2. On the Settings page, click on the Ease of Access option.
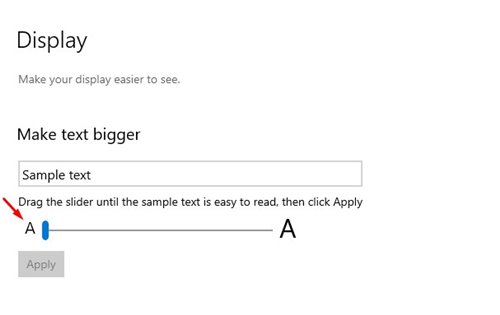
3. Click on the Display option on the left pane, as shown in the screenshot below.

4. Now on the right pane, you need to drag the slider until the exact text is easy to read. Next, you can drag the slider to adjust the text size.
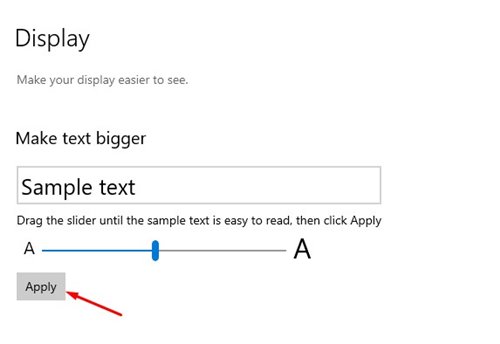
5. To confirm the new text size, click on the Apply button.
That’s it! You are done. This is how you can change the font size on Windows 10 pc.
Also read: How to Find & Remove Fonts On Windows 10 PC
So, this guide is all about how to change the font size on Windows 10 operating system. I hope this article helped you! Please share it with your friends also. If you have any doubts related to this, let us know in the comment box below.


