In recent years, PC games have undergone a drastic evolution in terms of graphics and gameplay. Those days were gone when video games for PC used to fit on CD and DVD; these days, PC games can fill up your entire HDD or SSD drives.
Even if you have enough storage left on your HDD or SSD drives, you will still need a capable processor and a GPU unit to run modern games smoothly on your system. Popular games like PUBG, Apex Legends, etc., can take up as much as 60-70 GB of installation space along with high-end specs.
If you are a gamer who spends most of the time playing games on a computer, you probably know about the Steam desktop client. Steam is a gaming service where you can download & install both free and premium games. If you rely on Steam to play games on your PC, you might want to change the game download location for better storage management.
Steps to Change the Game Download Location in Steam Client
By default, Steam saves the games in the C Drive, your system installation drive, and you may want to keep this drive as free as possible to get better performance. Fortunately, the Steam desktop client allows you to change the download & install location of games in easy steps.
Hence, in this article, we will share a step-by-step guide on how to change the game download location in the Steam desktop client on Windows 11. Let’s check out.
1. First of all, open the Steam client on your Windows 11 PC and then click on the Steam icon, as shown below.

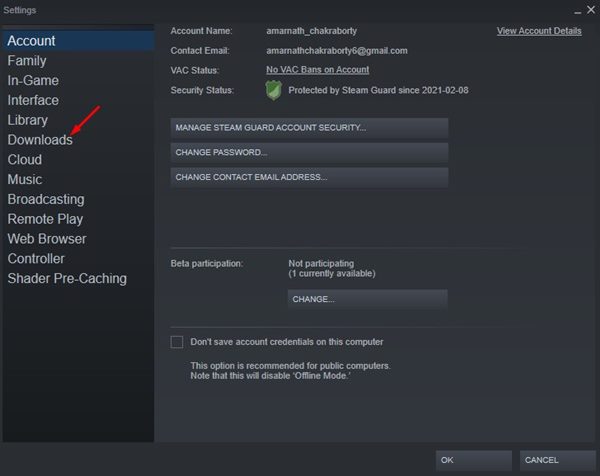
2. From the list of options, click on Settings.

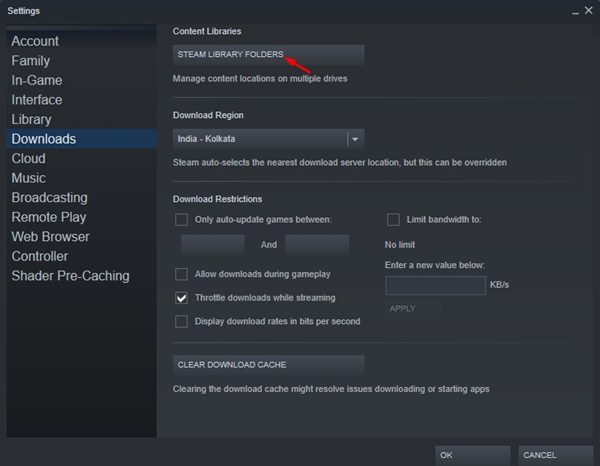
3. On the Settings page, select the Downloads section as shown below.
4. On the right pane, click on the Steam Library Folders under the Content Libraries.
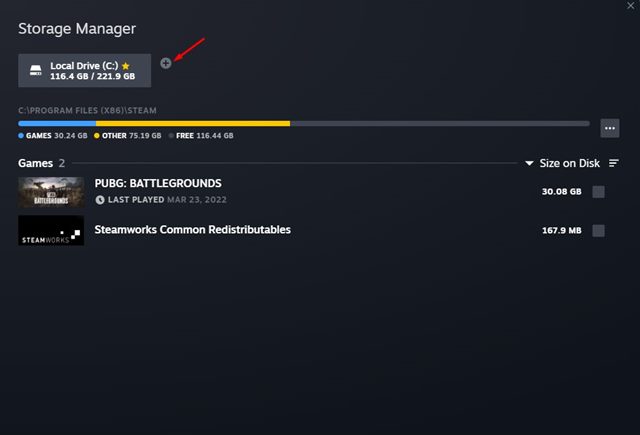
5. This will open the Steam Storage Manager. Here you need to click on the (+) button as shown below.
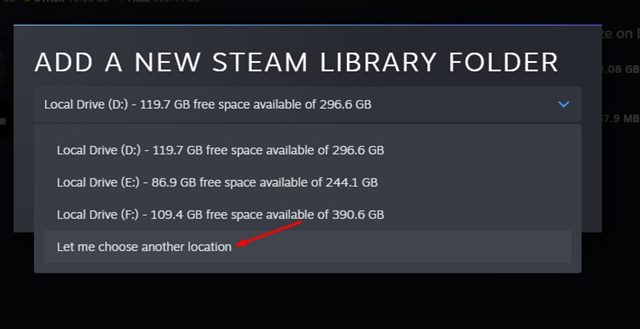
6. Next, on the Add a new Steam Library Folder screen, select the option ‘Let me choose another location’. Once done, click on the Add button.
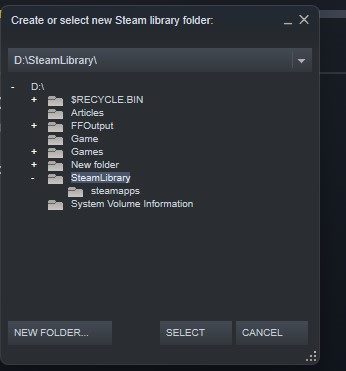
7. Now, you need to select the new folder where you want to store your Steam games. Once selected, click on the Select button.
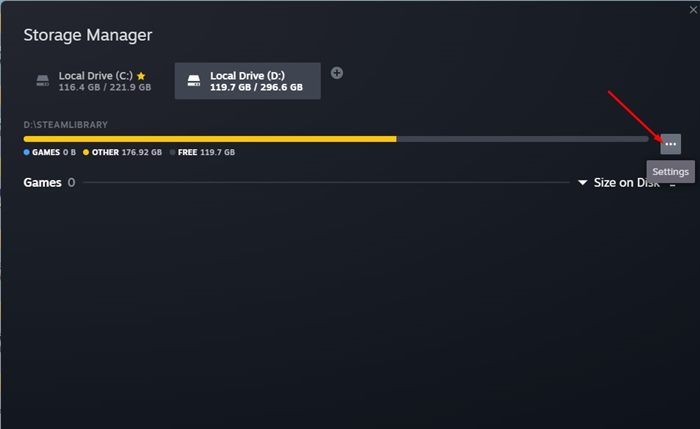
8. The new drive will be listed in the Storage Manager.
9. Now select the newly added folder and click on the three dots as shown below.
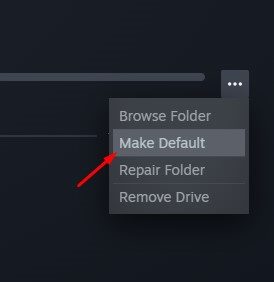
10. From the list of options, click on the Make Default.
That’s it! You are done. From now onwards, Steam will download & install the games on your new folder instead of the system installation drive.
How to Move Existing Steam Games to Another Drive?
If you wish to free up some storage space, you need to move Existing Steam games to another drive. We have shared a detailed guide on moving existing steam games to another folder on Windows 11.
We have shared the three best methods to help you move existing Steam games and all data files to a new drive & folder. Make sure to read that guide to know the methods.
So, this guide is all about how to change the Game download location in the Steam desktop client on Windows 11. I hope this article helped you! Please share it with your friends also. If you have any doubts related to this, let us know in the comment box below.


