Windows 10 is right now the best and most used desktop operating system. Compared to every other desktop OS, Windows 10 offers more features. One of the most used and useful features of Windows 10 is the ability to search the files. Windows search is indeed a helpful feature that allows you to find anything stored on your computer.
Unfortunately, Windows Search is not entirely bug-free. Sometimes it doesn’t start and fails to respond. So, if you have just found that Windows Search is no longer working properly, then you are reading the right article.
Fix Windows 10 Search Not Working Issue
In this article, we have decided to share some of the best methods to fix the Windows search problem in 2020. With these methods, you can quickly fix every Windows Search related issues.
1. Restart your computer

Well, this is one of the first things which you need to do. A simple restart can fix most of the Windows problems including the Search not working issue. So, if you haven’t restarted your computer after installing any new software or game, then you need to restart your computer. Once restarted, check whether the Windows 10 search is working or not. If it doesn’t work, then follow the next methods.
2. Using Task Manager
In this method, you need to restart the Cortana services to fix the Windows search not working. To restart the Cortana Services, we are going to use the Windows 10 Task Manager
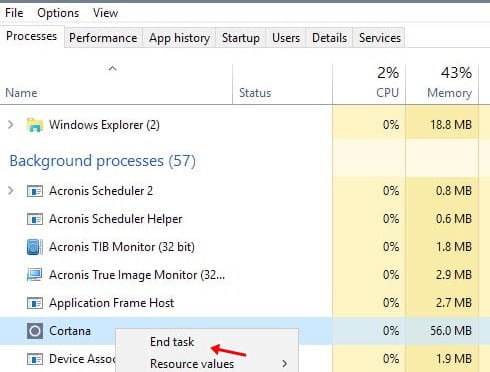
- Right-click on the Taskbar and select ‘Task Manager’
- On the Task Manager, look for Cortana.
- Right-click on the Cortana and select ‘End Task’
- Once done, restart your PC.
That’s it! You are done. After the restart, open the Windows Search again. It should work now.
3. Using Windows Services Settings
Well, if Windows 10 search is still not working, then you need to make some changes to the Windows services. For that, we are going to use the Windows services feature. Follow some of the simple steps given below.
- First of all, open the RUN dialog box and enter ‘services.msc’
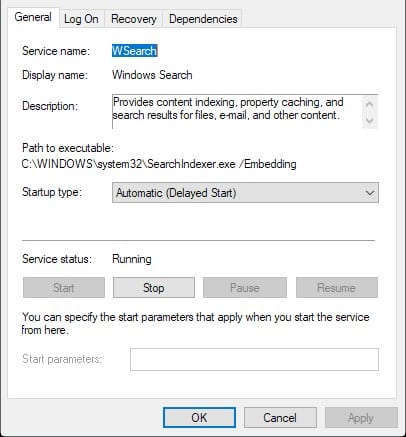
- On the Windows services, look for ‘Windows Search’
- Once located, double click on it and check the current status.
- If it’s showing ‘Stopped’ then select ‘Start’ under the Startup Type
- Apply the changes and restart your PC.
That’s it! You are done. This is how you can use Windows 10 services to fix the search not working.
4. Restore Indexing Services
Well, next we need to restore the indexing services of Windows 10 to fix Windows 10 search not working issue. Here’s what you need to do if you want to restore indexing services.
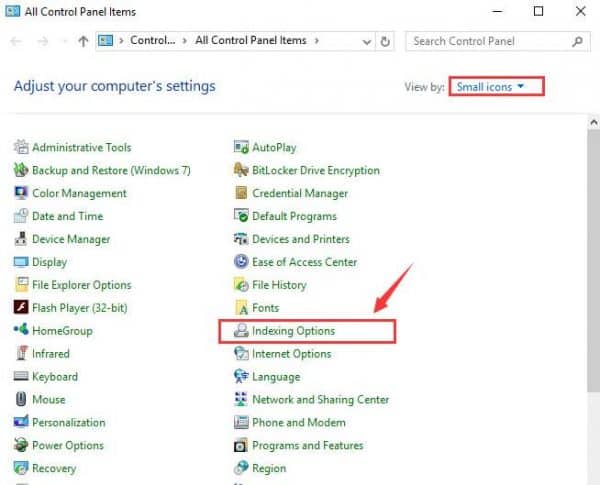
Step 1. First of all, click on the Start button and locate the Control Panel. You need to select the ‘View By’ option to ‘Small Icons’ and then click on the ‘Indexing Options’
Step 2. Under the Indexing options click on the ‘Advanced’ button.
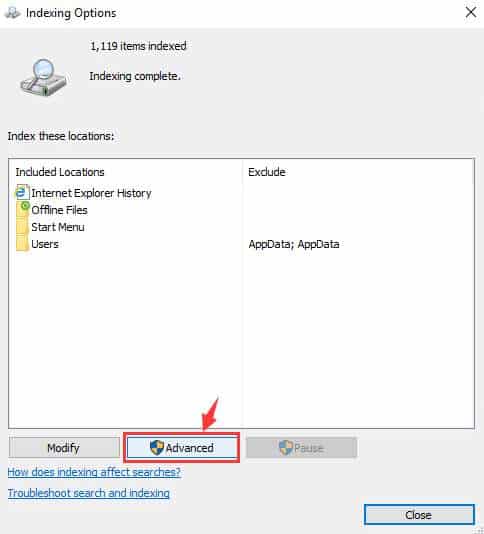
Step 3. On the new Window, click on the ‘Rebuild’ button which falls under the Troubleshooting category.
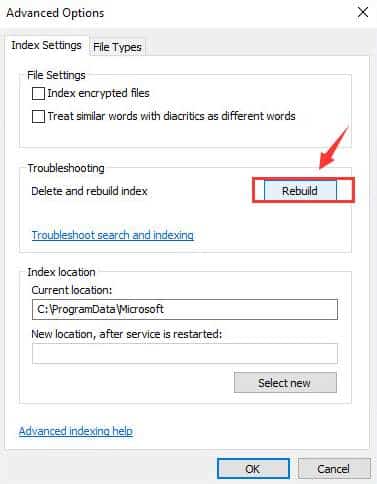
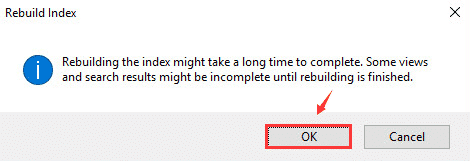
Step 4. Now, Windows 10 will ask you to confirm the Rebuilt Index. Simply, click on ‘Ok’ to continue.
That’s it, you are done! This process will Restore the indexing services. Restart your computer and the issue will be solved now.
5. Troubleshooting Indexing issue
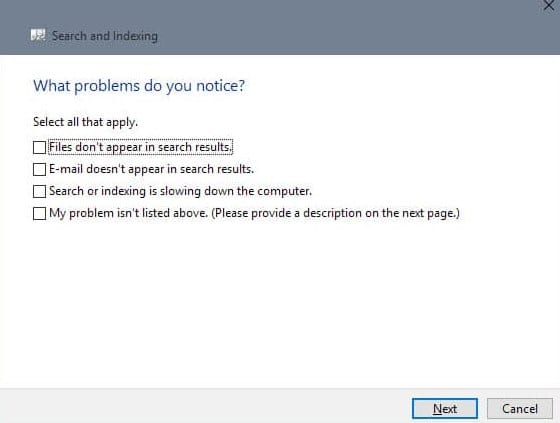
You can also use the Windows 10 Search and Indexing troubleshooting utility to deal with Windows search problems. You just need to open the Control Panel and click on the Indexing option. Under the Indexing option, click on the ‘Advanced’. Next, click on the ‘Troubleshoot search and indexing’. It will open the Search and Indexing troubleshooter. Just follow the on-screen instructions to complete the process.
6. Reset Windows 10
If all of the above-mentioned methods failed to fix the Windows 10 search not working issue, then the last remaining option is to reset the operating system. Make sure to back up important files before you reset Windows 10 because it will remove all files stored on Windows installation drive and desktop. To reset Windows 10, follow some of the simple steps given below.
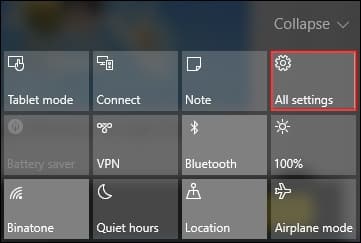
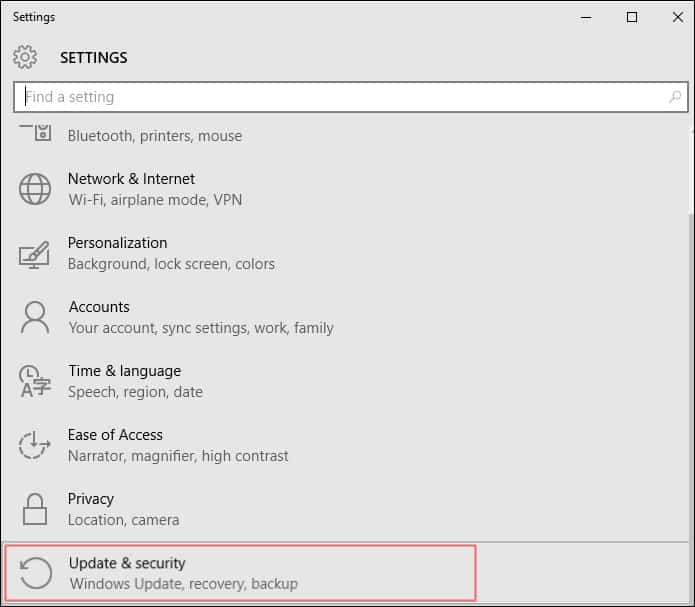
Step 1. First of all, open Notification Center and click on ‘All Settings’
Step 2. Under the Settings, click on ‘Update and Security’
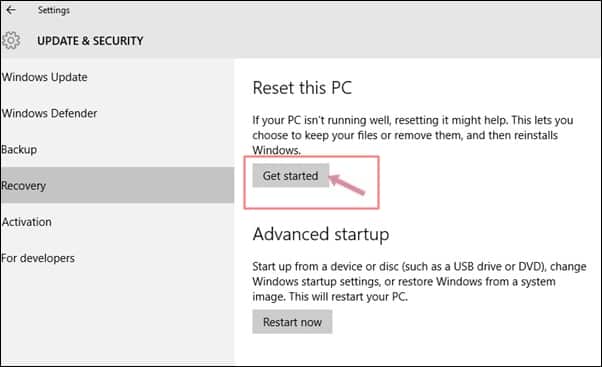
Step 3. Now click on the ‘Recovery’ tab and then click on ‘Get Started’
Step 4. In the next step, click on ‘Keep My Files’
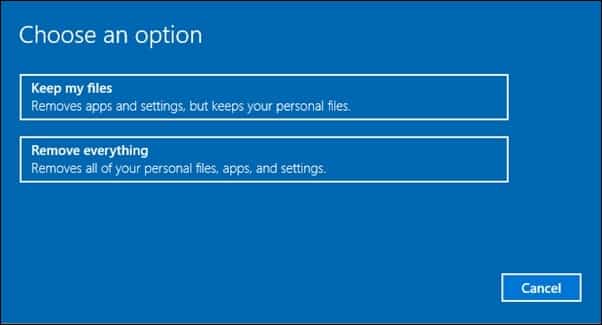
That’s it, you are done! Now, wait for a few seconds until the reset process completes. Once done, the Windows 10 Search problem will be fixed.
So, this article is all about how to fix Windows 10 Search Not working problems. I hope this article helped you! Share it with your friends also.


