If you use Windows, you may know that the operating system automatically installs drivers for your hardware during system updates. The entire process is done in the background and without your consent. While the feature is helpful and saves you time, it’s not meant for everyone.
Sometimes, you may want to disable automatic driver installation on Windows for a few reasons. For example, if the latest driver version has a bug, you may never want to install it. You may also want to prevent automatic driver installation due to compatibility issues.
So, if you don’t want Windows 11 to scan & install drivers automatically, disabling the feature is a good choice. Here’s how you can disable the feature.
1. Disable Automatic Driver Installation via Settings
This method will use Windows 11’s Settings app to disable the automatic driver installation.
1. Click on the Windows 11 Start button and select Settings.
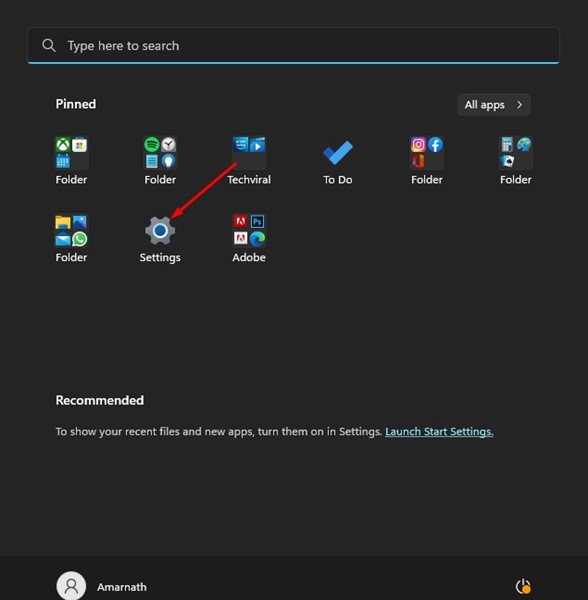
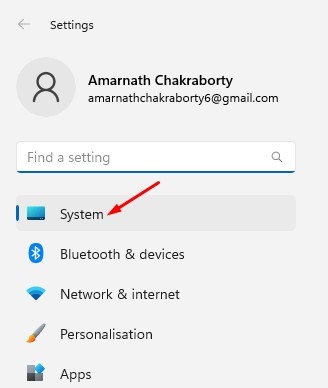
2. In the Settings app, click on the System tab in the left pane.
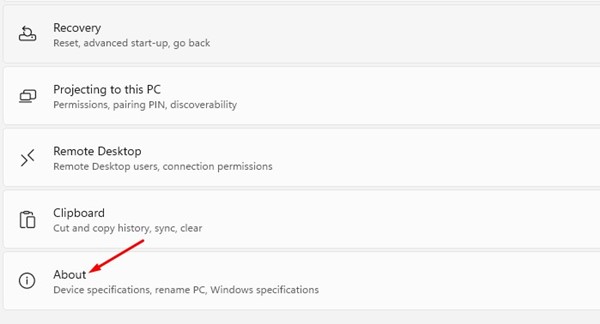
3. On the System screen, scroll down to the end and click on the About section.
4. In Related links, click on Advanced system settings.
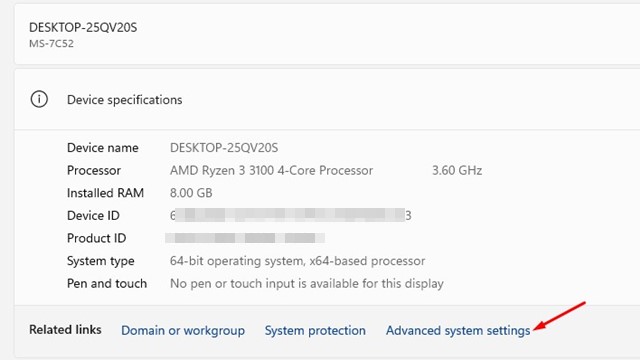
5. On the System Properties window, switch to the Hardware tab.
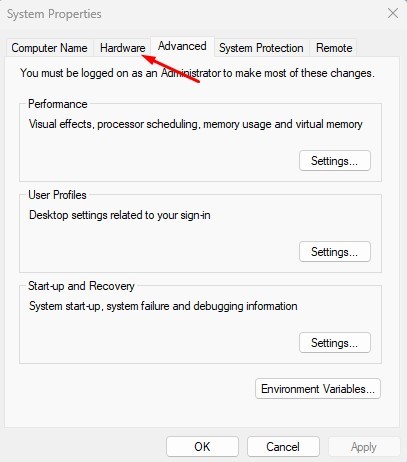
6. Click on the Device Installation Settings.
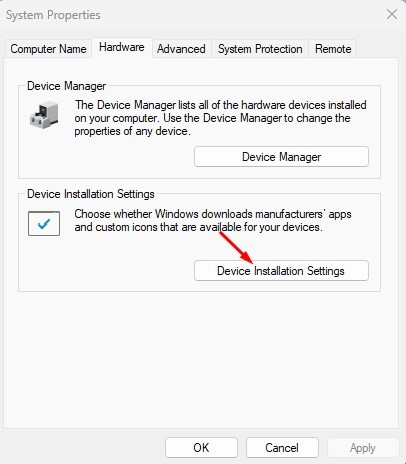
7. On the Device Installation Settings prompt, select ‘No (your device might not work as expected)’ and click on Save changes.
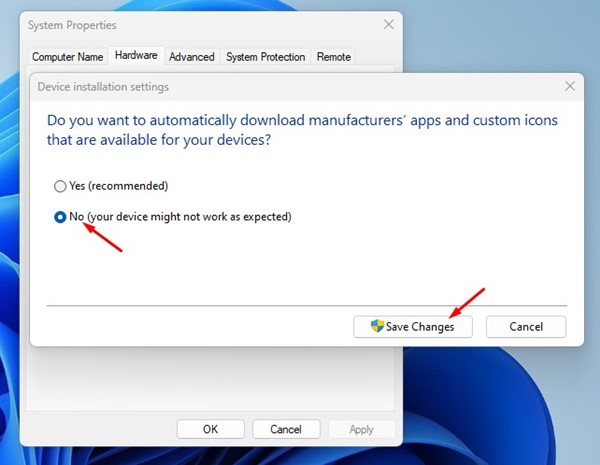
This will disable automatic driver installation on your Windows 11 PC. If you wish to enable automatic driver installation, select ‘Yes (recommended)’ on Step 7.
2. Disable Automatic Driver Installation on Windows 11 via Local Group Policy
You can even use the Local Group Policy Editor in Windows 11 to disable automatic driver installation.
1. Click on the Windows 11 search and type in Local Group Policy Editor. Next, open the Local Group Policy Editor from the list.
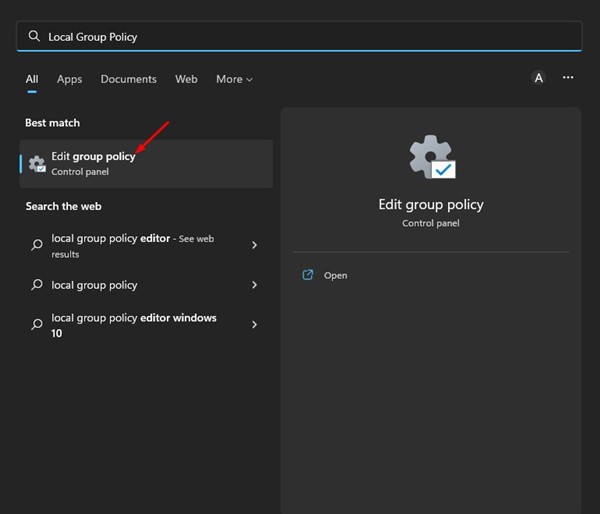
2. In the Local Group Policy Editor, navigate to the following path:
Computer Configuration > Administrative Templates > Windows Components > Windows Update > Manage updates offered from Windows Update
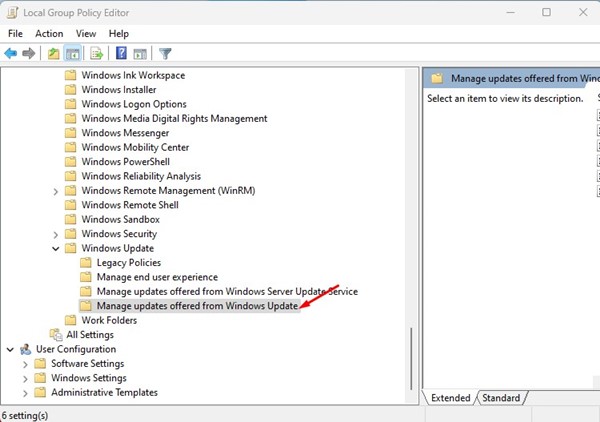
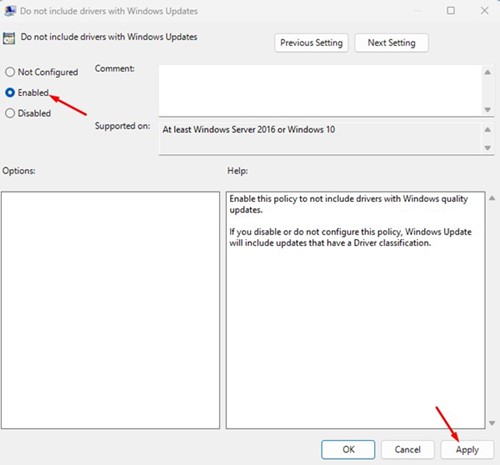
3. Double-click on Do not include drivers with Windows updates in the right pane.

4. Select Enabled and click Apply.
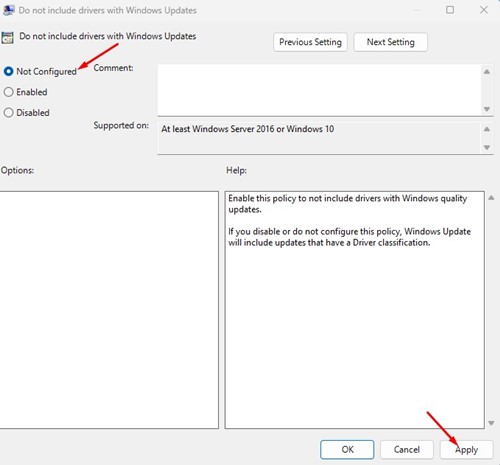
5. If you wish to enable automatic driver updates, select Not Configured in the above step and click Apply.
3. Disable Automatic Driver Installation via Registry Editor
Like the Local Group Policy Editor, you can also use the Registry Editor app to disable automatic driver installation.
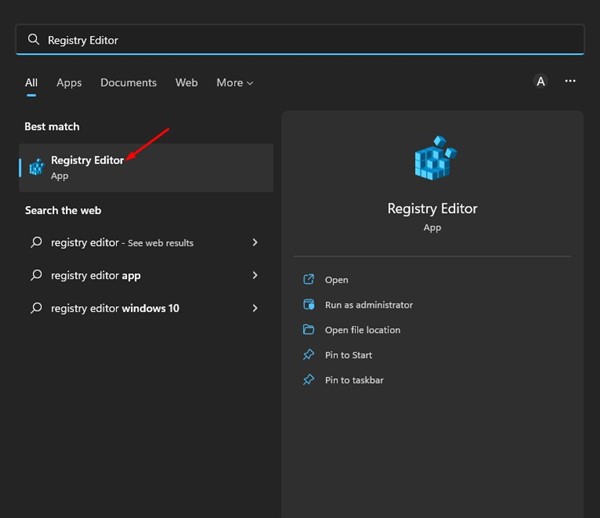
1. Click on the Windows 11 Search and type Registry Editor. Next, open the Registry Editor app from the list of matching results.
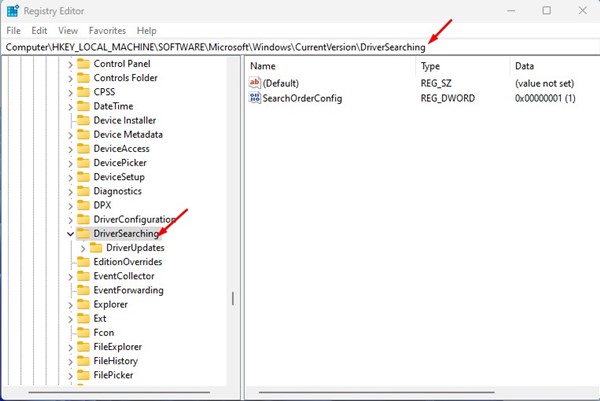
2. In the Registry Editor, navigate to the following path:
HKEY_LOCAL_MACHINE\SOFTWARE\Microsoft\Windows\CurrentVersion\DriverSearching
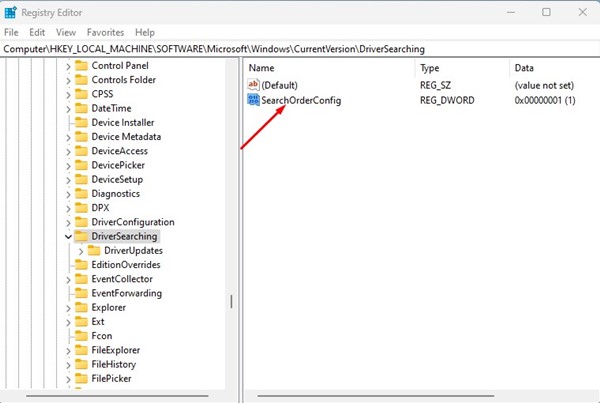
3. Double-click the SearchOrderConfig REG_DWORD key.
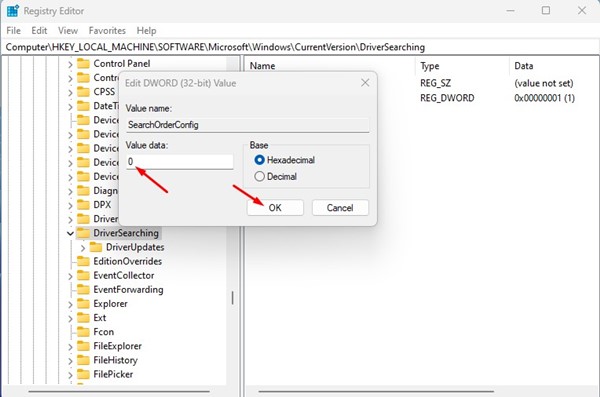
4. In the Value data field, enter the following:
- 0: To block automatic driver installation
- 1: Allow automatic driver installation.
5. If you want to block automatic driver installation, enter 0 in the Value data field and click on the Ok button. To revert the changes, enter 1 on the Value data field.
Also read: How to Install Audio/Sound Driver in Windows 11
These are a few of the best ways to disable automatic driver installation on Windows 11. If you prefer to install the drivers manually, you should disable the automatic driver installation. If you need more help, let us know in the comments below.