Microsoft’s new desktop operating system, Windows 11, delivers many useful & interesting features, and it ships with a more refined look and new icon set.
If you have just switched to Windows 11, you might be overwhelmed by the visual changes. The first thing that you would notice is the new Start Menu, new wallpaper, and new File Explorer icons. Although Microsoft has overhauled the user interface of Windows 11, the visual elements were not meant for low-end devices.
If your PC is having less than 4GB of RAM, you might face lots of issues while using Windows 11. It is because the visual elements of Windows 11 take up a lot of RAM resources and slow down the devices. So, if you are experiencing performance-related problems after installing Windows 11, you may like to disable the Visual effects.
Steps to Disable Visual Effects in Windows 11 to Improve Performance
Hence, in this article, we will share a step-by-step guide on how to disable visual effects in Windows 11. The steps we’re going to share will be very easy; just follow them as mentioned below. Let’s check out.
1) Disable Visual Effects via Advanced System Settings
In this method, we will use the Advanced System Settings to disable the visual effects on Windows 11. Follow some of the simple steps we have shared.
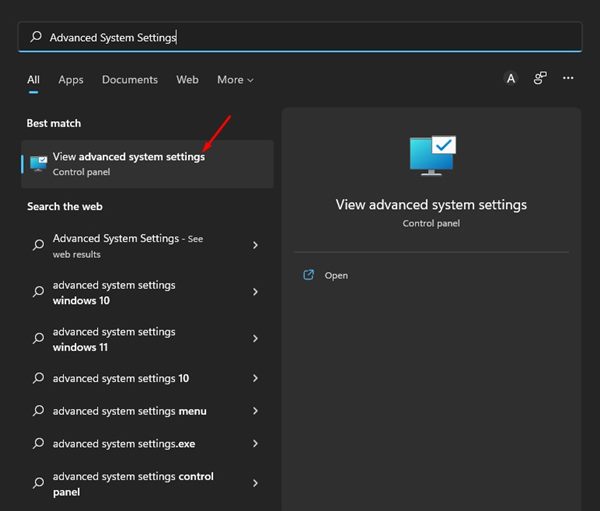
1. First of all, click on the Windows 11 search and type in Advanced System Settings. Next, open the View Advanced System Settings option from the list.
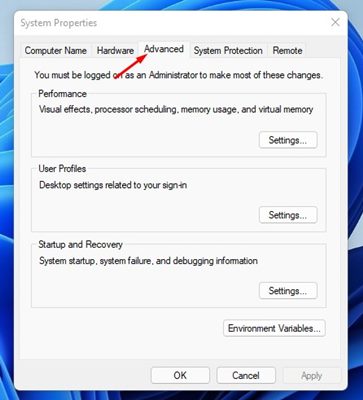
2. On the System Properties popup, switch to the Advanced tab as shown below.
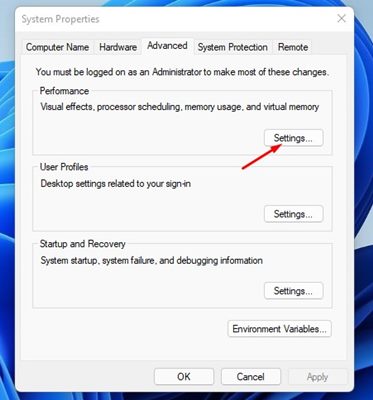
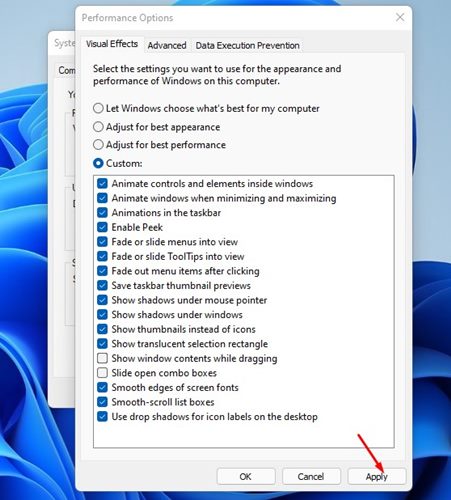
3. Next, click on the Settings button under the Performance.
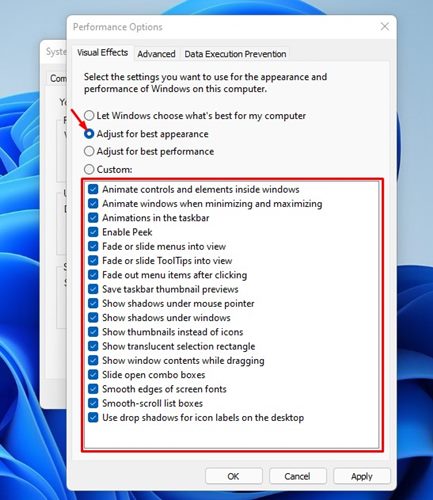
4. On the Performance option, you need to select the ‘Adjust for best performance’ option.
5. You also manually check or uncheck the visual elements.
6. After making the changes, click on the Apply button then on OK.
That’s it! You are done. This is how you can enable or disable visual effects on Windows 11. Make sure to restart your PC to apply the changes.
2) Disable Visual Effects via Windows 11 Settings
In this method, we will use the Windows 11 Settings app to disable the Visual effects. Here are some of the simple steps you need to follow.
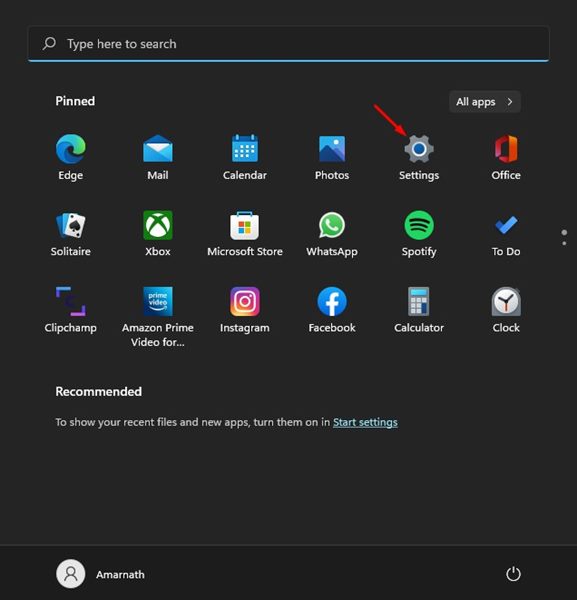
1. First of all, click on the Windows 11 Start button and select Settings.
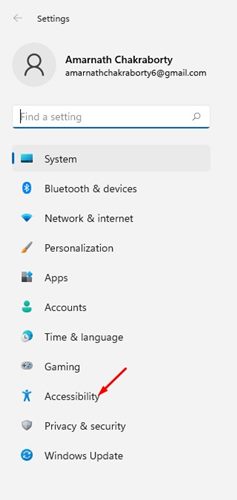
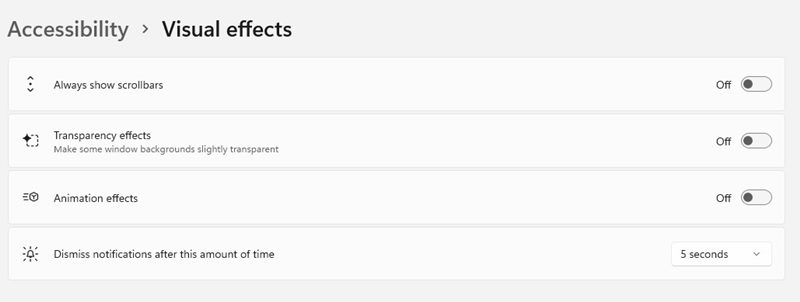
2. On the Settings app, click on the Accessibility option, as shown in the screenshot below.
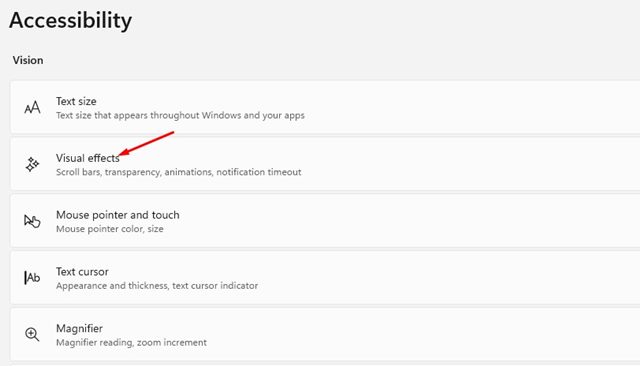
3. On the right pane, scroll down and click on the Visual effects.
4. To disable the visual effects, turn off the first four options – Always show scrollbars, Transparency effects, Animation effects, Dismiss notifications, etc.
That’s it! You are done. After making the above changes, make sure to restart your Windows 11 computer.
These are the best ways to disable the visual effects on Windows 11 operating system. I hope this article helped you! Please share it with your friends also. If you have any doubts related to this, let us know in the comment box below.


