If you have been using Windows 10 for a while, you might know that the operating system automatically downloads and installs all available quality updates (cumulative updates). Automatic updates would never be a problem if your ISP offers you unlimited internet bandwidth; however, it’s best to disable the automatic updates if you have limited internet data.
The auto-update feature of Windows 10 ensures better performance and stability, but it hasn’t been an ideal feature for every user. Along with the new features and bug fixes, Windows 10 updates also come with additional problems. Some users have even reported software compatibility issues after updating their operating system.
If you are among those users who have faced problems after installing the Windows 10 updates, it’s best to completely disable the auto-update feature. We have already shared an article where we have shared a few best ways to disable the auto-updates in Windows 10.
Also Read: How to Pause & Resume Windows 10 Updates
Steps to Disable Windows 10 Updates via Registry Editor
In this article, we will share another best trick that would permanently disable the auto-updates in Windows 10. So, let’s check out.
To disable the auto-updates, we will use the Registry editor. We need to add a new key to the Windows registry to disable the auto-updates. Follow some of the simple steps given below.
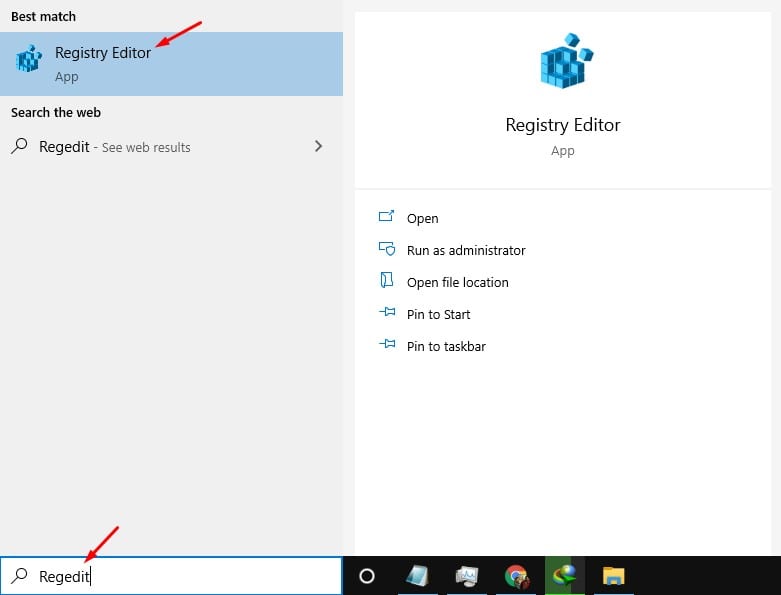
Step 1. First of all, click on the ‘Start’ button and search for ‘Regedit’ Open the Registry Editor from the list.
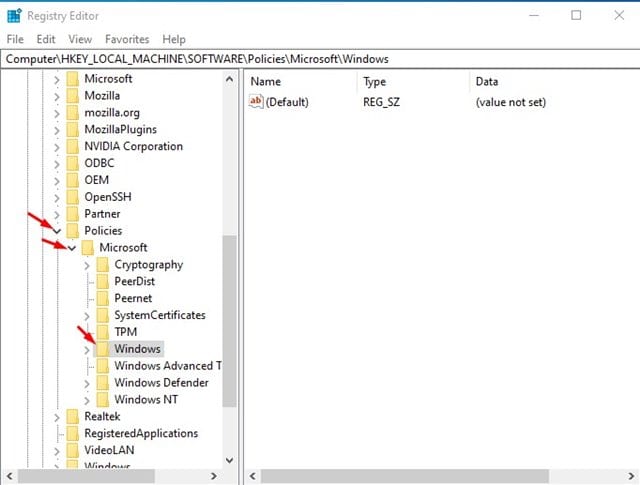
Step 2. This will open the Registry editor. Now navigate to the following path:
HKEY_LOCAL_MACHINE\SOFTWARE\Policies\Microsoft\Windows
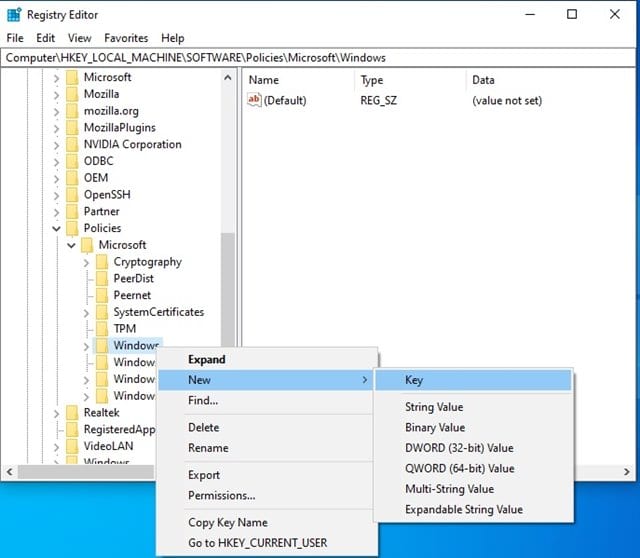
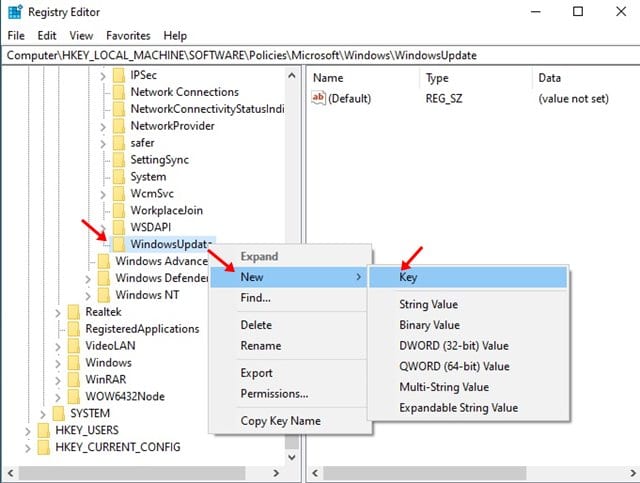
Step 3. Now right click on the Windows folder and select New > Key.
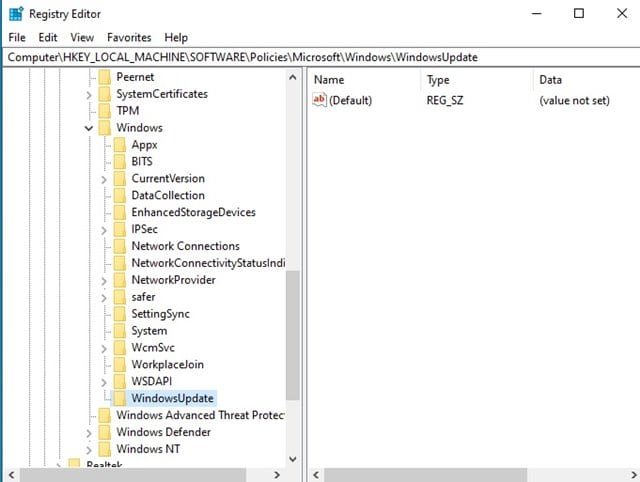
Step 4. Name the new key WindowsUpdate and press the Enter button.
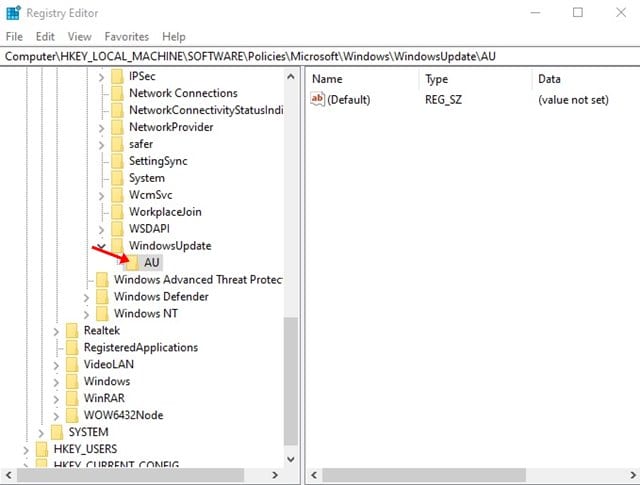
Step 5. Now right click on the WindowsUpdate key and select the New > Key option.
Step 6. Name the new key ‘AU’ and press the Enter button.
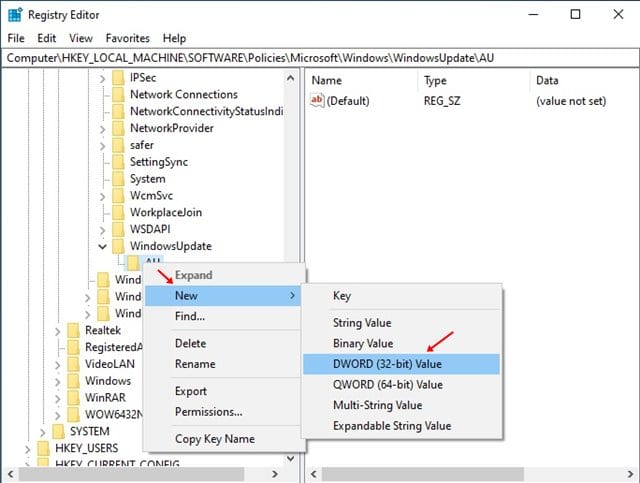
Step 7. Right-click on the AU key, and select the New > DWORD (32-bit) Value option.
Step 8. Now name the new key NoAutoUpdate and press the Enter button.
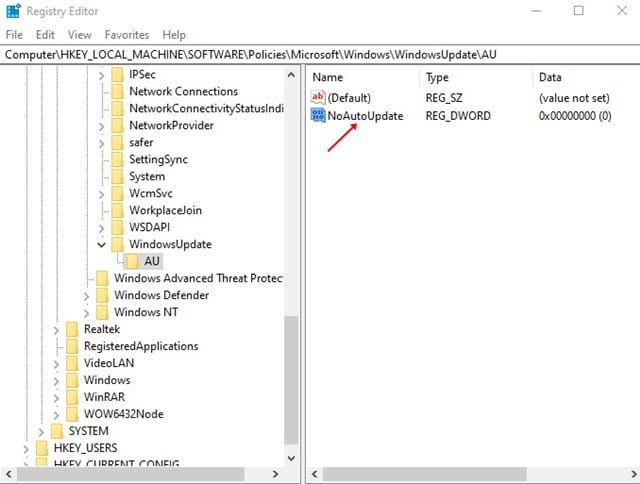
Step 9. Double click on the NoAutoUpdate key and change its value from 0 to 1.
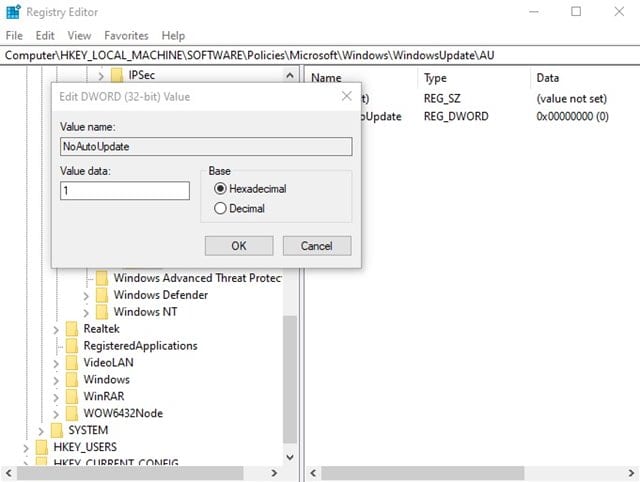
Step 10. Once done, click on the ‘Ok’ button and then restart your PC.
That’s it! You are done. This is how you can disable automatic updates on Windows 10 via registry editor. If you wish to enable the updates, then change the value of the ‘NoAutoUpdate’ key in Step no. 9 to ‘0’. You can even use the ‘Check for Update’ option in Windows 10 to install the pending updates.
So, this article is all about how to disable automatic updates via Registry editor in Windows 10. I hope this article helped you! Please share it with your friends also. If you have any doubts related to this, let us know in the comment box below.


It appears to be a workable solution,
Hope it continues to work?
I don’t mind Win X updates but I believe having control will alleviate many Net/PC concerns,
Thanks for the walkaround.
How to disable Windows 10 updates?