Quick Settings is one of the essential features of Windows 11 computers. The quick settings panel of Windows 11 is very similar to the Action Center seen on Windows 10. Windows 11 users can manage various PC features & settings with it, such as Brightness, Bluetooth, WiFi, Volume, WiFi, etc.
While the Quick Settings Panel is helpful, many users don’t use it and prefer to keep it disabled. If you don’t use Quick Settings on Windows 11, you may like to turn off the feature. Hence, this article will share the two best ways to disable the Windows 11 Quick Settings.
2 Ways to Enable & Disable Quick Settings in Windows 11
Since we will be editing the registry file, creating a system restore point is recommended. The System Restore Point will help you revert the changes if anything goes wrong.
1) Enable & Disable Quick Settings in Windows 11 via Group Policy Editor
We will use the Local Group Policy Editor of Windows 11 to enable or disable the Quick Settings panel in this method. Here are some of the simple steps you need to follow.
1. First, click on the Windows 11 search and type in Local Group Policy Editor.

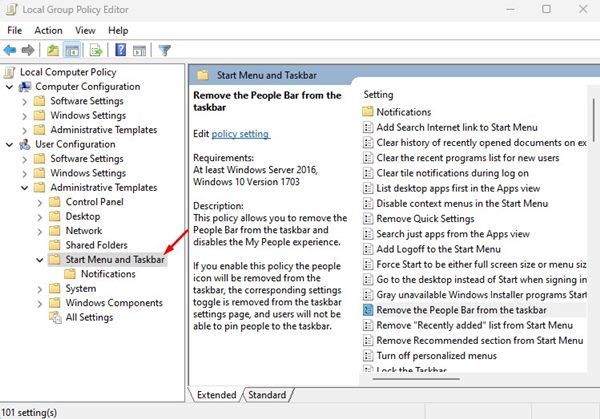
2. On the Local Group Policy Editor, navigate to the following path:
User Configuration > Administrative Templates > Start Menu and Taskbar
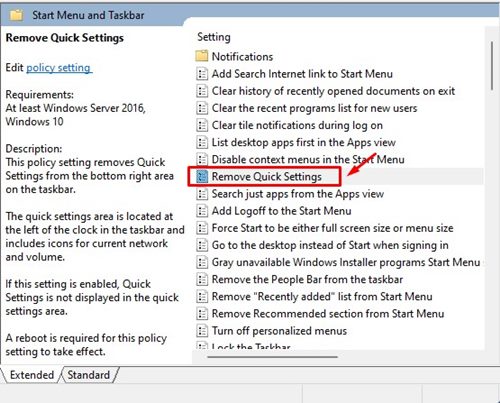
3. On the right pane, find and double-click on the Remove Quick Settings policy.
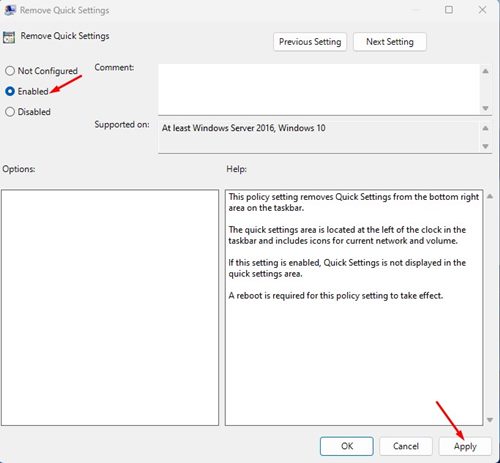
4. Next, on the Remove Quick Settings window, select Enabled and click on the Apply button.
5. This will remove the Quick Settings on your Windows 11. Select ‘Not Configured’ on the above step if you wish to enable Quick Settings again.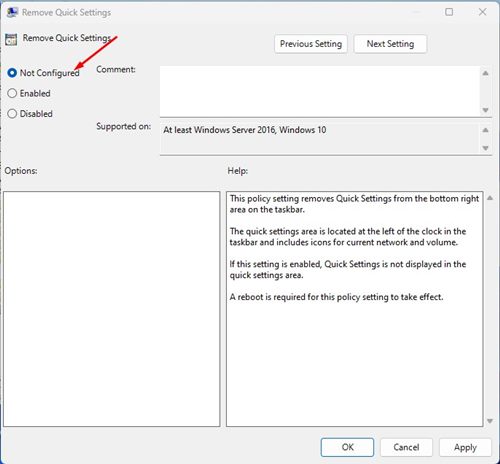
That’s it! This is how you can enable or disable Quick Settings in Windows 11 via Local Group Policy Editor.
2) Enable or Disable Quick Settings via Registry
In this method, we will use the Registry Editor of Windows 11 to enable or disable the Quick Settings. Here are some of the simple steps you need to follow.
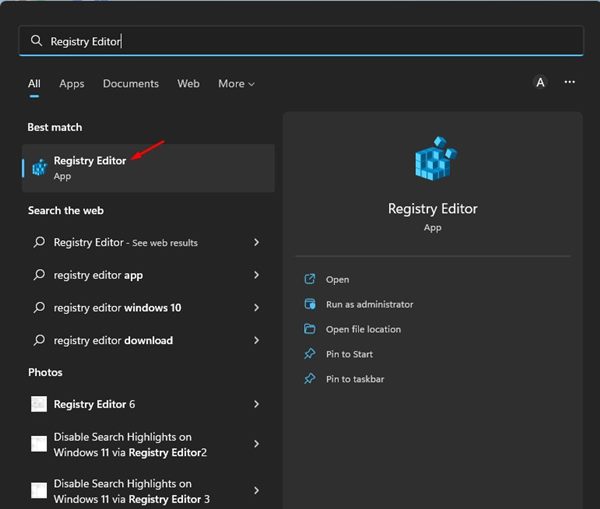
1. First, click on the Windows 11 search and type in Registry Editor. Next, open the Registry Editor app from the list.
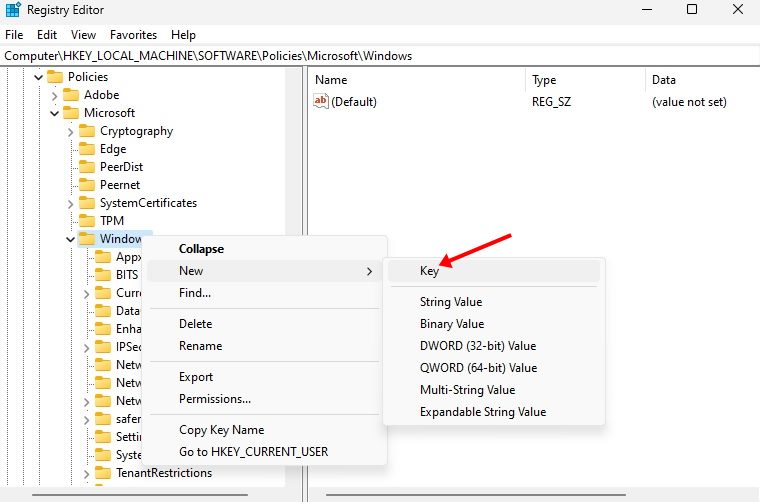
2. On the Registry Editor, navigate to the following path:
HKEY_LOCAL_MACHINE\SOFTWARE\Policies\Microsoft\Windows
3. Next, right-click on the Windows folder and select New > Key.
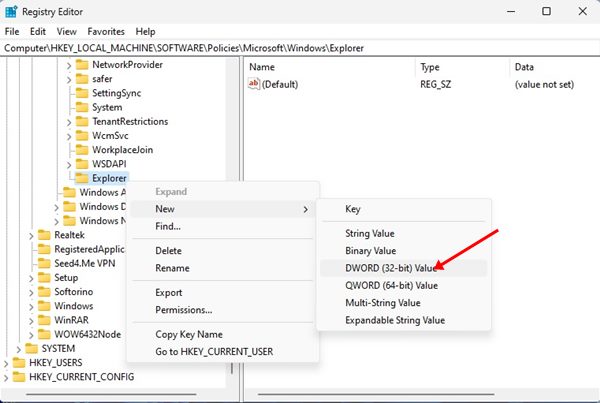
4. Name the new key Explorer. Next, right-click on the Explorer and select New > DWORD (32-bit) Value.
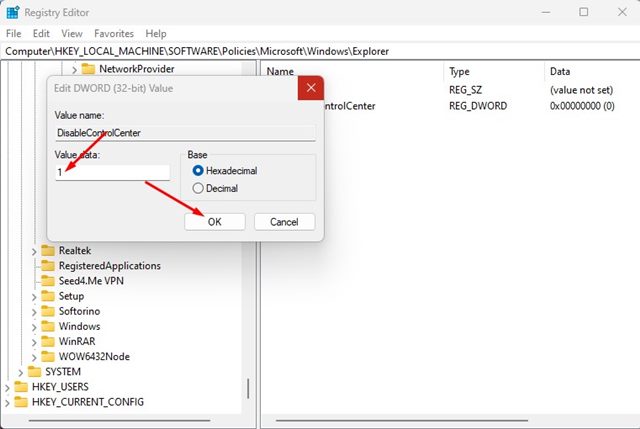
5. Name the new DWORD (32-bit) value as DisableControlCenter.
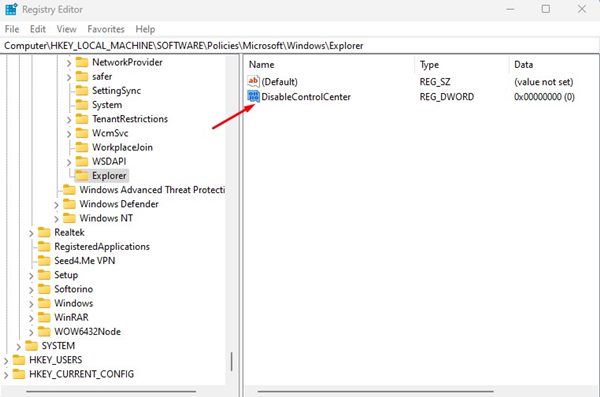
6. Double click on the DisableControlCenter, and the Value data field, enter 1. Once done, click on the Ok button. This will disable the Quick Settings on your Windows 11.
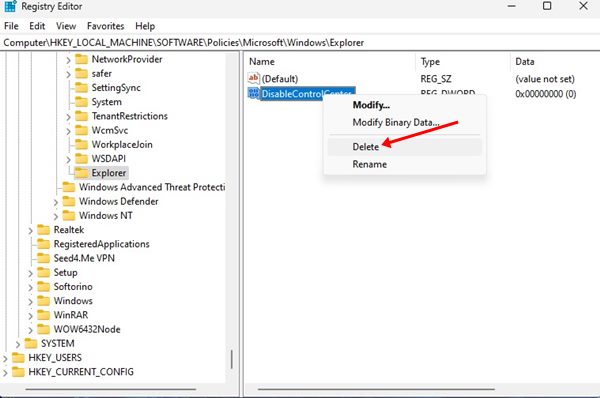
7. If you wish to enable the Quick Settings, delete the DisableControlCenter key you have created in Step 5.
Also Read: How to Hide & Show the Taskbar in Windows 11
Quick Settings on Windows 11 is highly customizable. You can add, remove or reset Windows 11’s Quick Settings in easy steps. So, these are the two best methods to enable or disable Quick Settings on Windows 11. If you have any doubts about Windows 11’s Quick Settings, let us know.


