
With Windows Security, users no longer need to invest in premium security apps to protect their computers/laptops from security threats like viruses, malware, adware, and potentially unwanted programs (PUPs).
Windows Security also has a feature which is called Ransomware Protection, and it helps secure your device against ransomware attacks. Here’s how you can enable that feature on your PC.
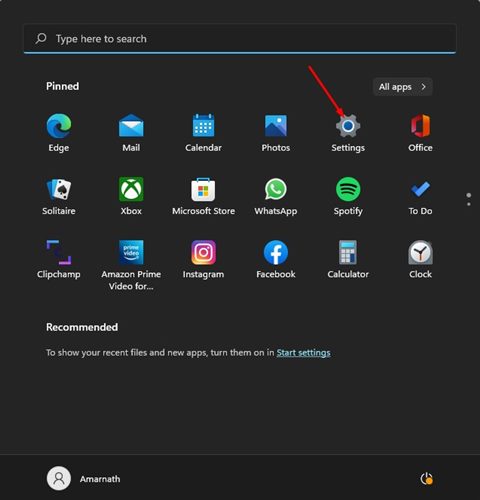
1. Click on the Windows Start button and select Settings.
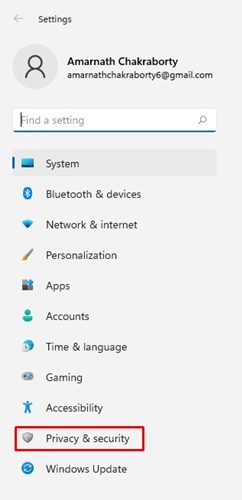
2. In the Settings app, click on the Privacy & Security option.
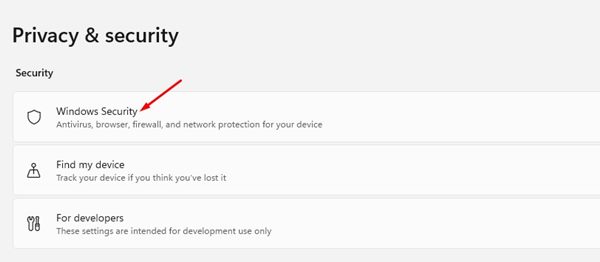
3. Click on the Windows Security section in the right pane.
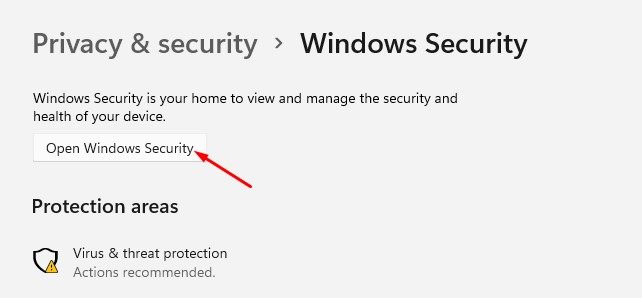
4. On the next screen, click on Open Windows Security.
5. This will open the Windows Security app on your device. On the left pane, click on Virus & threat protection.
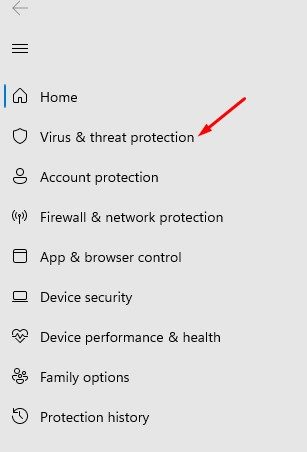
6. On the right, scroll down and click on the Manage ransomware protection link.
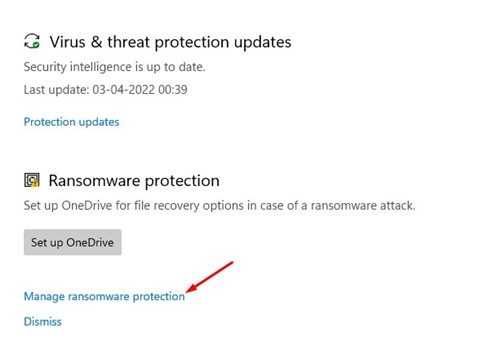
7. On the next screen, enable the ‘Control Folder Access’ option. Toggle the switch to enable it.
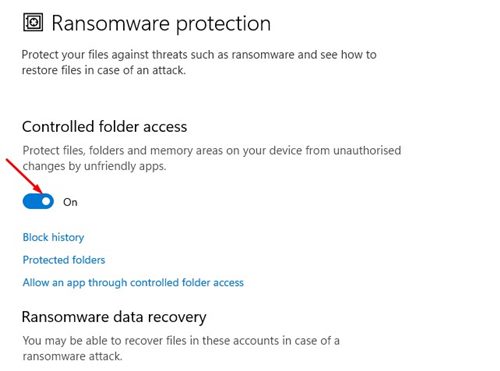
How to Allow an app through Controlled Folder Access
Controlled Folder Access is a part of Windows Security, and it blocks all unfriendly apps from making changes to your protected folders. Sometimes, the feature might block apps from making changes even when they are safe to use.
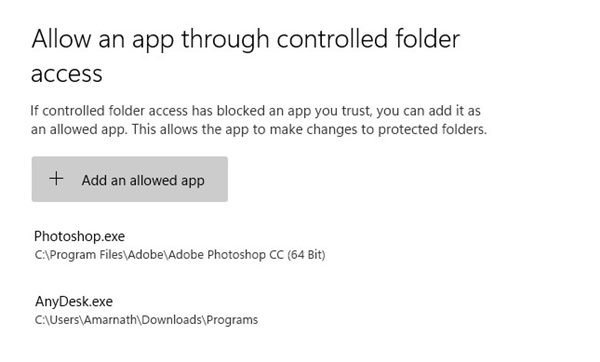
In that case, you need to allow apps through Controlled Folder Access. On TechViral, we have shared a detailed guide on how to allow apps through Controlled Folder Access in Windows 11. Make sure to follow that guide to prevent Windows Security from blocking safe apps.
As we have mentioned above, it’s pretty easy to enable Ransomware protection on Windows 11. I hope this article helped you! Please share it with your friends also. If you have any doubts related to this, let us know in the comment box below.