Microsoft’s new & improved Edge browser is no less than Google Chrome when it comes to the feature. Within a short time, the new Edge browser managed to gain lots of active users. As of now, Microsoft Edge is considered one of the best web browsers for desktop.
The new web browser is unique in its own way, and it now uses a Chromium-based engine. It has a new user-interface and is now compatible with all Chrome extensions and themes. In fact, Edge browser now comes with an exciting set of features that were never seen before.
While using Microsoft Edge browser, we found another best feature known as ‘Sleeping Tabs’. The feature aims to improve the browser’s performance. When enabled, Edge browser automatically releases system resources for inactive tabs when they haven’t been used for a while.
Also read: How to Enable News & Weather Widget On Microsoft Edge
Steps to Enable ‘Sleeping Tabs’ in Microsoft Edge To Save Memory
According to Microsoft, the Sleeping tabs reduce memory usage by 32% and CPU usage by up to 37%. In this way, the Sleeping tabs feature also increases the battery life of a laptop.
In this article, we will share a detailed guide on how to enable the sleeping tabs feature in the Microsoft Edge web browser. Let’s check out.
Step 1. First of all, open the Microsoft Edge browser on your computer.
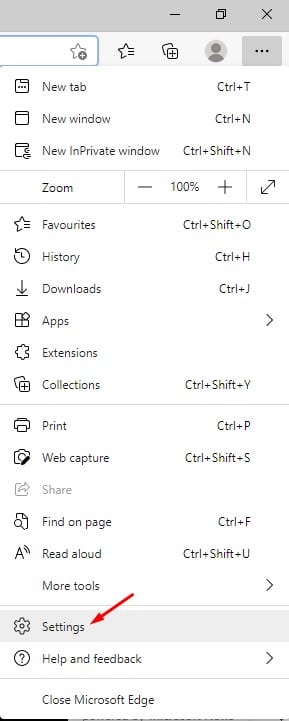
Step 2. Now click on the ‘three dots’ as shown below.
Step 3. From the menu that appears, click on ‘Settings’.
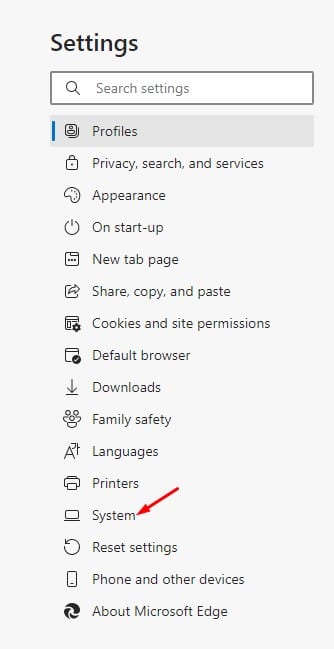
Step 4. On the Settings page, click on the ‘System’ option.
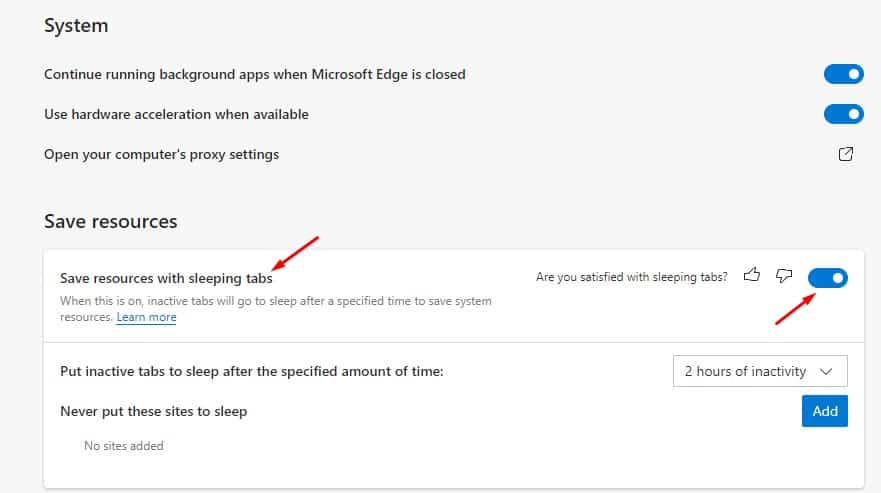
Step 5. On the left pane, scroll down and find the option ‘Save resources with sleeping tabs’. Use the toggle button to turn on the feature.
That’s it! You are done. With this feature enabled, the inactive tabs will go to sleep after a specified time to save system resources.
So, this article is all about how to enable the sleeping tabs feature in the Microsoft Edge browser. I hope this article helped you! Please share it with your friends also. If you have any doubts related to this, let us know in the comment box below.


