It’s no doubt that Google Chrome is right now the best web browser. The good thing is that the web browser from Google is available for all platforms, including Windows, iOS, Android, Linux, etc. Comparted to all other web browsers, Chrome provides users more features, but it lacks customization options.
If you have been using Chrome for a while, then you might know that the browser doesn’t provide any tab management features. Tab management features on the web browser become useful if you have the habit of shuffling through hundreds of tabs.
To deal with tabs cluttering issues, Google introduced a new ‘Tab Groups’ feature on Chrome Canary a few months ago. The feature allows users to organize tabs into visually distinct groups. That means you can create groups and associate different tabs on it.
How To Enable Tab Groups Feature on Chrome Browser (Stable Build)
Previously, the feature was available only on Chrome Canary Build, but now it had arrived on the stable build of the Chrome browser. Yes, you read that right! The tab group feature is finally available on Google Chrome stable build.
In this article, we are going to share a detailed method to enable Tab Groups in the Chrome browser. You just need to tweak a few flags settings to enable the feature on the Google Chrome browser.
Step 1. First of all, open the Google Chrome browser on your Windows 10 PC.
Step 2. On the Chrome browser, enter ‘Chrome://flags’ on the URL bar and hit Enter.
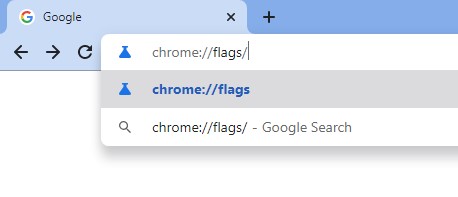
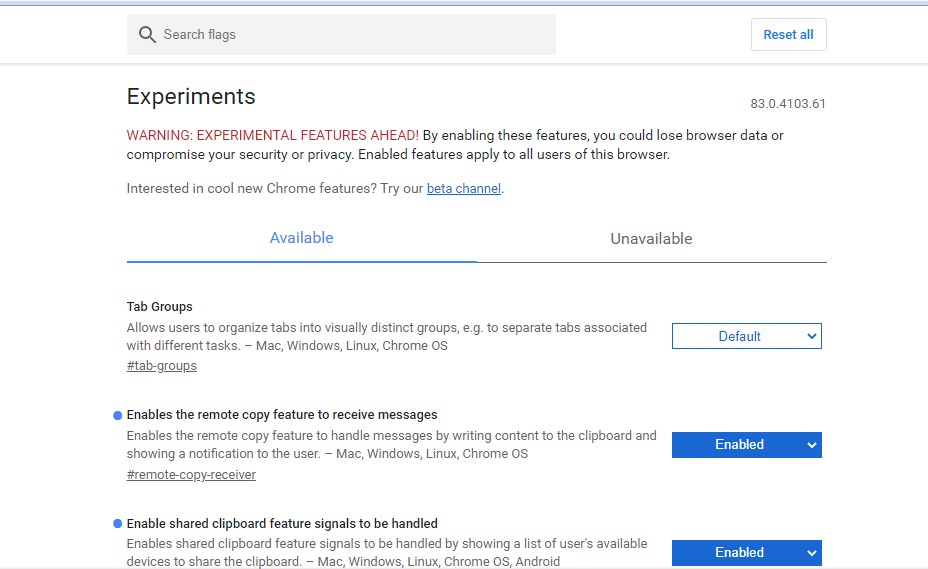
Step 3. This will open the Chrome’s Experiments page.
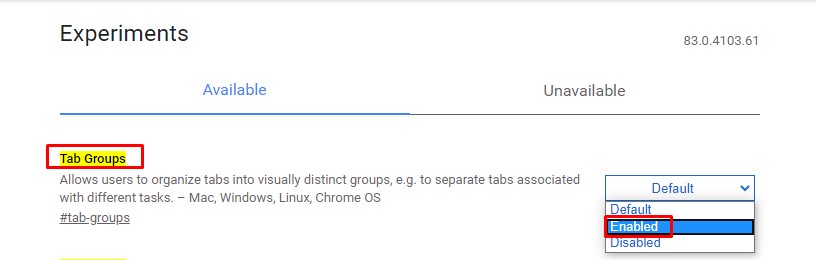
Step 4. On the Search bar, type in ‘Tab Groups’
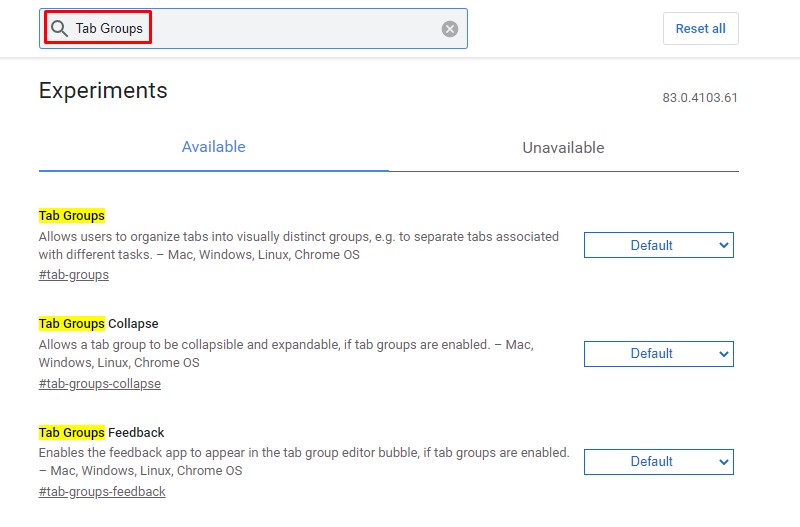
Step 5. From the list of options, you need to look for the ‘Tab Groups’ option.
Step 6. Select ‘Enabled’ from the dropdown menu next to the flag.
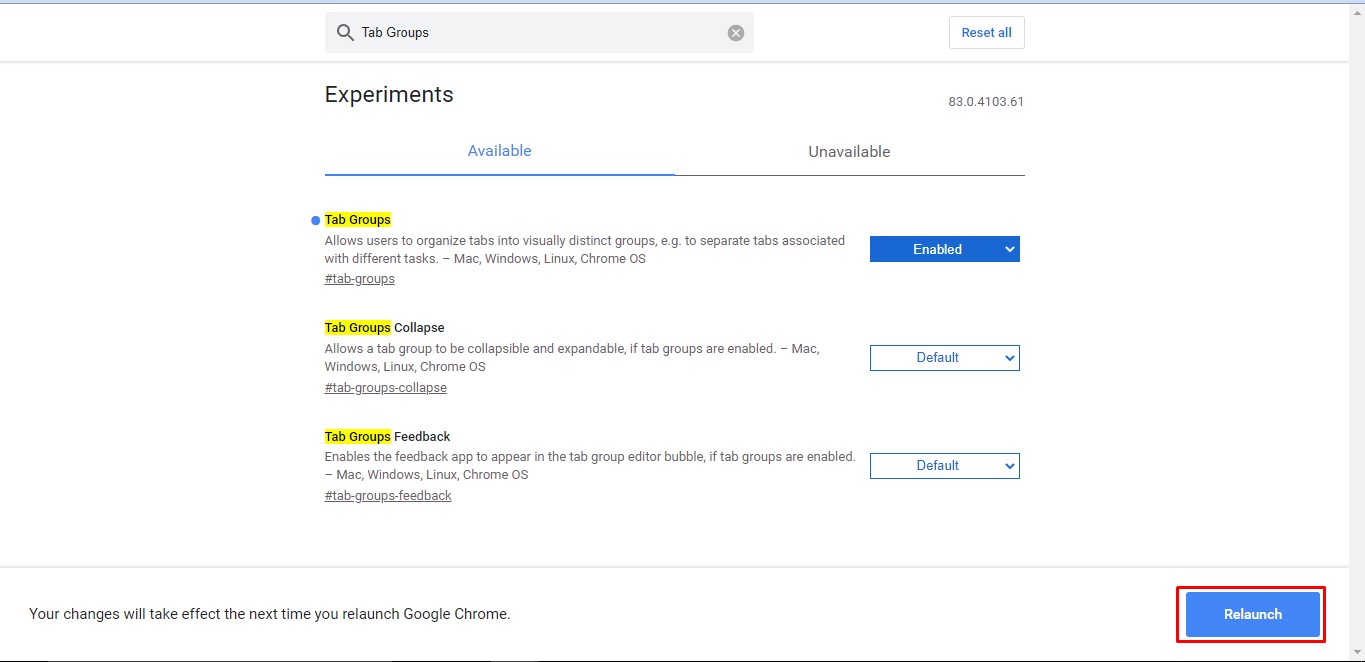
Step 7. Finally, click on the ‘Relaunch’ button.
Step 8. Once done, visit your favorite website to start grouping your tabs.

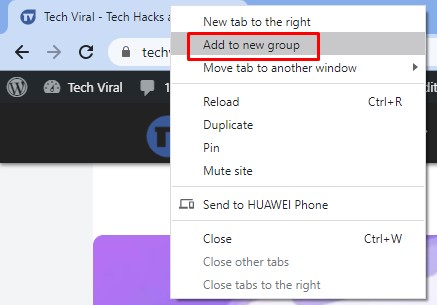
Step 9. Right-click on the tab and select ‘Add to New Group’ to create a new group.
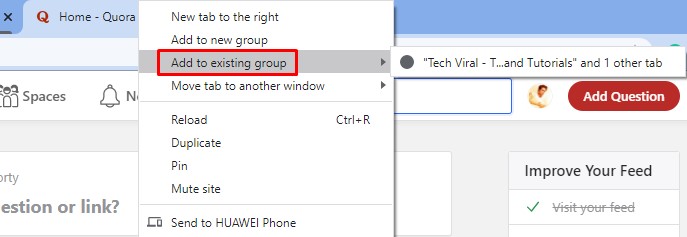
Step 10. If you want to assign another tab to the group, right-click on the tab and select ‘Add to existing group’
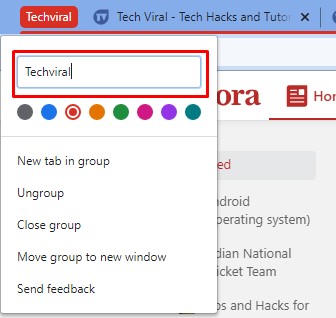
Step 11. You can also customize the color of the new group. For that, click on the colored circle appearing next to the tab and select the color.
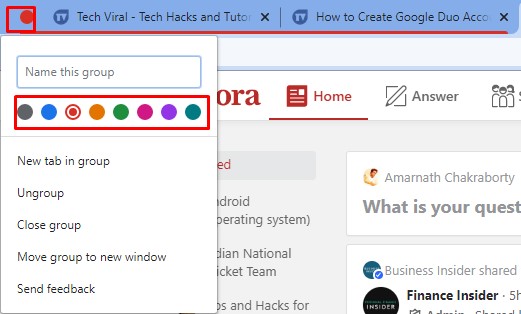
Step 12. You can even give the group a name.
That’s it! You are done. This is how you can enable Tab groups feature on the Chrome browser.
So, this article is all about how to enable tab group feature on Google Chrome browser. I hope this article helped you! Share it with your friends also.

")
