Although Windows 10 is now powering majority of the computer nowadays, it’s not without its downsides. Most often or not, users face errors like Windows file corrupted, BSOD errors, Hard disk errors, etc. Out of all these, hard disk errors are the most prominent ones, and it can ruin up your Windows experience for sure.
Hard disk errors like slow windows startup, mouse lagging, glitches while moving data are often caused due to hard disk problems. So, in this article, we are going to share a few methods which could help you to deal with different types of hard disk problems.
To fix hard disk errors, Microsoft provides users with check disk utility. Check disk utility which is also known as chkdsk scans through the hard drive to find and fix errors. The chkdsk command also finds and fix damaged or malfunctioned sectors on the hard drive. So, in this article, we are going to share the two best methods to use chkdsk commands.
Scan & Fix Hard Drive Errors With CHKDSK In Windows 10
So, here we will be discussing how to scan & fix hard drives with Chkdsk in Windows. So, let’s explore the two best methods to use the check disk utility on Windows 10 computer
1. Check Disk Utility – Without CMD
The disk error checking utility is also known as Check Disk Utility. In this method, you don’t need to use Command Prompt to run the Check disk utility. So, let’s know how to use Check disk utility without Command Prompt.
Step 1. First of all, double click on ‘My Computer’, or ‘My PC’. It will open up the File Explorer.
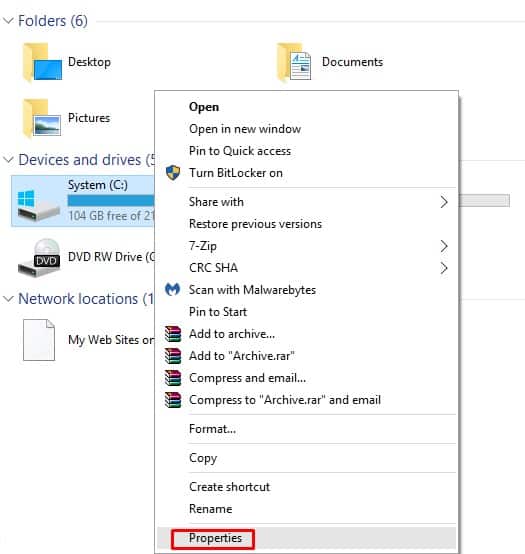
Step 2. In the next step, right-click on the drive where you have installed the Windows and select ‘Properties’
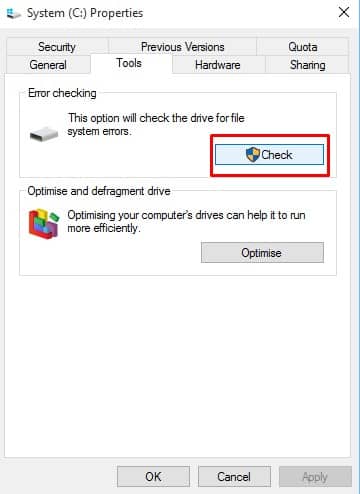
Step 3. Now under the Properties’ Menu, select the ‘Tools’ tab and then click on ‘Check’ under the Error-checking.
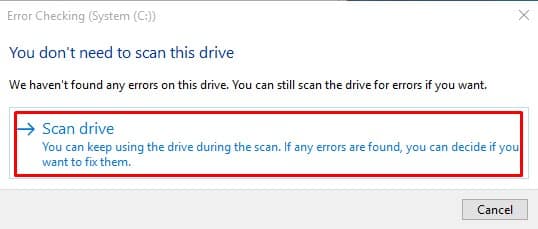
Step 4. In the next step, select ‘Scan Drive’
That’s it, you are done! This is how you can use Check Disk Utility without CMD to scan and fix Hard disk errors on Windows 10.
2. Using CHKDSK command
Well, in this method, you need to rely upon the Command Prompt to utilize the Check disk utility. So, follow some of the simple steps listed below to run Chkdsk from Command Prompt on Windows 10.
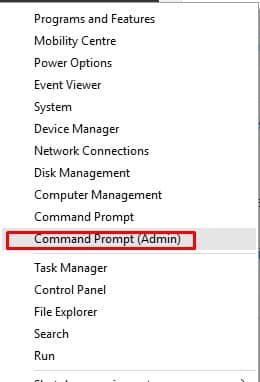
Step 1. In the first step, right-click on the Windows icon and then select ‘Command Prompt (Admin)’
Step 2. In the next step, enter the command chkdsk /x: and press enter. Make sure to replace the X with the drive letter.
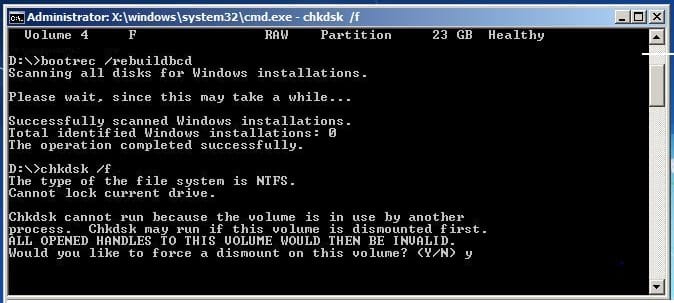
Step 3. In the next step, you will be asked to confirm the changes. So, enter ‘Y’ on the Command Prompt and press Enter.
That’s it, you are done! Now the check disk utility will scan and fix possible hard disk drive errors. Once done, restart your computer.
So, these are two best methods to scan & fix hard disk drive problems with Chkdsk command in Windows 10. If you have any other doubts, discuss it with us in the comment box below. I hope this article helped you! Share it with your friends also.


