While attempting to reset Windows, users may encounter errors like ‘There was a problem resetting your PC.’ If you also get the same error message, resetting requires these troubleshooting steps.
1. Startup Repair
If you encounter an error message or are stuck in the reboot loop, we recommend trying the Windows Startup Repair tool.
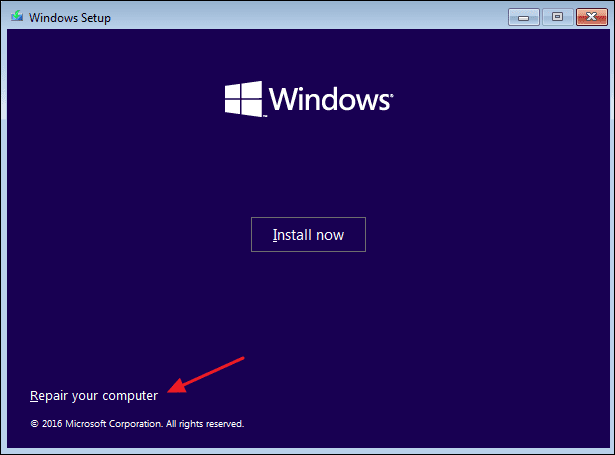
1. Insert the Windows installation disc or bootable USB into your PC. Now restart the PC and press the F8 button during boot.
2. On the Windows Setup screen, click Repair your computer.
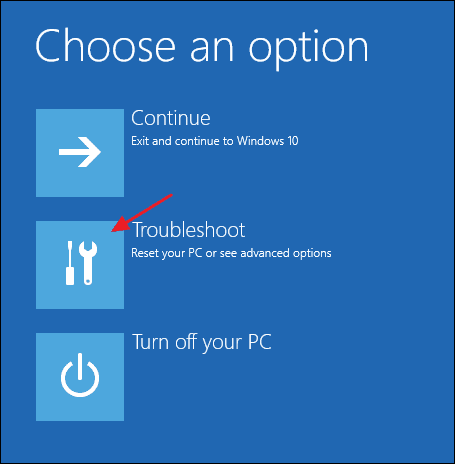
3. Click on the Troubleshoot.
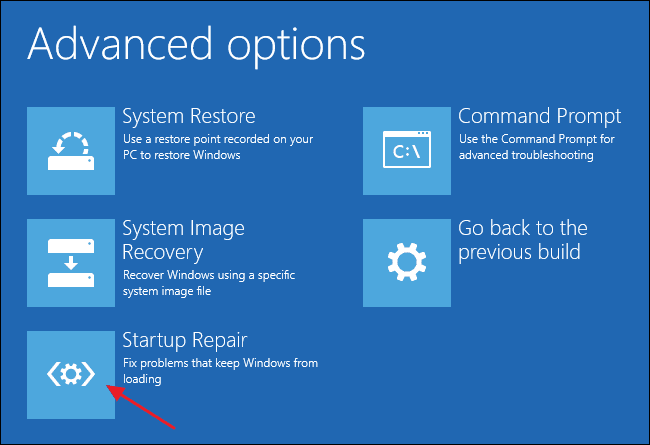
4. Click Startup Repair.
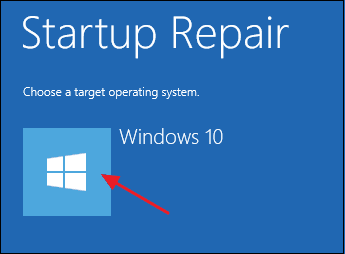
5. Select the target operating system.
2. Run SFC Command
Users get the ‘There was a problem resetting your PC’ error message due to corrupted system files. You can quickly fix corrupted system files by running the SFC command.
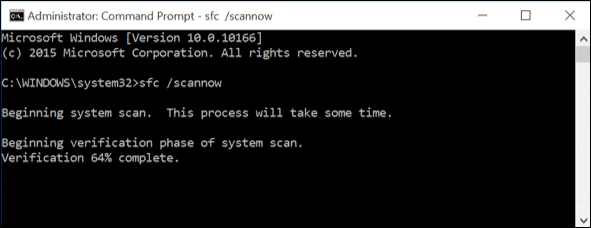
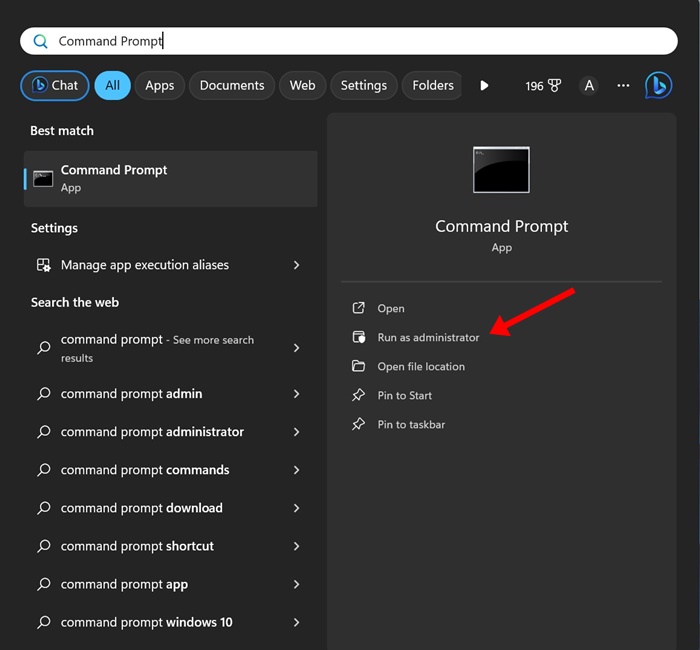
- Right-click on the Windows icon and select the option Command Prompt (Admin).
- On the Command Prompt Window, type sfc /scannow and hit Enter.
- Wait until the scan completes.
If the System File Checker utility finds any problem, it will fix it on its own. Once the scan is completed, restart your system to fix the ‘There was a problem resetting your PC’ error message.
3. Fix Windows Image with DISM Command
The DISM Command file checker utility returns an error; you need to fix the Windows Image by running the DISM command.
1. Open Command Prompt with admin rights.
2. Execute this command:
dism /online /cleanup-image /restorehealth
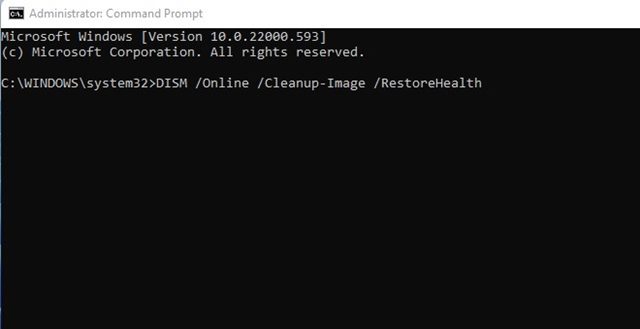
3. Wait a few seconds for the scan to complete.
Restart your PC and check whether you can reset your PC now.
4. Perform a System Restore
If both solutions fail, you might want to perform a system restore. System restore is another built-in tool for repairing damaged Windows software and files. The feature restores your Windows settings to a previous point where everything is working fine.
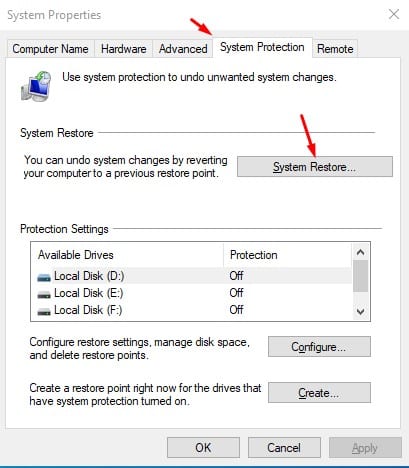
- Open Windows Search and type in System Restore.
- Click on the Create a Restore Point option.
- On the System Properties, click on the System Protection tab.
- Click the System Restore option; in the next dialog box, click Next.
- Select the desired restore point and click Next.
Once done with the restore, restart your system. After the restart, you will be able to boot into your PC.
5. Restart the REAgentC.exe
REAgentC.exe is an executable file that configures the Windows Recovery Environment. If you encounter an error message while resetting your PC, restarting the Windows Recovery Environment might help.
To do so, right-click the Start button and select Command Prompt (Admin). On the command prompt window, enter the commands –
- reagentc /disable
- reagentc /enable
After executing the above two commands, exit the CMD and restart your system. After the restart, try to reset your system again.
6. Rename the System and Software Registry
Sometimes, the system and software registry prevent Windows from resetting your PC. The best way to eliminate this issue is by renaming the System and Software Registry Hive.
Click on Windows Search and type Command Prompt. Right-click on the Command Prompt and select Run as administrator.
- Type the given command and press Enter.
cd %windir%\system32\config
- Type ren system system.001 and press Enter.
- Type ren software software.001 and press Enter.
- To close the Command Prompt, type exit and press Enter.
7. Perform a clean installation
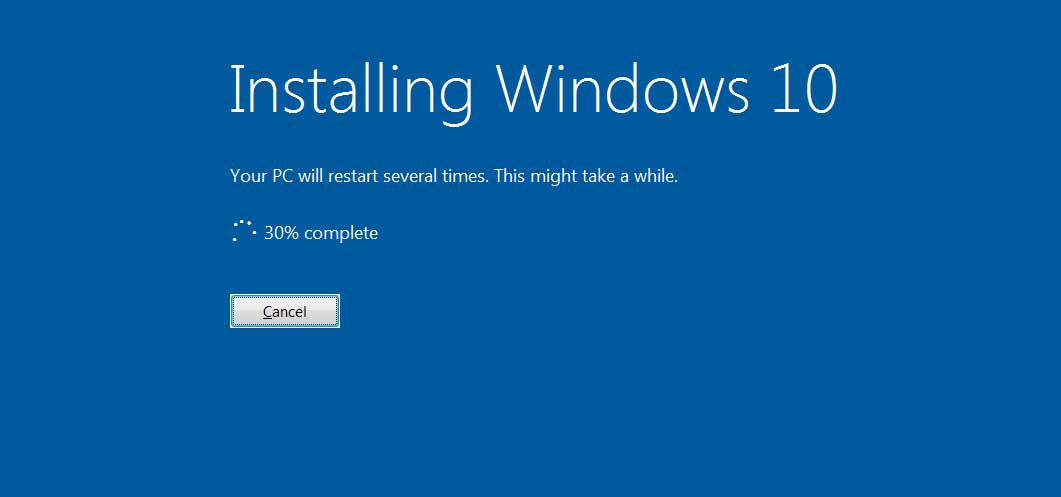
If you cannot reset your PC after following the above methods, you may want to perform a clean installation.
However, if you can access your computer, back up your essential files. To install Windows 10 from a Pendrive or USB drive, follow our guide – How to Install Windows 10 From Pendrive/USB. The method shared in that guide will help you download & install the latest version of Windows on your system.
This article is about fixing the ‘There was a problem resetting your PC’ error message. If you have any doubts, let us know in the comment box below.


