After installing all pending Windows 10 updates, we usually face a few problems. Of course, problems like high RAM usage are nothing new for a Windows user. However, have you ever wondered what causes the 80% or 100% RAM usage?
Few programs demand and require more RAM usage to run correctly, like Adobe Photoshop or Google Chrome. However, after using the extra RAM segment, the program fails to inform the Windows RAM manager and continues to mark that additional RAM as ‘in use.’
So, the unreleased RAM is what we call ‘Memory Leak.’ Memory Leak leads to higher RAM usage, even though no programs are using the RAM. Memory Leak problems mostly appear after installing Windows 10 updates.
7 Best Methods to Fix Windows 10 Memory Leak Problem
So, if you feel that your computer is using too much RAM, even though you are not running any RAM demanding application, you need to check for the memory leak problems. So, let’s check out how to fix the Windows 10 Memory Leak Problem.
1. Checking Task Manager
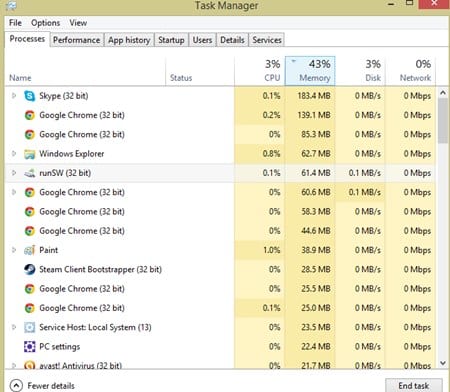
First of all, you need to check the task manager. On the task manager, you need to check the apps consuming RAM. If you find any RAM demanding application, you need to close the application. To close any application from the Task Manager, right-click on the Program and select ‘End Task.’ This would force stop the app and would fix the memory leak problems.
2. Startup Programs
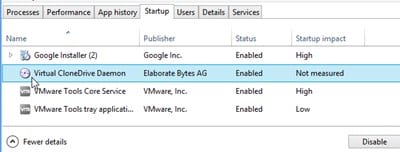
If you feel that your PC is taking too much time to start up, you need to check the startup programs. Startup programs and services can also cause memory leak problems. So, open the Task Manager and select the ‘Startup’ tab. Under the Startup, disable the unnecessary apps/services.
3. Removing Malware
Several times, malware plays with Windows components which constantly sends system interrupts messages to the CPU, which in turn causes 100% CPU & RAM usage in windows 10. So, the best thing here is to use a proper and reliable anti-malware tool.
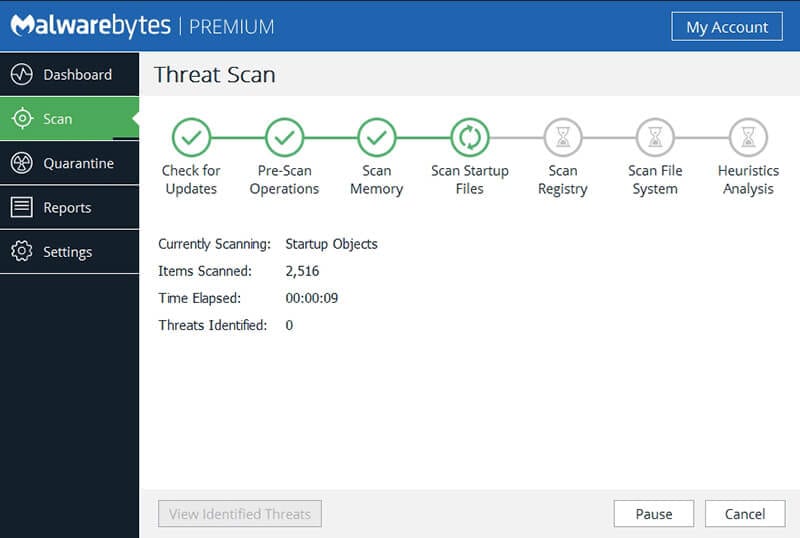
You can use the accessible version of the Malwarebytes Anti-Malware tool or rely upon the native Windows Defender to find and remove the malware. If you are using some premium security solution like Kaspersky, Norton, etc., you need to perform a deep system scan to remove any malware infection.
4. Updating Drivers In Windows

Well, drivers are also software that enables hardware devices to communicate with the operating system. Without drivers, the operating system can’t send and receive data to hardware devices. Outdated drivers often lead to memory leak problems. So, it is better to update all systems and hardware drivers on Windows 10.
5. Defragment Your Hard Drive
Well, over time, our hard drive gets fragmented. Due to this, we often face problems regarding high CPU and storage usage. Not only that, but our computer also slows down to an extreme level, and you could face problems like windows ten high CPU usage when idle. So, to have your computer run more efficiently, we need to defrag our hard drive timely.
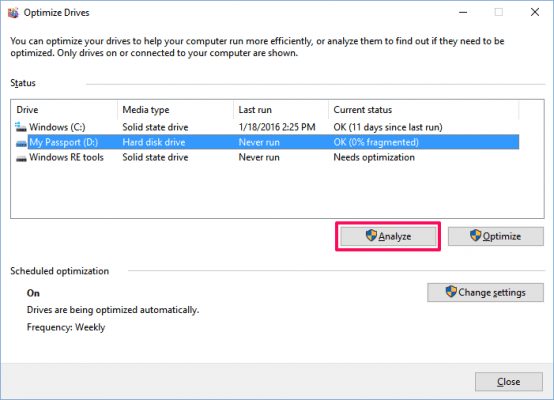
Step 1. First of all, open your start menu, search ‘defrag.’
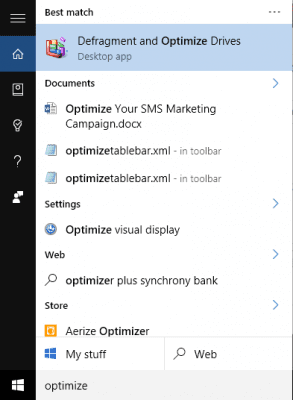
Step 2. Now you will see a screen like below. Here you need to select the hard drive.y, select the hard drive and click on ‘Analyze.’
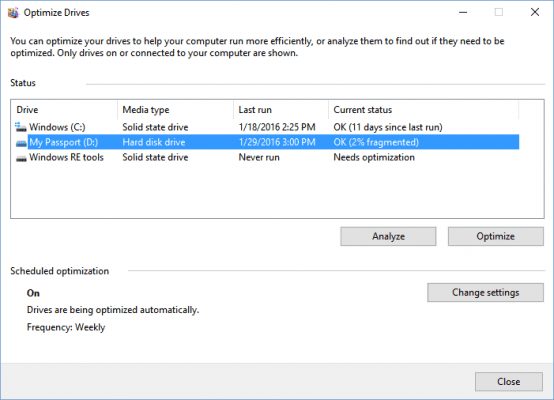
Step 3. After the analyzing process, you will see the percentage of fragmented files.
Step 4. Now, if you wish to defragment your drive, click on ‘Optimize.’
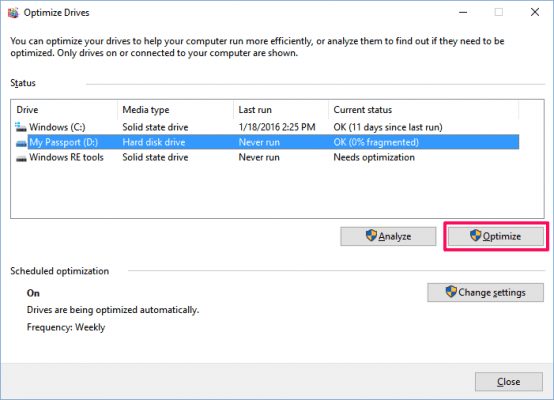
Don’t use the computer while and let Windows defragment the drive efficiently. Once done, restart your computer, and you will not face the High CPU usage on Windows 10 error anymore.
6. Use Windows Memory Diagnostic Tool
Windows Memory Diagnostic is a built-in tool on Windows 10 operating system for those who don’t know. The utility checks and fixes memory problems that cause your computer to lose information or stop working. Here’s how you can use the Windows Memory Diagnostic Tool to fix Windows 10 Memory leaks.
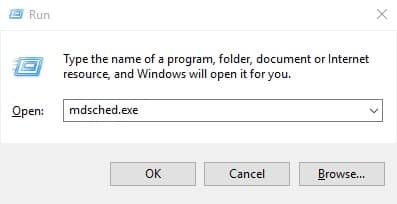
Step 1. First of all, save all your important work on your Windows computer and then press Windows key + R. It will open up the RUN Dialog Box.
Step 2. On the RUN dialog box, you need to type in mdsched.exe and then press Enter.
Step 3. Now you will see the Windows Memory Diagnostic Utility. There you need to select the option ‘Restart Now and check for problems’

That’s it; you are done! Now your Windows 10 computer will automatically restart and will check for the memory problem. The great thing is that it will automatically fix the Windows 10 memory leak problem.
7. Adjust Windows 10 for Best Performance
Many Windows 10 users have reported that they have fixed the memory leak problem after Adjusting the PC for Best performance. Users need to make changes to the Performance option to fix the Windows 10 memory leak problem. Below, we have shared a step-by-step tutorial on how to adjust for best performance.
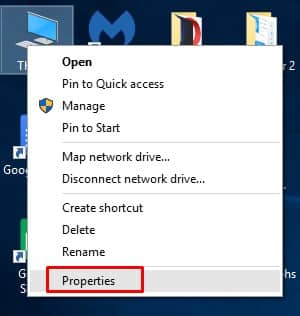
Step 1. First of all, right-click on ‘This PC’ and select ‘Properties.’
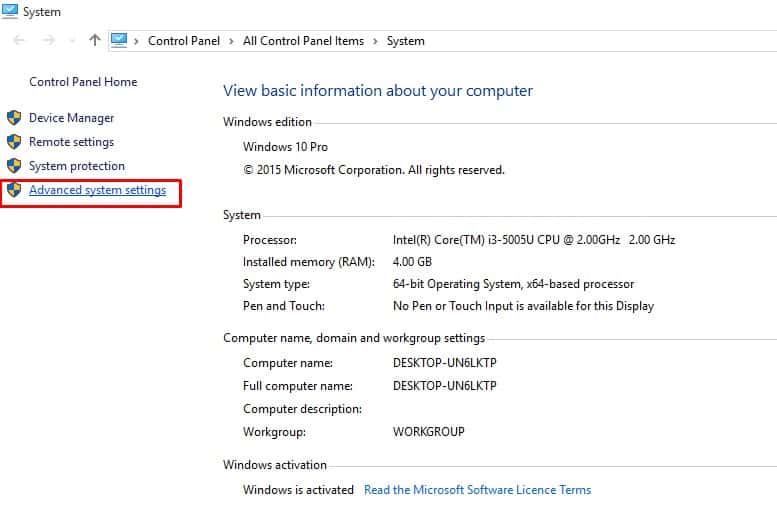
Step 2. Now on the System page, you need to click on ‘Advanced System Settings
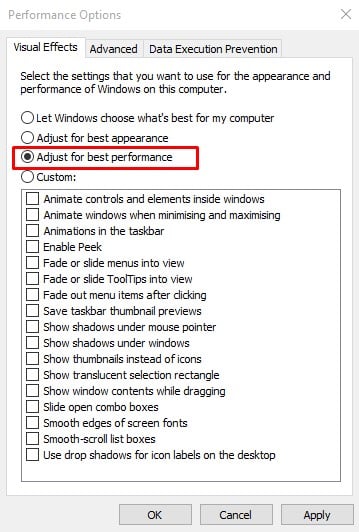
Step 3. In the next step, select the ‘Advanced’ tab and click on ‘Settings.’

Step 4. Now under the Settings, select ‘Performance’ and then enable ‘Adjust for best performance.’
That’s it; you are done! Now restart your computer, and the memory leak problem will be fixed.
So, this article is all about how to fix Windows 10 Memory Leak Problems. If you have any doubts related to this, let us know in the comment box below. I hope this article helped you! Please share it with your friends also.


