Back in 2016, Apple introduced its Touch-Bar integrated MacBook Pro. For those who don’t know, TouchBar is a MacBook exclusive feature that provides users access to quick toggles for controlling various system settings. At the initial stage, the feature was heavily praised by the users.
Inspired by the MacBook’s Touch Bar, a senior XDA developer who goes by the name alecot18 has developed an app known as ‘TouchBar’. Basically, the TouchBar Android app mimics the Touch Bar’s control stop on Android smartphones.
So, in this article, we are going to share some of the best methods that would help you to get a MacBook-like Touch Bar on any Android device. The good thing is that the TouchBar app is completely free to download and it works on both rooted and non-rooted devices. So, let’s check out how to use the TouchBar app to get a Mac-like Touch Bar on Android.
Also Read: How To Get Facebook Messenger Type Chat heads On Any Android App
Get MacBook Like Touch Bar on Android
The method is quite simple and easy and you just need to follow some of the simple steps given below. So let’s check out.
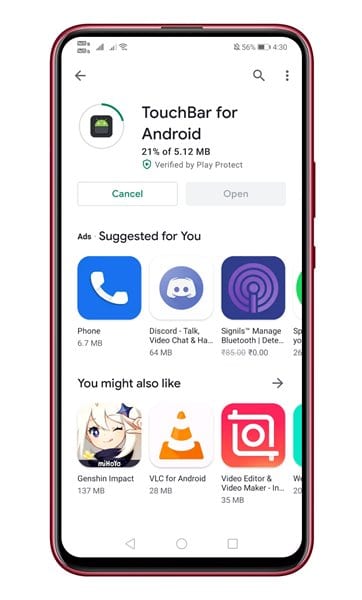
Step 1. First of all, download & install Touchbar for Android on your device from the Google Play Store.
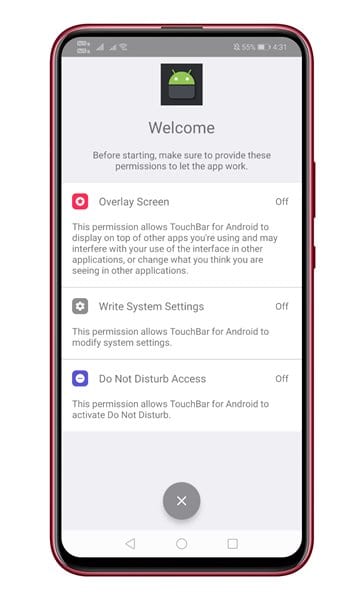
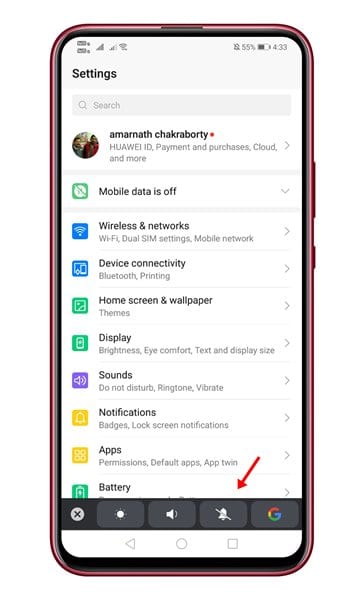
Step 2. Now open the app and you need to grant the three permission – Overlay, Write System Settings, Do Not Disturb Access.
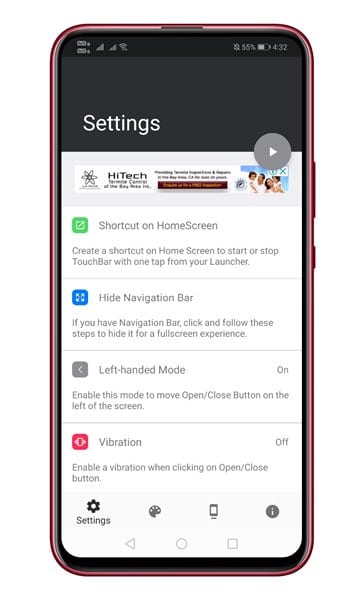
Step 4. Now you will see the main interface of the app.
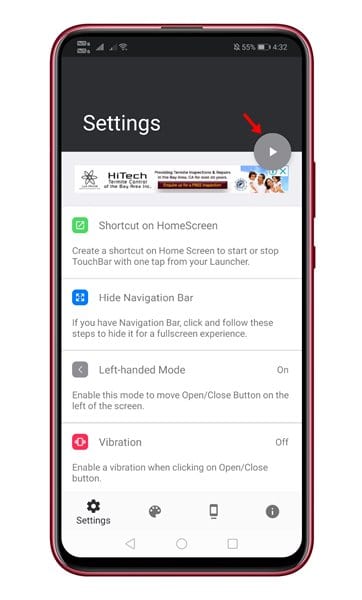
Step 3. Now you need to tap the play button to activate the touch bar. This will activate the Touchbar on Android.
Step 4. Once done, you will see the touch bar on every screen.
That’s it, you are done! You can further customize the touch bar on your Android as per your wish. You can adjust the length, height, add custom shortcuts to the touch bar.
So, this is how you can get a MacBook Pro type Touch Bar on any Android device. The method shared above works on both rooted and non-rooted Android devices. If you have any other doubts related to this, let us know in the comment box below. I hope this article helped you, please share it with your friends also.


