If you have been using Windows 11 for a while, you might have noticed that the operating system sends you notifications to remind you that an update is ready to be installed. It also sends you a message asking you to restart your computer to complete the installation.
Although Windows 11 sends the notifications for good, many users find those notifications irritating. Suppose you don’t care about the Windows 11 update, nor do you want the operating system to annoy you by sending update notifications. In that case, it’s best to hide the display options for update notifications.
On Windows 11. it would help if you made some changes to the Group Policy Editor or Registry Editor to hide those annoying update notifications. Hence, you have landed on the right page if you are looking for ways to show or hide the update notifications.
2 Ways to Hide Display Options for Update Notifications in Windows 11
This article will share the two best methods to show or hide Display Updates for Update Notifications on Windows 11. Let’s get started.
1) Turn off Update Notifications via Registry Editor
In this method, we will use the Windows 11 Registry editor to show or hide the Display options for update notifications. Here are some of the simple steps you need to follow.
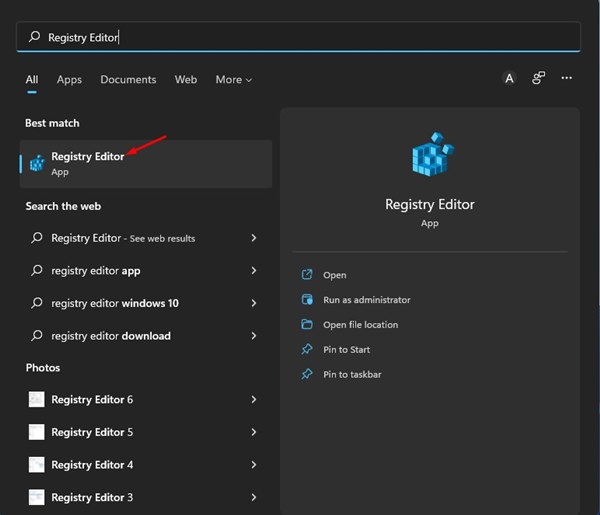
1. First, click on the Windows 11 Search and type in Registry Editor. Next, open the Registry Editor app from the list.
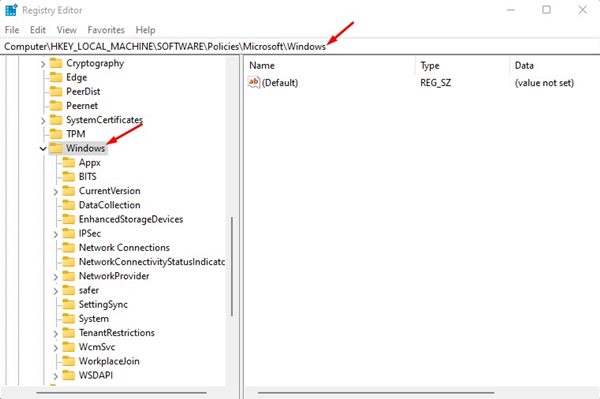
2. On the Registry Editor, navigate to the following path:
HKEY_LOCAL_MACHINE\SOFTWARE\Policies\Microsoft\Windows
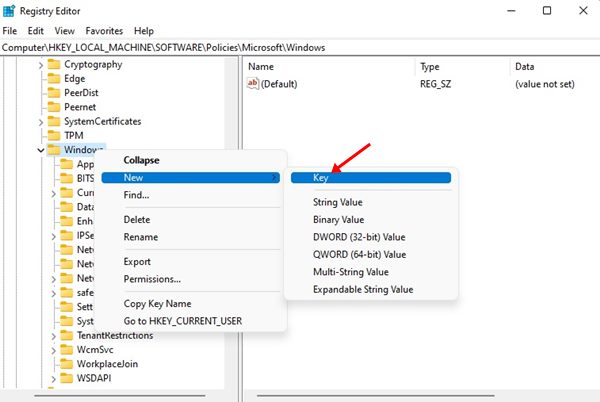
3. Now, right-click on the Windows Folder and select New > Key.
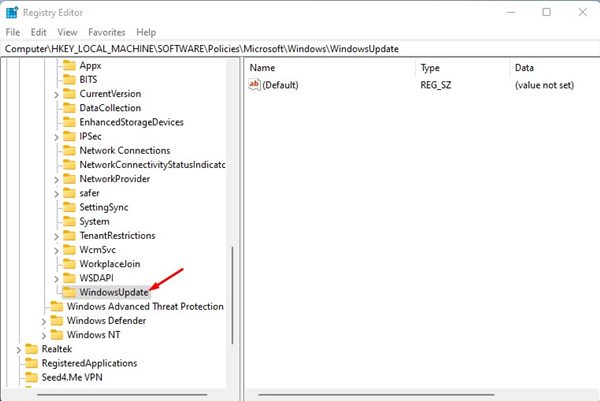
4. Name the new key WindowsUpdate
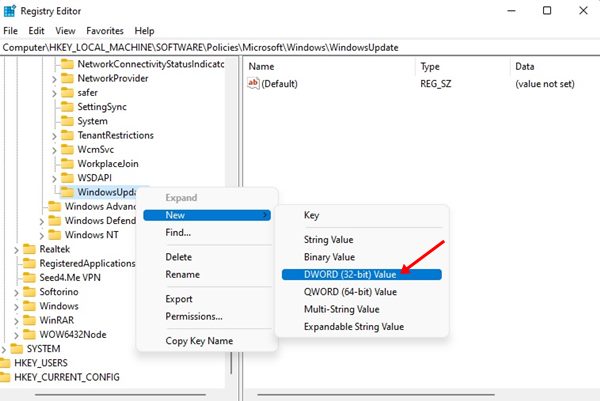
5. Now, right-click on the WindowsUpdate folder and select New > DWORD (32-bit) Value.
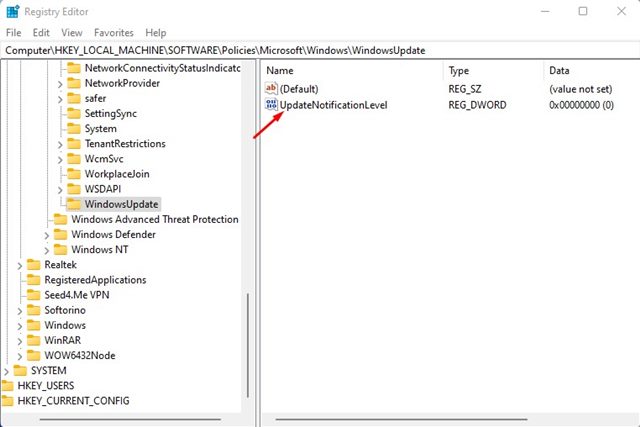
6. Next, name the newly created key as UpdateNotificationLevel.
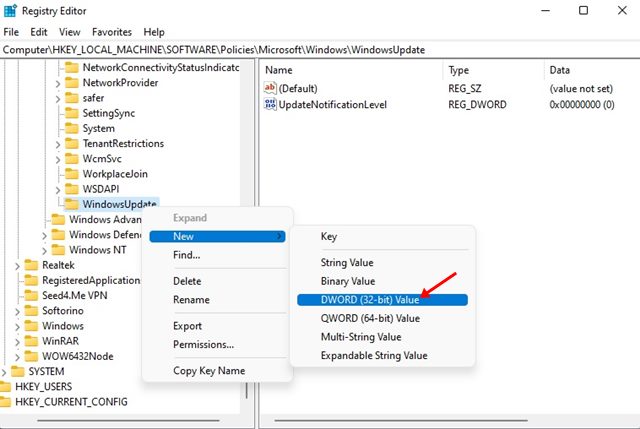
7. Right-click on the WindowsUpdate folder on the left pane and select New > DWORD (32-bit) Value.
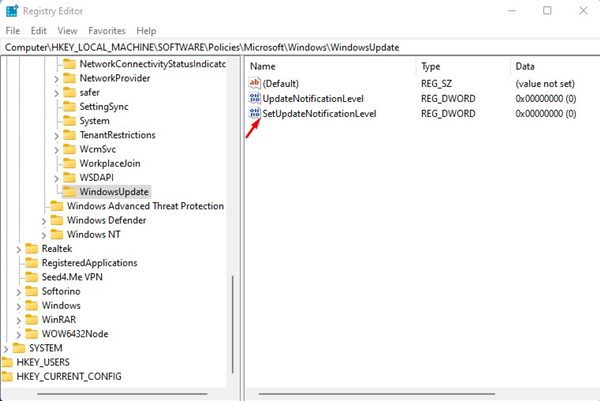
8. Name the newly created key as SetUpdateNotificationLevel.
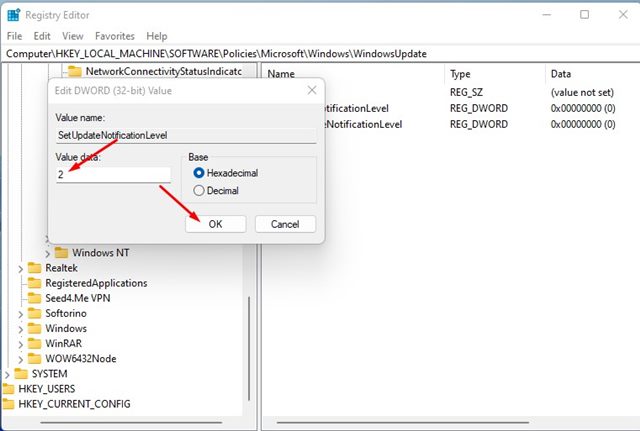
9. Now double click on the SetUpdateNotificationLevel key and enter 2 on the Value Data field. Once done, click on the Ok button.
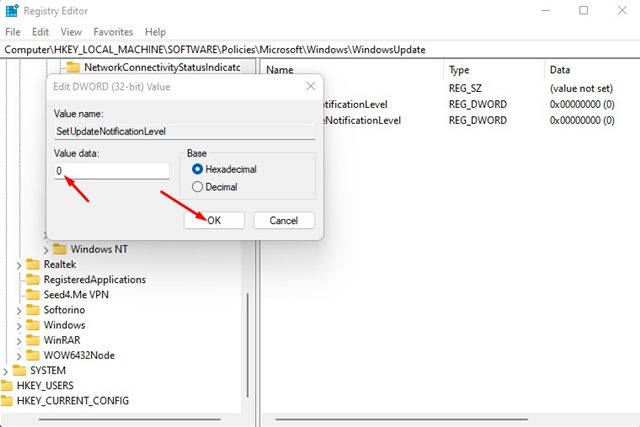
10. If you want to enable the notifications again, double-click on the UpdateNotificationLevel and enter 0 on the Value data field.
That’s it! You are done. This is how you can enable or disable Update notifications in Windows 11.
2) Show or Hide Update Notifications via Local Group Policy Editor
In this method, we will use the Local Group Policy editor to show or hide the Update Notifications in Windows 11. Here are some of the simple steps you need to follow.
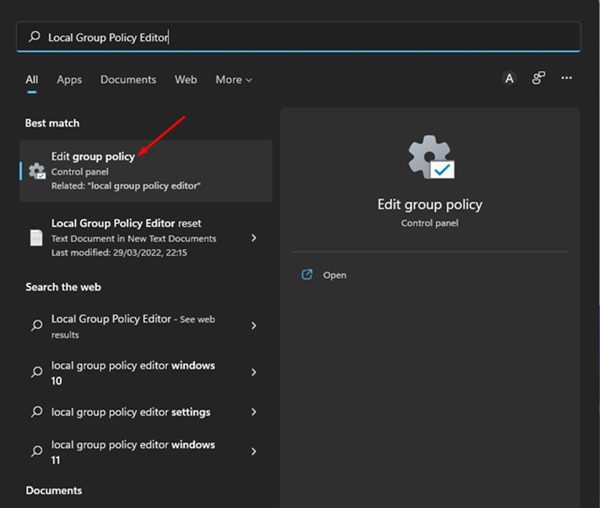
1. First, click on the Windows 11 search and type in Local Group Policy. Next, open the Local Group Policy Editor from the list.
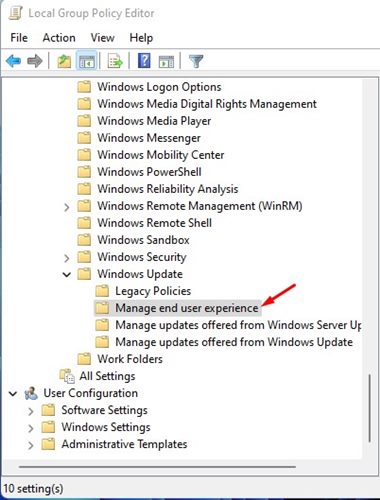
2. On the Local Group Policy Editor, navigate to the following path:
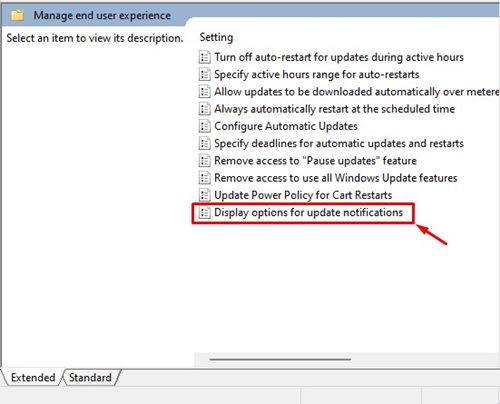
Computer Configuration > Administrative Templates > Windows Components > Windows Update > Manage end-user experience
3. Double click on the Display Options for the update notifications policy on the left pane.
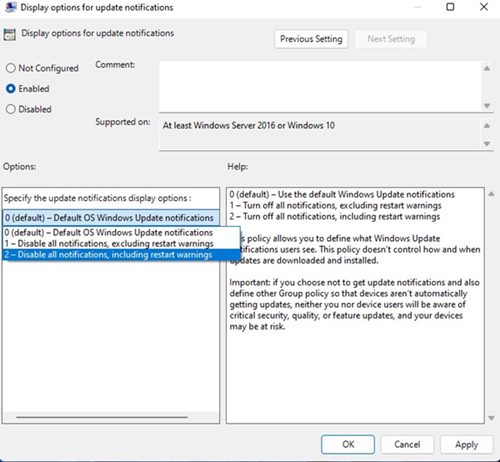
4. On the Window that opens, click on the drop-down menu for ‘Specify the update notifications display options’ and select the third option – Disable all notifications, including restart warnings.
5. Once done, select Enabled and click on the Apply button.
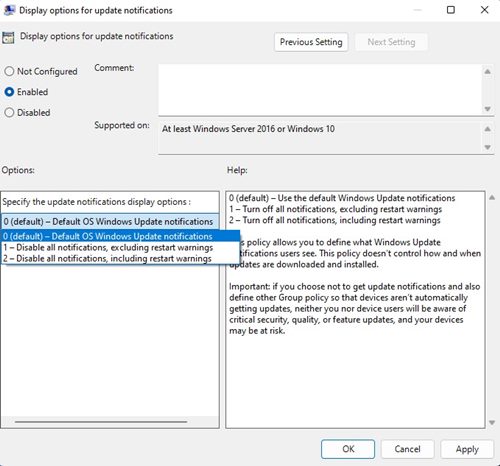
6. If you wish to enable the notifications, you need to select the first option (Default) in the drop-down menu for Specify the update notifications display options on Step 4.
That’s it! This will disable all update notifications on your Windows 11 operating system. You are done.
So, that’s all about how to show or hide display options for update notifications on Windows 11. If you don’t want Windows 11 to send you update notifications now and then, you can follow these two methods to get rid of them completely.
