When you link your Microsoft Account to a Windows 11 device, the device will automatically set your account name as ‘User Name’ and your organization name as ‘Org Name’. However, you can change this later if necessary. Changing the registered owner name in Windows 11 requires modifying the Registry file.
How to change the Registered owner name in Windows 11?
Before you modify the Registry file, it’s essential to back up the Registry Settings.
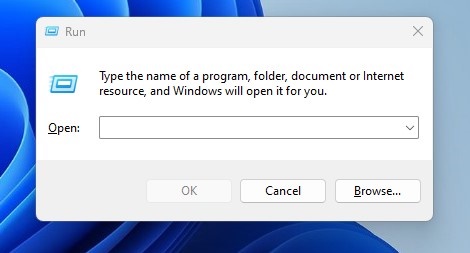
1. Press the Windows Key + R button on your keyboard. This will open the RUN dialog box.
2. Type Winver and press Enter.
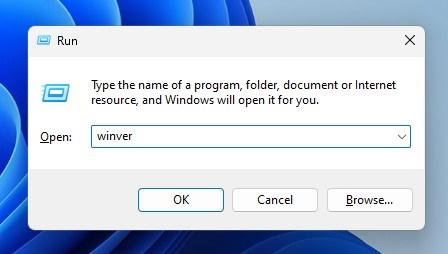
3. You will now see the About Windows prompt. Please check the text at the bottom.
Use PowerShell to Check the Registered Owner Name in Windows 11
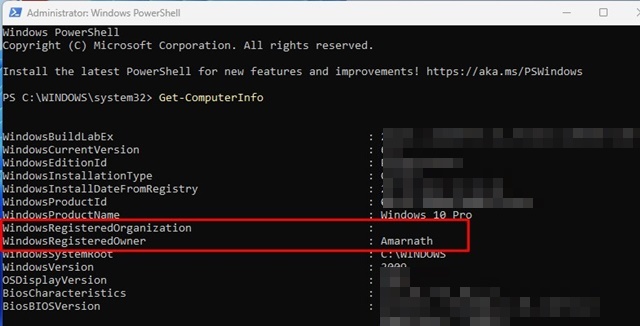
If the RUN command isn’t working, you can use the PowerShell utility to check the Registered owner name.
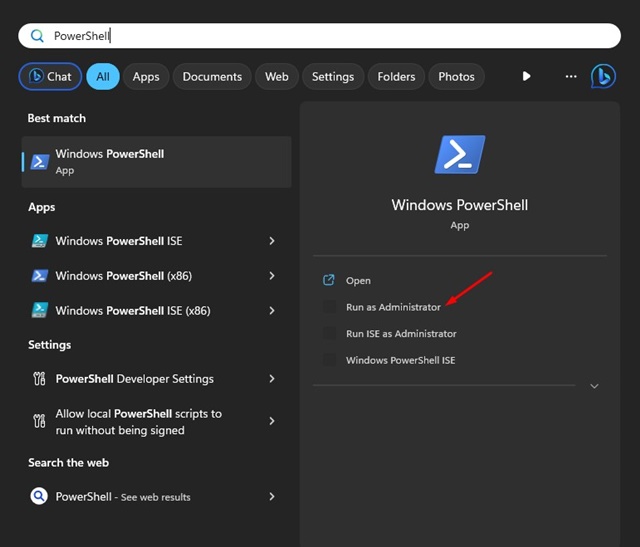
1. Type PowerShell in Windows Search. Right-click on it and select Run as administrator.
2. Type the command and press Enter:
Get-ComputerInfo
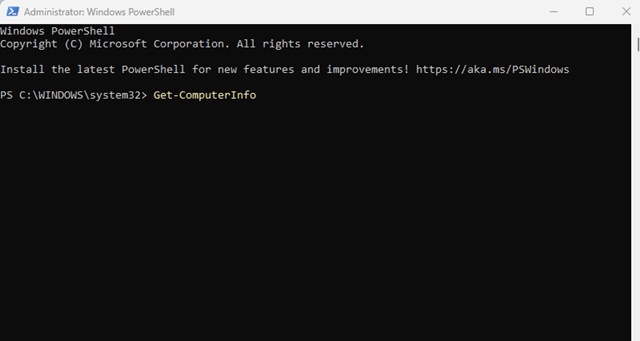
3. On the information that PowerShell fetches, look at the WindowsRegisteredOrganization and WindowsRegisteredOwner rows.
Change Registered Owner Name in Windows 11
After confirming the registered owner name in Windows 11, if you want to change it, follow these steps.
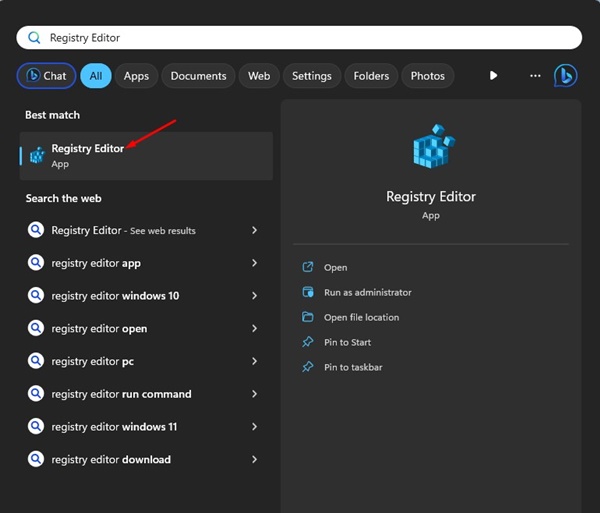
1. Open Windows search and type in Registry. Open the Registry Editor app from the list.
2. Navigate to this path:
HKEY_LOCAL_MACHINE\SOFTWARE\Microsoft\Windows NT\CurrentVersion
Note: You can also copy and paste the Path in the Address bar of Registry Editor.
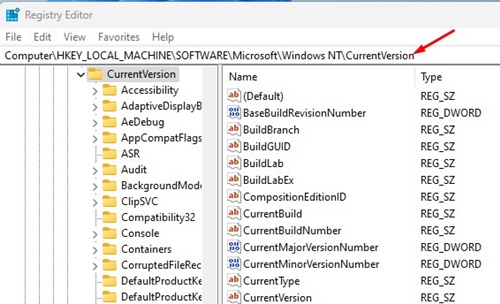
3. On the left, select the CurrentVersion folder. In the right pane, find the RegisteredOrganization and RegisteredOwner keys.
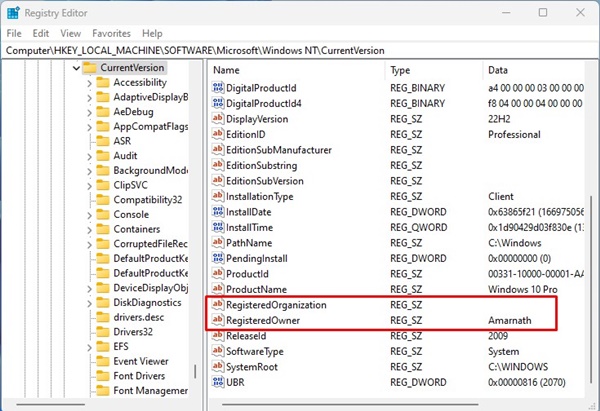
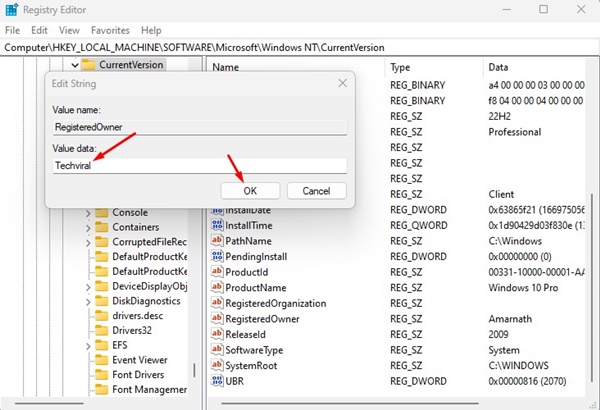
4. If you want to change the registered owner name of your computer, double-click on the RegisteredOwner key.
5. On the Value Data field, enter the name you want to set and click Ok.
6. To change the organization name, double-click on the Registered Organization and enter the new name in the Value data field.
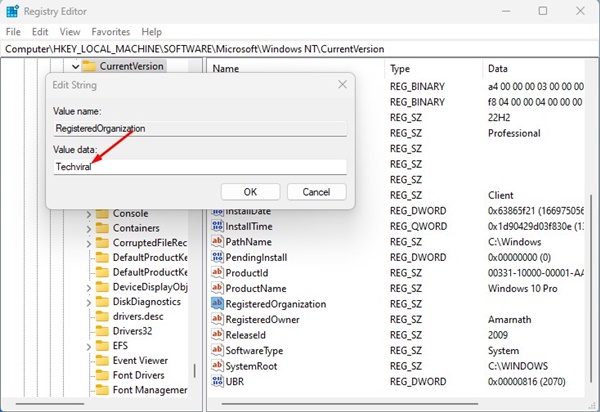
7. Click on Ok.
How to change your computer name in Windows 11?
Like the registered owner and organization name, you can also change the computer name in Windows 11. There are various ways to change the PC name on Windows 11; we have shared the easiest one.
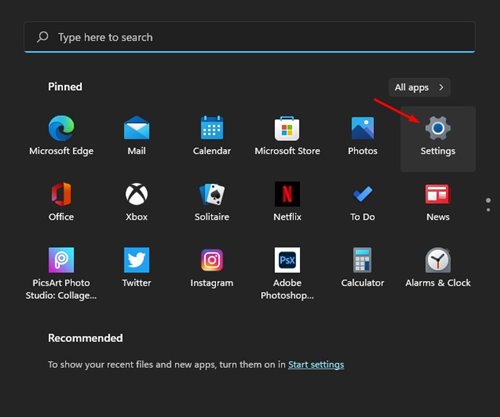
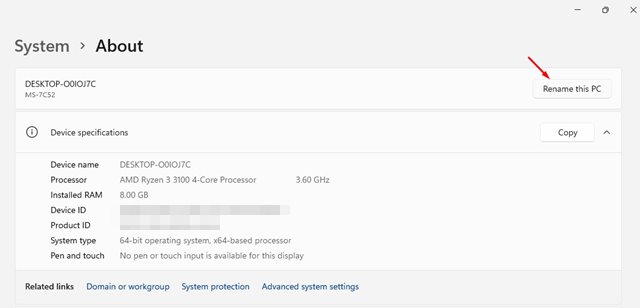
1. Click on the Windows Start button and select Settings.
2. Switch to System.

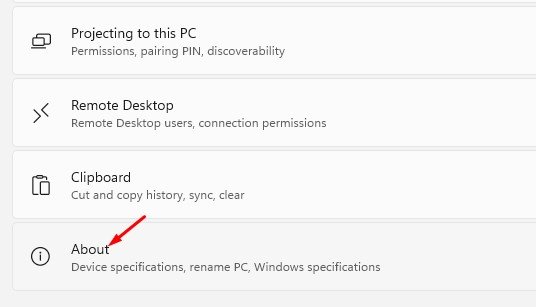
3. Click on the About section.
4. Click on Rename this PC.
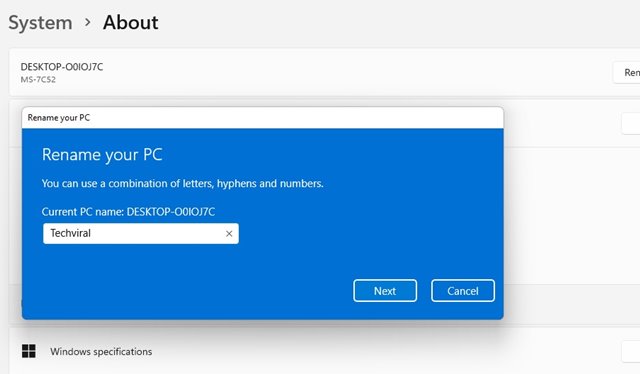
5. Enter the name you want to set and click Next.
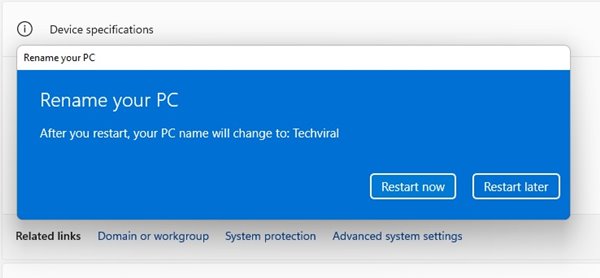
6. Click on the Restart Now button to restart your PC.
These are the methods to change the registered owner and organization name on your Windows 11 computer. We have also shared the steps for changing your PC name on Windows 11.


 in Windows 11")