The 0x80070103 Windows Update Error can appear due to various reasons. The full error message reads:
Windows Update: There were some problems installing updates, but we’ll try again later. If you keep seeing this and want to search the web or contact support for information, this may help – (0x80070103). Retry.
While the error itself doesn’t state anything about why it appeared, the potential culprits that led to update error 0x80070103 are:
- The driver is already in use during the installation/update process.
- Corrupted system files.
- Update Services are disabled.
- Corrupted Windows Update Files.
How to Fix Windows Install Error 0x80070103?
If you just got the error, here’s what you should do to resolve the problem.
1. Retry the Windows 11 Update

The error may have appeared due to a bug preventing the Windows Update components from functioning properly. So, before you try the next methods, retry the Windows Update.
Simply click the Retry button shown on the error pop-up. If it doesn’t help, you can pause and resume the Windows 11 update again.
2. Restart your Windows 11 PC

Restart will release the RAM and terminate all apps & processes that may be preventing the Windows Update Services from functioning properly.
Also, it’s a good practice to restart the system at regular intervals. Doing so gives the hardware component time to cool down and also eliminates bugs & glitches.
3. Run the Windows Update Troubleshooter
If both methods fail to fix the 0x80070103 Update error, the next best thing you can do is run the Windows Update Troubleshooter.
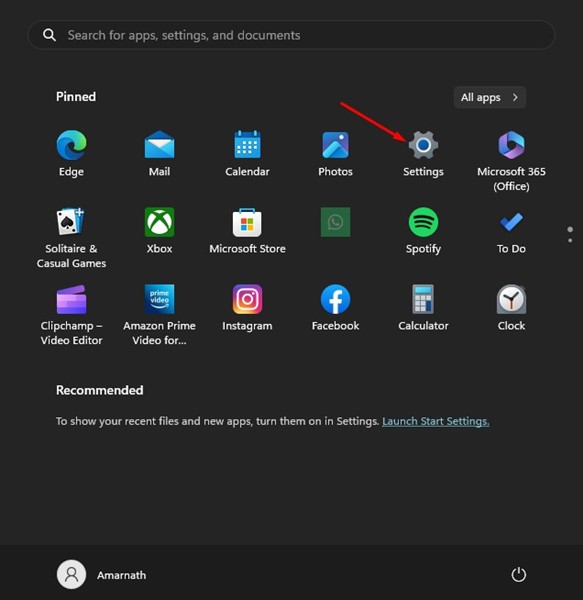
1. Click on the Windows 11 Start button & select Settings.
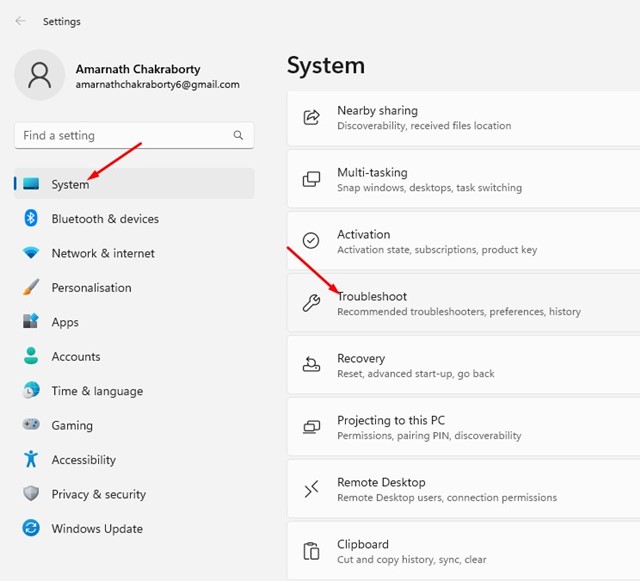
2. Switch to the System > Troubleshoot > Other Troubleshooter.
3. Click the Run button beside Windows Update.

4. The Windows Update troubleshooter will run. Just follow the on-screen instructions to complete the troubleshooting process.
Once the process is complete, check for Windows Updates again. This time, you won’t get a Windows 11 update error.
4. Clear the SoftwareDistribution Folder
If you don’t know, Windows stores its update files in the SoftwareDistribution folder. If files stored in this folder are corrupted, you will get the Windows Update 0x80070103 error. So, you can try flushing the SoftwareDistribution folder & redownload the files.
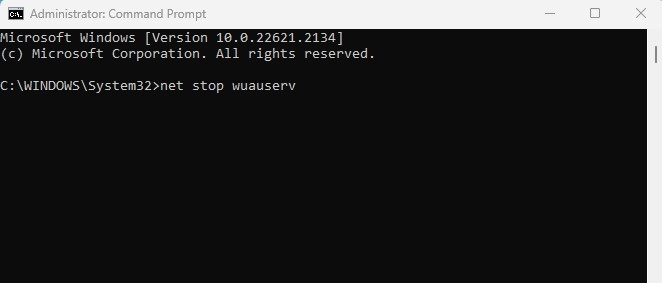
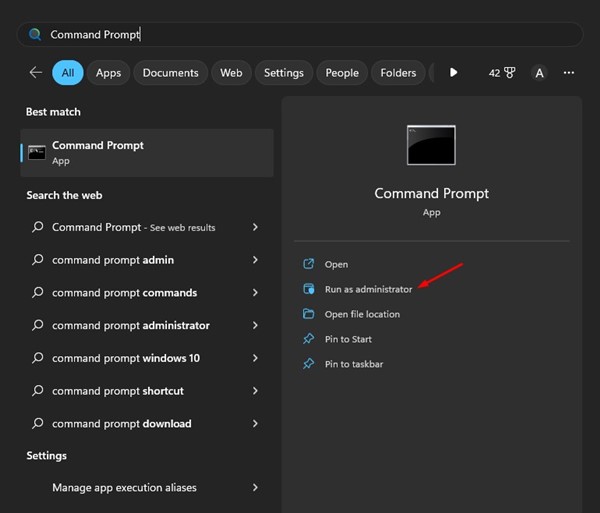
1. Type Command Prompt in Windows 11 Search. Next, right-click on the CMD and select Run as administrator.

2. Execute these two commands one by one.
net stop wuauserv
net stop bits
3. Minimize the CMD and navigate to this path on your File Explorer:
C:\Windows\SoftwareDistribution

4. Delete all files & folders available in the SoftwareDistribution folder.
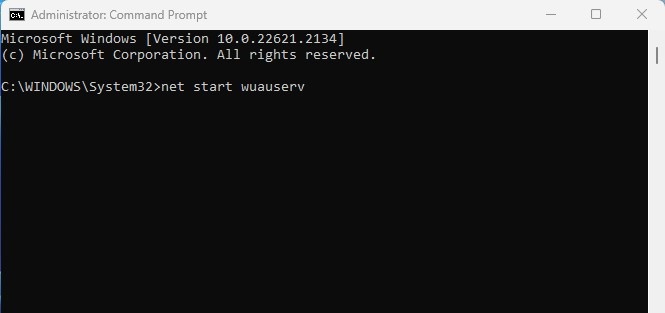
5. Switch to the command prompt and execute these two commands to start the Windows update services:
net start wuauserv
net start bits
Close the command prompt and launch the Windows Update again.
5. Restart the Windows Update Service
Windows update services run in the background and check for available updates. If this service is experiencing problems, the updates may fail to install. The best way to deal with such an issue is by restarting the Windows Update Service.
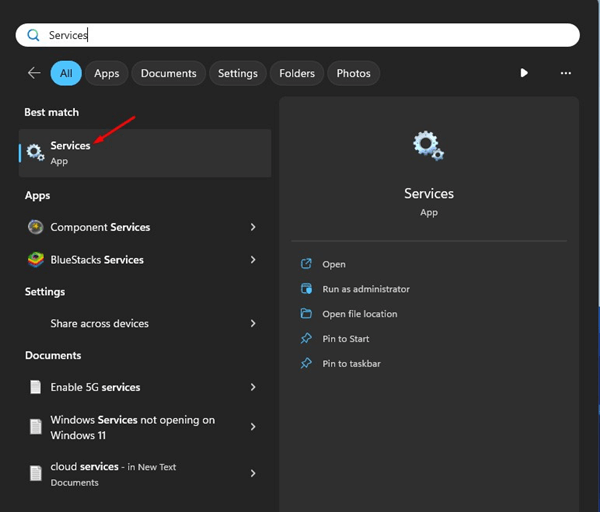
1. Open the Services app from the Windows Search.
2. Find the Windows Update service.
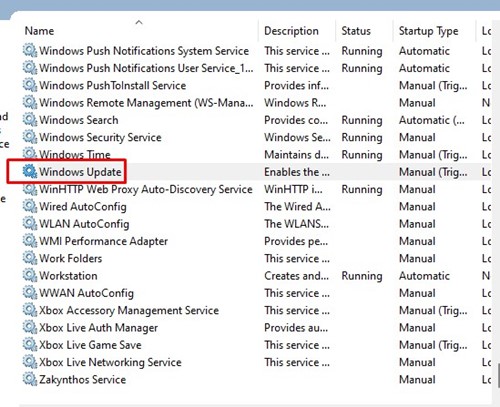
3. Right-click on the Windows Update service and select Restart.
After restarting the Windows Update service, head to Settings > Windows Update and install the pending updates.
6. Delete the Windows Temporary Files
Many Windows 11 users have claimed to fix the 0x80070103 Update Error by deleting the Windows Temp Files. You can also try deleting the Windows Temp files to resolve this problem.
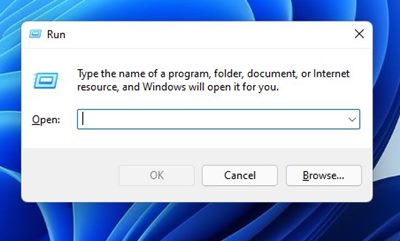
1. Press the Windows Key + R button on your keyboard. This will open the RUN dialog box.
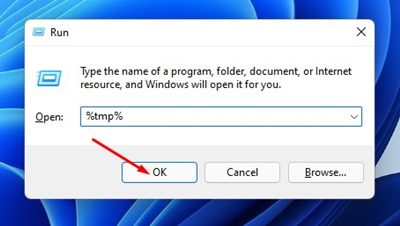
2. Type %temp% and press Enter.
3. This will open the Temp folder. Press CTRL + A to select all files. Right-click on any of the files and select Delete.
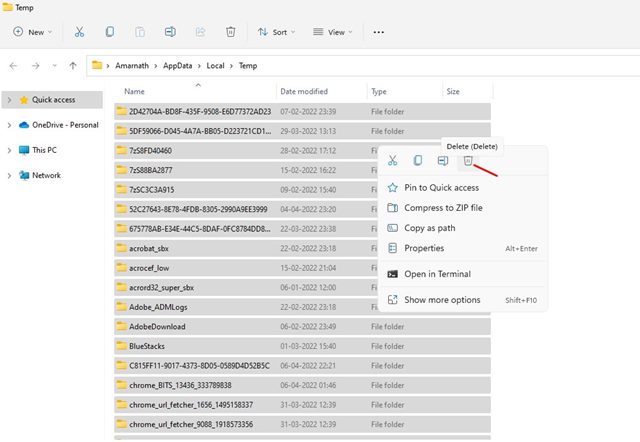
After deleting the Windows Temporary files, restart your Windows 11 computer. After the restart, check for Windows updates again.
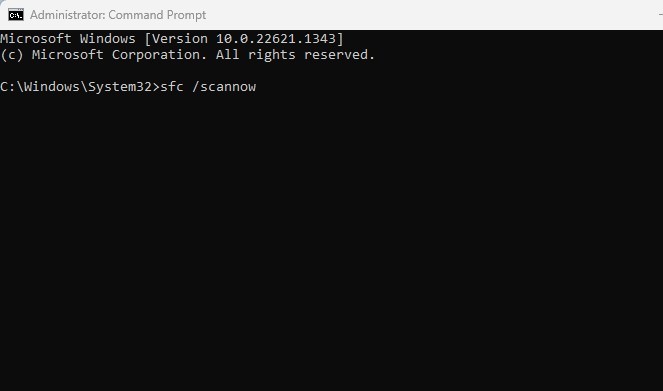
7. RUN the SFC/DISM Command
System file corruption is another prominent reason for Windows Install Error 0x80070103. If the system files are corrupted, you need to run the System File Checker utility to replace them with fresh ones.
1. Type in Command Prompt on Windows 11 Search. Right-click on the Command Prompt and select Run as administrator.
2. Type sfc /scannow and press Enter.
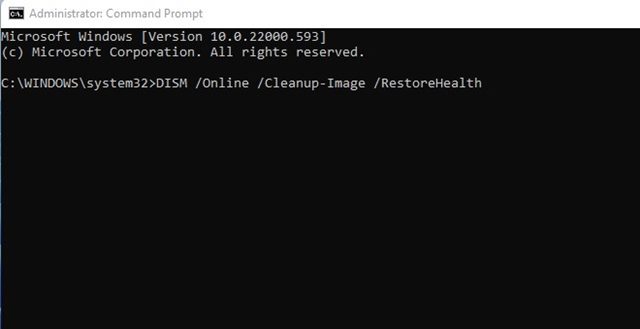
3. If the above command returns with an error, run these two commands one by one:
Dism /Online /Cleanup-Image /ScanHealth

Dism /Online /Cleanup-Image /RestoreHealth
After executing the commands, restart your Windows 11 computer. After the restart, restart the Windows Update tool.
8. Manually Download & Install Windows Updates
If you are getting the Windows Install error while installing a specific update, you can manually download & install that particular update on your PC.
The process of installing Windows updates is the same as installing software. You need to visit the Microsoft Update Catalog site and download the update, which is failing to download/install.
Once downloaded, you can install it by following the on-screen instructions. For a detailed guide, check out our article – How to Manually Download & Install Windows Updates.
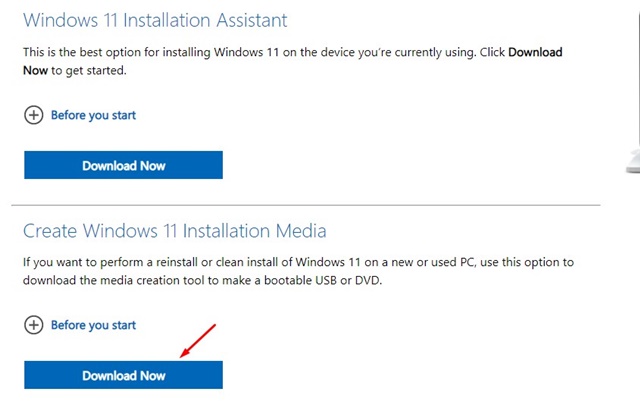
9. Use Windows Media Creation Tool
If none of the methods worked, you need to use the Windows Media Creation tool to install the update.
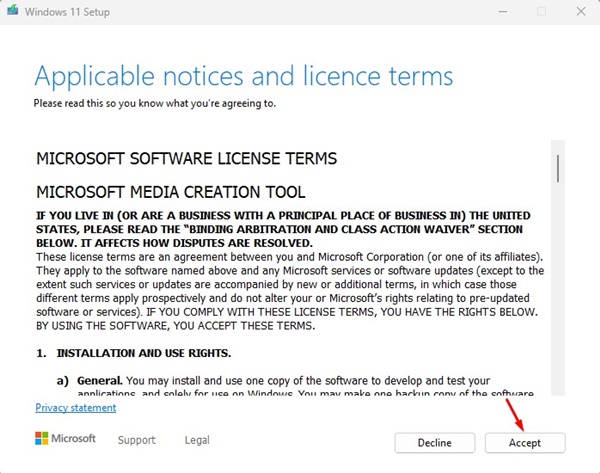
1. Open this webpage and download the Media Creation tool.
2. Open the Media Creation tool and click Accept.
3. Select the Language & Edition, Choose which media to use, etc.
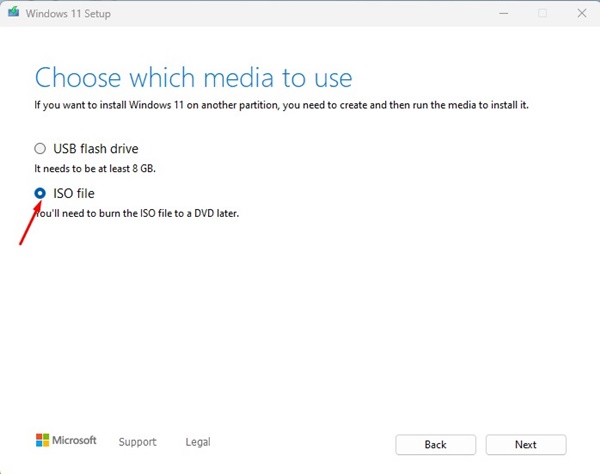
4. Once you’ve done this, you need to clean install Windows 11. This will install all pending updates.
These are some of the best ways to fix Windows Install Error 0x80070103. If you have followed all the methods, the error is likely already fixed. Let us know which method worked for you to fix the Windows Update error.

")
