As of now, there are plenty of web browsers available for the Windows 10 operating system. Out of all those, Firefox, Google Chrome, and the new Microsoft Edge browser stand out from the crowd. If we talk mainly about the new Edge browser, Microsoft has improved its functionality and performance.
What makes the new Edge browser unique is its Chromium-based engine and the new UI. Since the new browser from Microsoft is based on Chromium, it’s compatible with all Chrome extensions and themes. Although it now supports Chrome extensions, many users don’t know how to install/uninstall the extensions.
Also Read: How to Force Dark Mode on Websites in Edge Browser
Steps to Install & Uninstall Extensions in Microsoft Edge Browser
This article will share a detailed guide on how to install and uninstall extensions in the Microsoft Edge browser. Let’s check out.
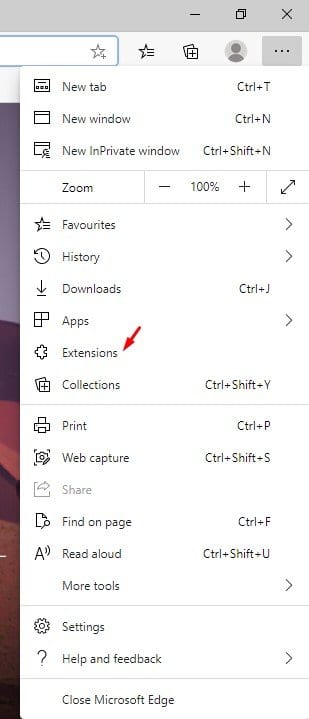
Step 1. First of all, launch the Microsoft Edge browser and click on the three dots.
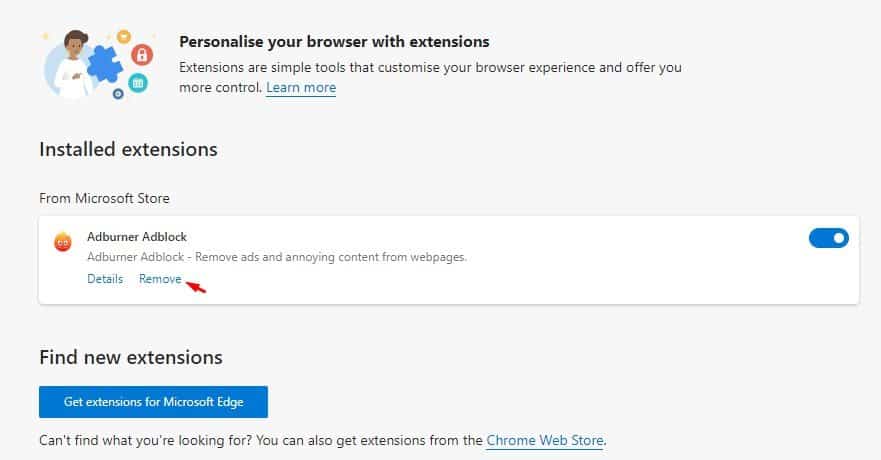
Step 2. From the drop-down menu, select ‘Extensions.’
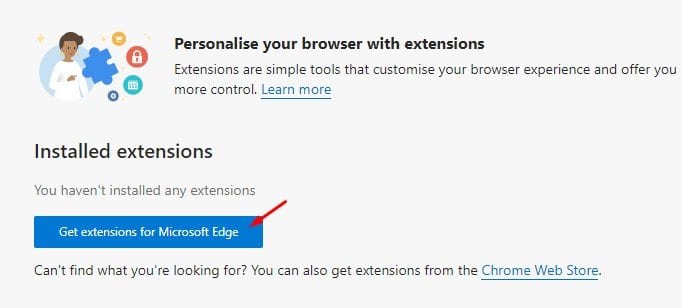
Step 3. On the next page, click on the ‘Get extensions for Microsoft Edge.’
Step 4. This will open the Microsoft Edge Addons page. Search for the extension that you want to install and click on the ‘Get’ button.

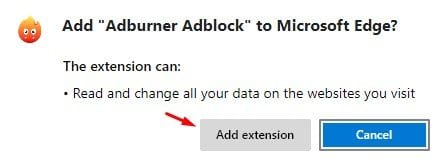
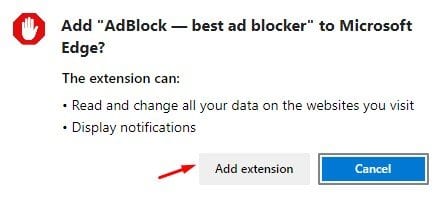
Step 5. Now on the confirmation popup, click on the ‘Add extension’ button.
Step 6. To remove the extension, visit the extension page and click on the ‘Remove’ button.
How to Install Google Chrome Extensions
Well, you can directly install the Chrome extension to the Microsoft Edge browser. For that, follow the steps given below.
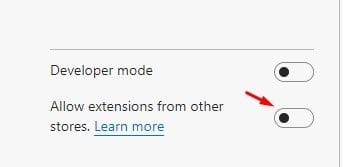
Step 1. First of all, open Edge browser and open this link – edge://extensions/
Step 2. This will open the Edge’s extension page. Enable the option ‘Allow extensions from other stores’
Step 3. Now head to the Chrome web store and search for the extension that you want to install.
Step 4. On the extension page, click on the ‘Add to Chrome’ button.

Step 5. On the confirmation popup, click on the ‘Add extension’ button.
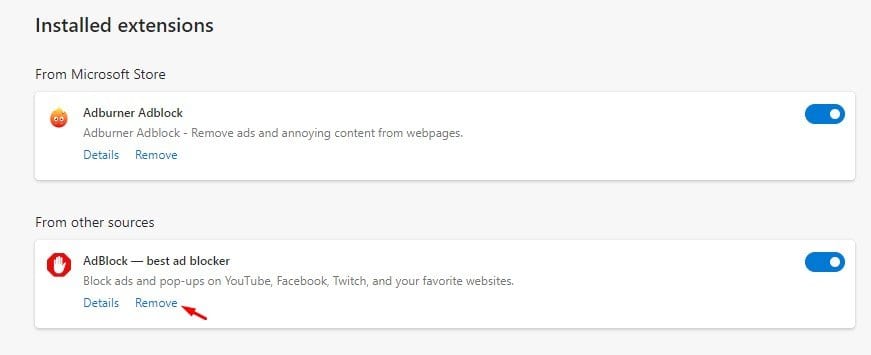
Step 6. The extension will be added to the web browser. To uninstall the extension, open the Edge extension page, and click on the ‘Remove’ button behind the extension.
That’s it! You are done. This is how you can install & uninstall the extension in the Edge browser. I hope this article helped you! Please share it with your friends also. If you have any doubts related to this, let us know in the comment box below.


