A few months ago, Microsoft unveiled its new desktop operating system – Windows 11. Although Windows 11 is great, it’s not meant for every device. As a result, Microsoft has upped the system requirements to run Windows 11.
First, you would need a 64-bit processor to run Windows 11. Second, the PC should have Trusted Platform Module (TPM) version 2.0 to run Windows 11. If you try to install Windows 11 on a non-supported processor, you will see an error message.
The PC must have a compatible processor, support for TPM 2.0, and should support Secure Boot. Yes, you can try the preview builds of Windows 11 by bypassing the TPM requirements, but your PC won’t receive the stable builds of Windows 11.
So, if your PC is incompatible with Windows 11, still you want to give the new operating system a try, you are reading the right guide. In this article, we have listed a step-by-step guide on installing Windows 11 on Unsupported PCs. Let’s check out.
1. Enable or Bypass TPM 2.0
You can’t install Windows 11 on a motherboard without a TPM chip. However, if you desperately want to give Windows 11 a try, you need to bypass the TPM requirements on your PC.
You can bypass Windows 11’s TPM requirements in easy steps. We have shared a detailed guide on bypassing Windows 11 TPM requirements. Make sure to go through the steps and follow them as directed.
If your PC has a TPM chip, you need to follow this guide to enable TPM on Windows PC.
2. Enable Secure Boot
After bypassing Windows 11’s TPM requirements, you need to enable the Secure Boot. Secure Boot is a security feature found in the startup software for your computer.
Enabling/disabling Secure Boot is easy, mainly if you use Windows 10. We have shared a step-by-step guide on enabling or disabling secure Boot in Windows.
You need to go through that article and follow the steps as directed. After enabling the secure Boot, your PC will be ready to install Windows 11.
Steps to Install Windows 11 on Unsupported PCs
If you have followed the above two steps, your PC will install Windows 11. Below, we have shared a step-by-step guide on installing Windows 11 on Unsupported PCs. Let’s check out.
1. First of all, open your favorite web browser and head to the Microsoft website. Next, you need to download the Windows 11 ISO file from the site.
2. Now install WinRAR on your PC. Once installed, right-click on the Windows 11 ISO file and select the ‘Extract to’ option. Next, extract the ISO file into a folder.
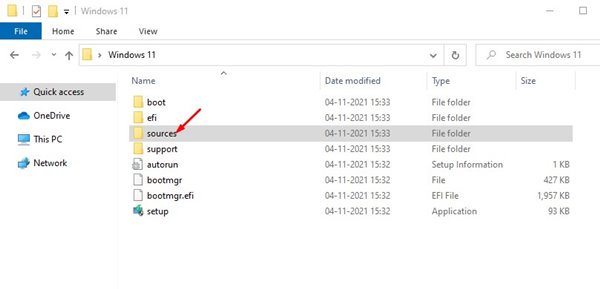
3. Now, open the extracted ISO file folder and the sources folder as shown below.
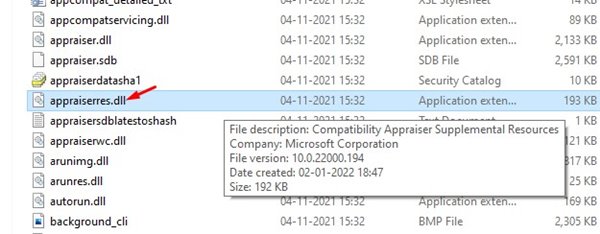
4. On the sources folder, find and delete the appraiserres.dll file.
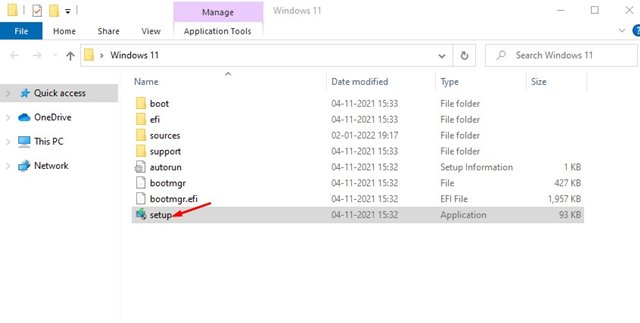
5. Now, move back to the extracted folder and double click on the ‘Setup’ file to start the Windows 11 installation wizard.
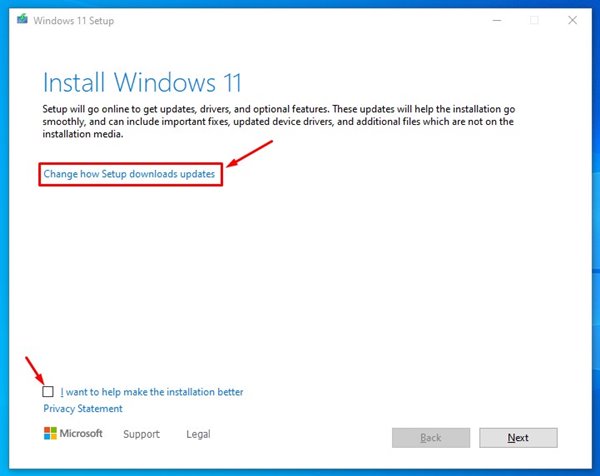
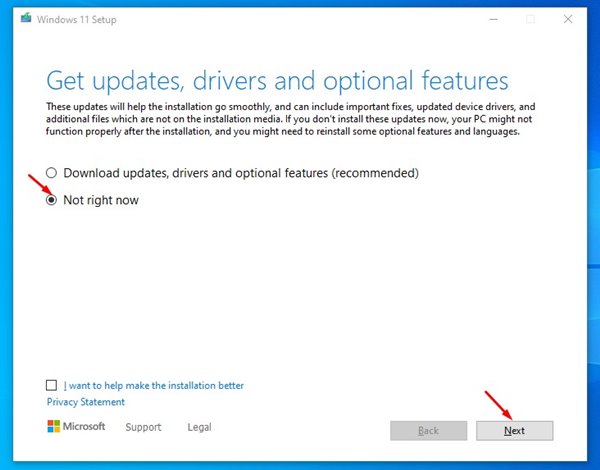
6. On the Windows installation wizard, uncheck the option ‘I want to help make the installation better’. Next, click on the Change how SetUp downloads update link.
7. Select the Not right now option and click on the Next button on the next page.
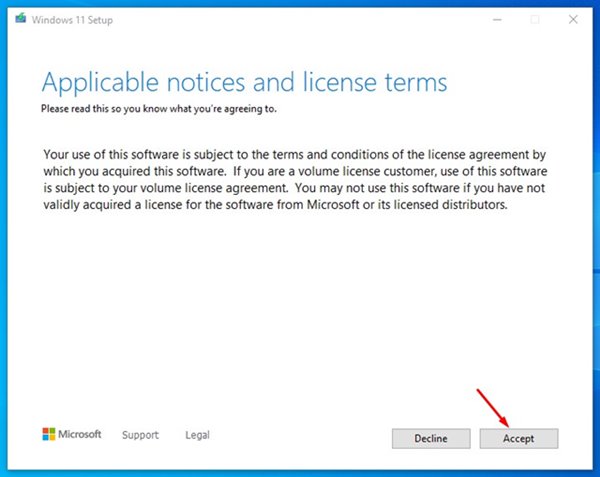
8. On the license terms, click on the Accept button.

9. On the next screen, click on the Install button below.
That’s it! You are done. Now Windows 11 installation wizard will install Windows 11. After the installation, you will use the new Windows 11 operating system.
Installing Windows 11 on an unsupported PC is easy, but you should avoid installing unstable builds. Unstable builds have lots of bugs and might fail to boot. I hope this article helped you! Please share it with your friends also. If you have any doubts about this, let us know in the comment box below.


