Even though Google Drive is secure and requires a password to access, you can improve the security of your saved files by adding a password to them. There’s no direct option to add passwords to your Google Drive files, but a few workarounds still allow you to do so.
If you want to add more security to your Google Drive files, you should add a password before uploading. Here are the best ways to password-protect Google Drive files.
1. Restrict File Access on Google Drive
Since Google Drive doesn’t officially support password-protecting files, you can restrict file access. Restricting file access on Google Drive is one of the best ways to prevent unauthorized access to your files.
1. Open your favorite web browser and visit the Google Drive website.
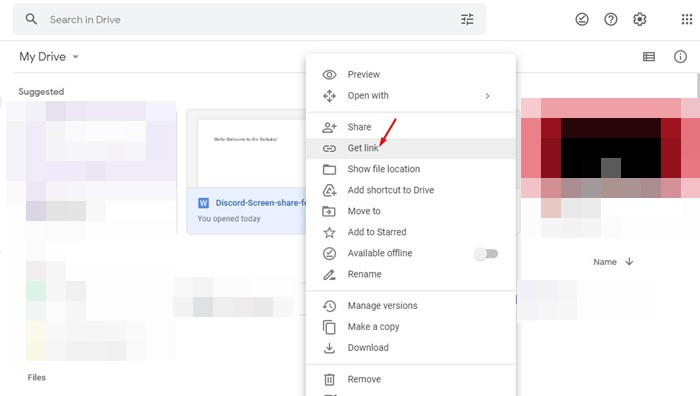
2. Right-click on the Google Drive file to which you want to restrict access and select Get Link.
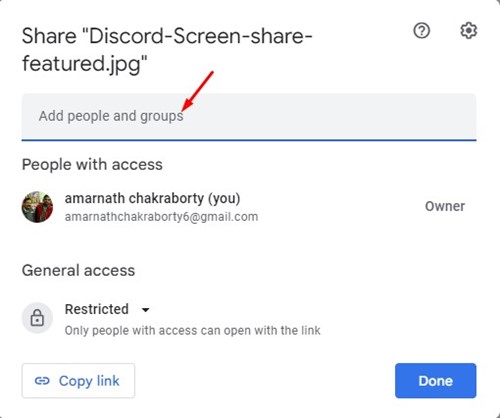
3. On the General Access, select Restricted and click the Done button.

4. If you want to share the restricted file with your friend, enter their email address in the Add People and Groups field.
2. Password-Protect Files via Google Forms
You can use Google Forms to create a password-protected form and add the Google Drive sharing link inside it. This way, the user must first unlock the Google Forms with a password to access the Google Drive file.
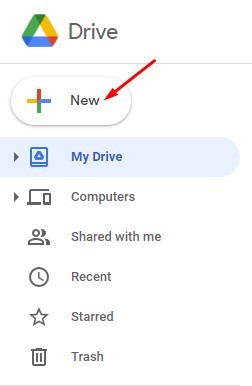
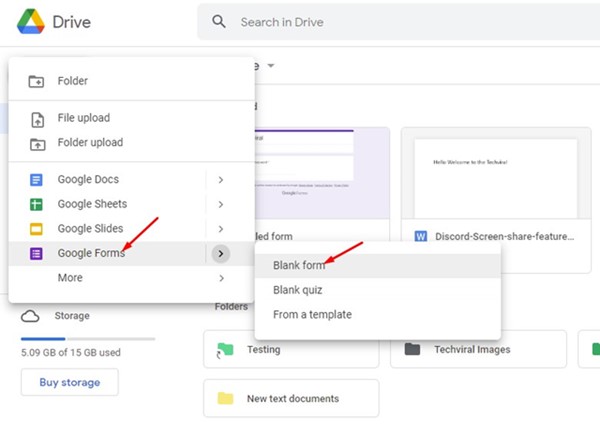
1. Click the (+ New) button on Google Drive.
2. From the list of options that appears, click on Google Forms > Blank Form.
3. On the Google Form website, name the newly created form.
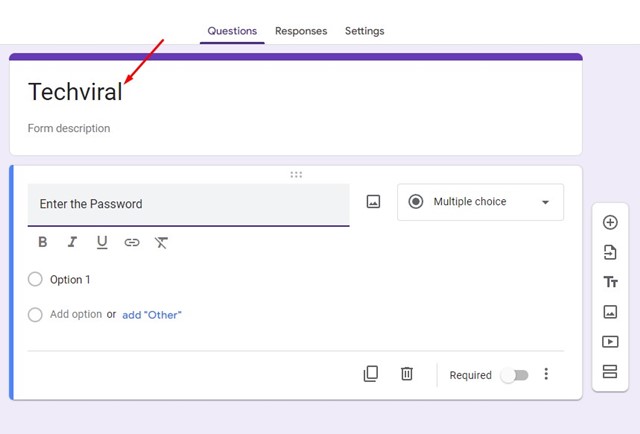
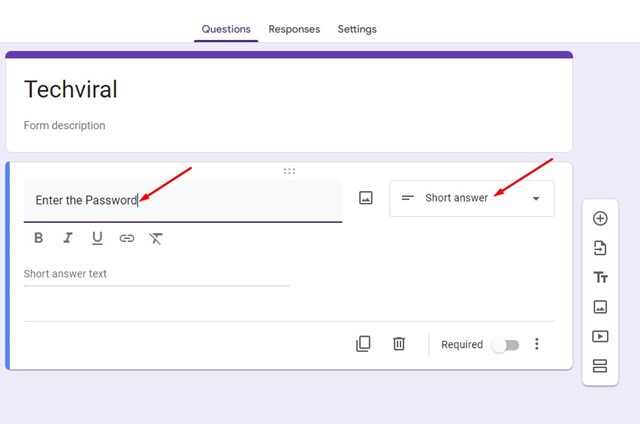
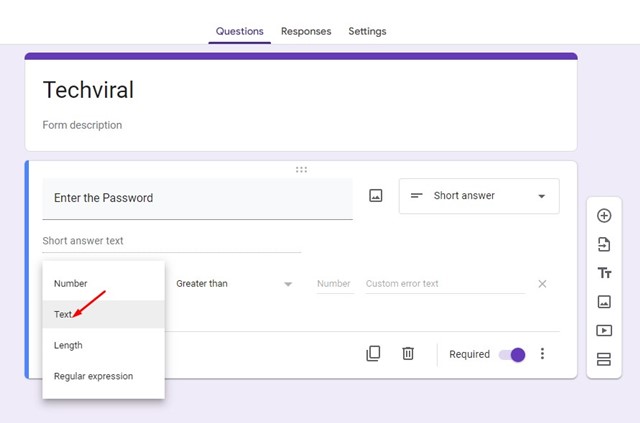
4. Tap on the field that says Untitled Question and add the password detail. Click on the drop-down menu next to it and select Short Answer.
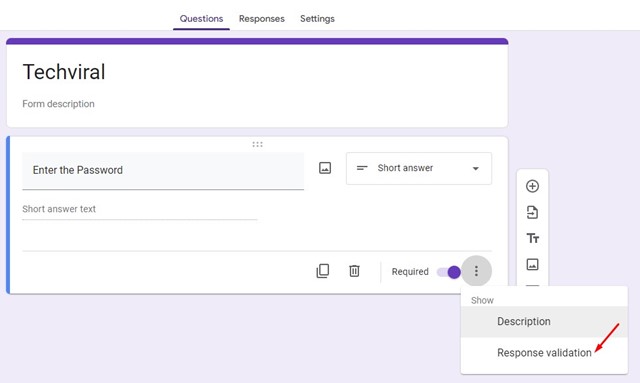
5. Enable the Required toggle. Next, click on the three dots beside it and select Response validation.
6. To use Text as a password, click the Number drop-down and select Text.
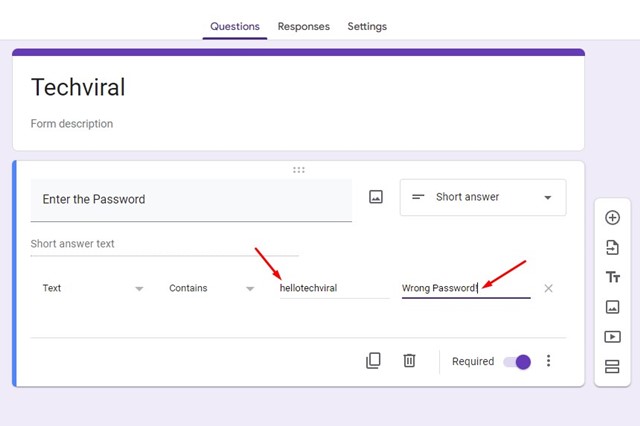
7. Enter the Password in the text field. Enter the incorrect password message in the Custom error text field.
8. Click the Settings tab.
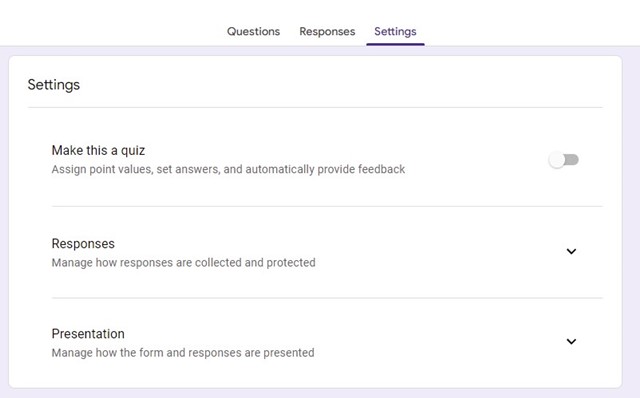
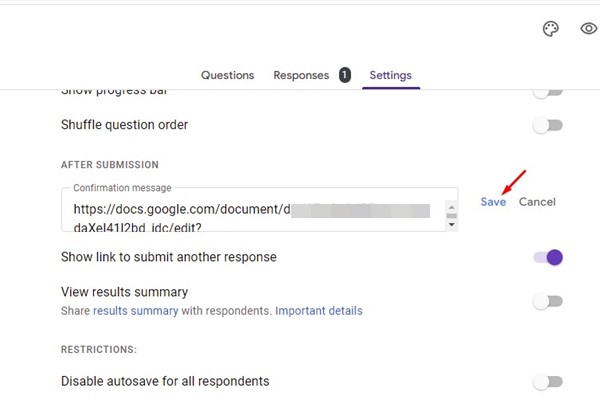
9. Scroll down to the Presentation and click the Edit button beside the Confirmation message.
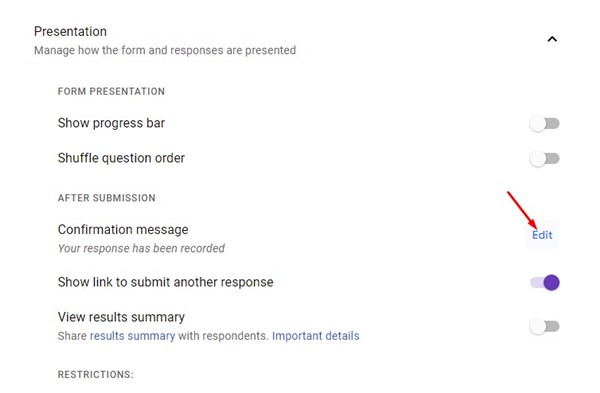
10. Enter the Google Drive URL and click the Save button.
11. Click the Send button at the top-right corner.

12. Switch to the link tab on the Send form and copy the Google Docs link.

After getting the Google Docs link, you can send it to any other user. When someone opens the form, they will be asked to enter the password. Users who enter the correct password will get the Google Drive file URL.
3. Password Protect the Google Drive Files Before Uploading
You can use file compressors to create a password-protected ZIP/RAR file containing your photos, videos, docs, etc. After creating a password-protected RAR or ZIP file, you can upload it to Google Drive. This way, when someone downloads the ZIP/RAR file from your Google Drive link, they will be asked to enter the password to access the files.
1. Download & install WinRAR on your Windows PC.
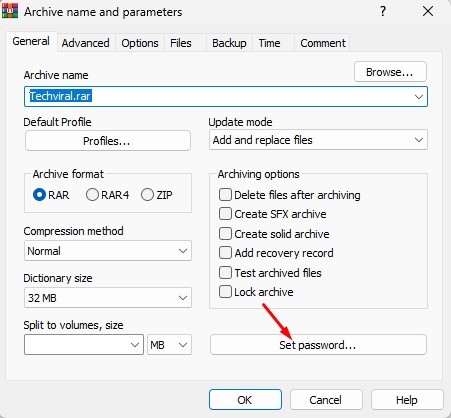
2. Navigate to the file that you want to password protect. Right-click on it and select Add to archive.

3. Click the Set password on the Archive name and parameters.
4. At the Enter password prompt, enter and reenter the password. Once you’ve done this, click the OK button.
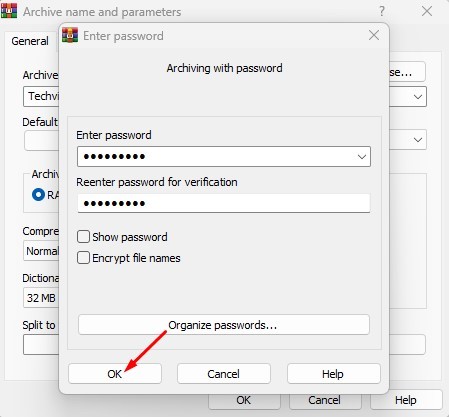
5. In the Archiving with a password prompt, click on the OK button.
After password-protecting the file, you can upload it to Google Drive and generate a file link. Users who download the ZIP file will be asked to enter the password to unlock the files.
You can also use other third-party file compressors on your Windows 11 to create a password-protected RAR/ZIP file.
4. Password-Protect Microsoft Office Files before Upload
If you are planning to store Microsoft Office files on your Google Drive account, you can password-protect them before uploading.
We have shared a detailed guide on password-protecting MS Office files on Windows. We have shared the steps for Excel files, but the steps remain the same for other Microsoft Office files.
Once the MS Office files are password-protected, you can upload them to your Google Drive account.
You can easily password-protect your Google Drive files by following our shared steps. Let us know in the comments below if you know any other ways to password-protect Google Drive files.


