The native file compression tool of Windows 11 can create a ZIP file or extract it, but it can’t password-protect it. If you want to password-protect ZIP files, here’s what you need to do.
1. Create a password-protected ZIP file via 7-Zip
7-Zip is a free archive program that you can use to create a password-protected ZIP file.
1. Download & install 7-Zip.
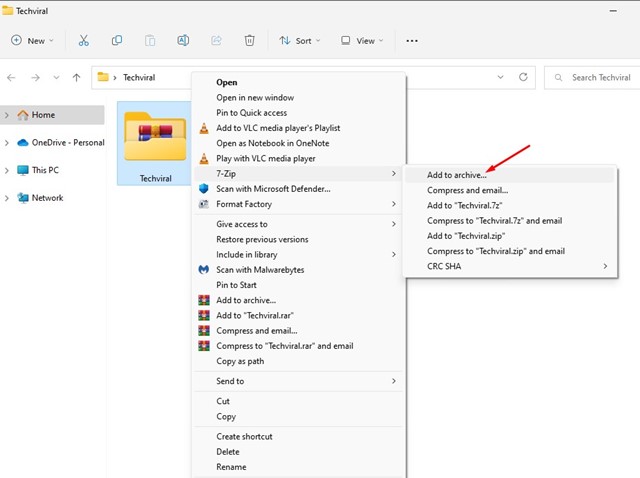
2. Once installed, right-click on the file or folder you want to add to the archive. Next, select 7-Zip > Add to archive.
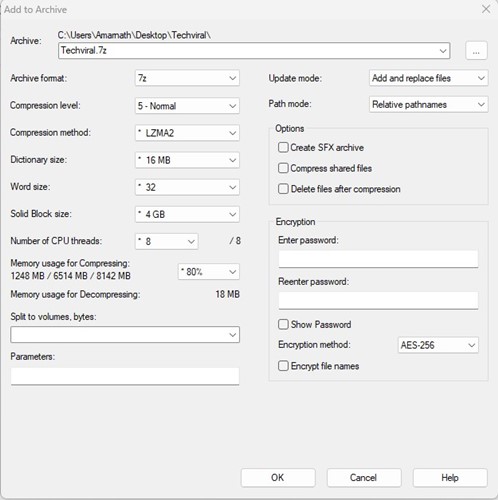
3. Switch to the Encryption tab.
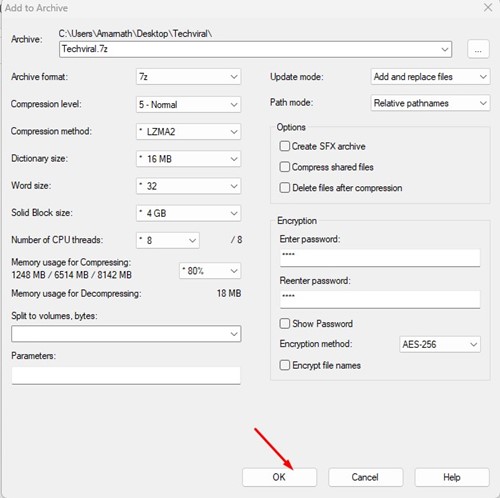
4. Enter the archive password and re-enter it. Once you’ve done this, check the ‘Encrypt file names’ option and click OK.
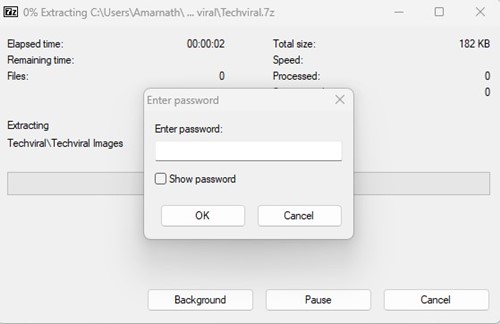
5. This will create a ZIP file and will password-protect it. If you try to access the ZIP file, you will be asked to enter the password.
2. Create a password-protected ZIP file using WinRAR
WinRAR is probably the best and most advanced file compression tool for Windows. You can use it to create a password-protected ZIP file.
1. Download & install WinRAR.
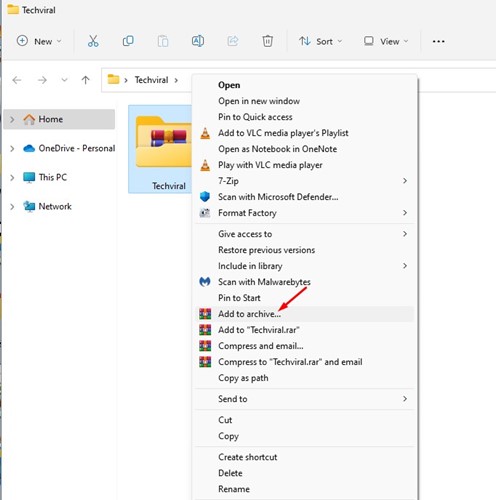
2. Once installed, right-click on the file or folder you want to compress. Next, select the Add to archive option on the context menu.
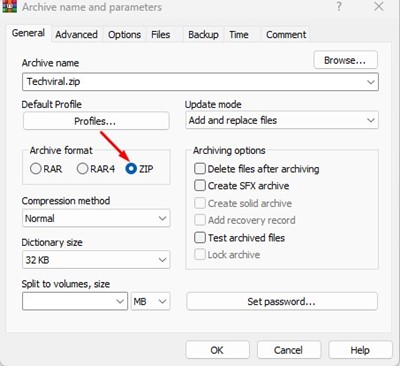
3. On the Archive name and parameters window, select ZIP on the Archive format.
4. Click Set password.

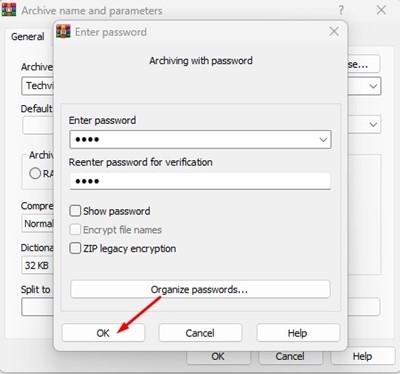
5. At the Enter password prompt, enter and re-enter the password you want to set and click OK.
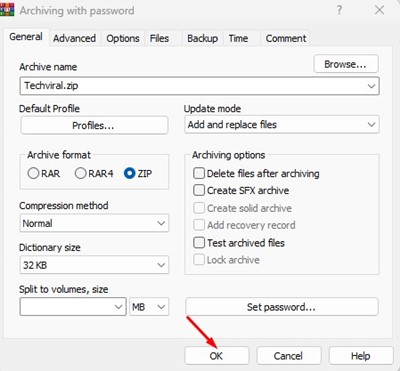
6. Click Ok on the Archive name and parameters window.
This will create a password-protected ZIP file on your Windows 11 computer. You will now be asked to enter the password whenever you attempt to open the ZIP file.
When to Password-Protect ZIP Files?
It’s a good idea to password-protect the ZIP file if your requirements match these conditions.
- While sharing large amounts of information with other people over the web.
- Protecting the sensitive information.
- Avoid misuse of the ZIP file.
- If you want to keep the files safe and secure.
Also read: How to Password Protect Folders in Windows 11
Since Windows 11 doesn’t natively support password-protecting files and folders, creating a password-protected ZIP file is a great option. If you know any other ways to password-protect ZIP files on Windows 11, let us know in the comments below.


