Most of the new web browser you use today comes with an Incognito Mode. Incognito Mode is available on both Google Chrome and Microsoft Edge web browser, and when you enable it, your browsing history is not saved.
So, if you are using Google Chrome and don’t want the web browser to remember your browsing activity, you can browse the web privately in the Incognito Mode. It’s pretty easy to enable the Incognito mode in Chrome browser – just launch the browser, click on the three dots and select ‘New incognito Window’.
Generally, Incognito Mode is used for private browsing, but what if you don’t want to use it, nor do you want the browser to save your browsing history? Yes, you get the option to delete all your Chrome browsing history in a few clicks, but you need to repeat the process every time you close the browser.
Steps to Prevent Chrome from Saving Browsing History in Windows 11
If you are using Windows 11 operating system, you can prevent the Chrome web browser from saving browsing history on your local storage. The process requires a bit of registry editing, but it completely blocks the browsing history feature of Google Chrome on regular mode.
Hence, in this article, we will share a step-by-step guide on how to Prevent Chrome from Saving your browsing history on Windows 11 PC. The process will be a bit complicated; therefore, follow them carefully. Here’s what you need to do.
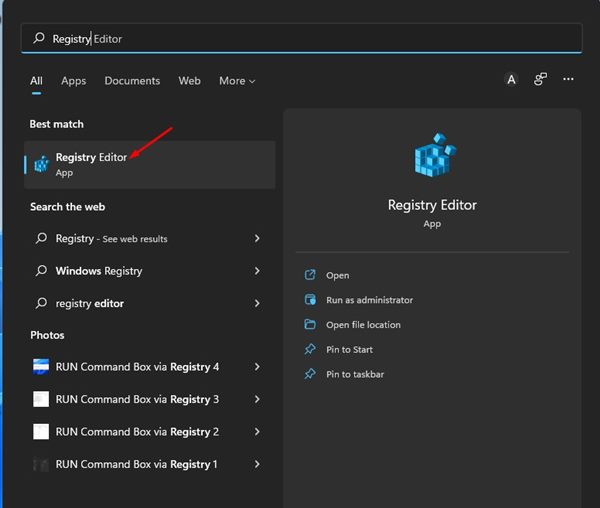
1. First of all, click on the Windows Search and type in Registry. Next, open the Registry Editor from the list.
2. Now, you will see a UAC dialog box. You need to click on the Yes button.
3. On the Registry Editor, you need to navigate to the following path:
HKEY_LOCAL_MACHINE\SOFTWARE\Policies

Note: You can also copy and paste the path we have shared in the Address bar to access the Policies folder.
4. Now, right-click on the Policies and select New > Key.
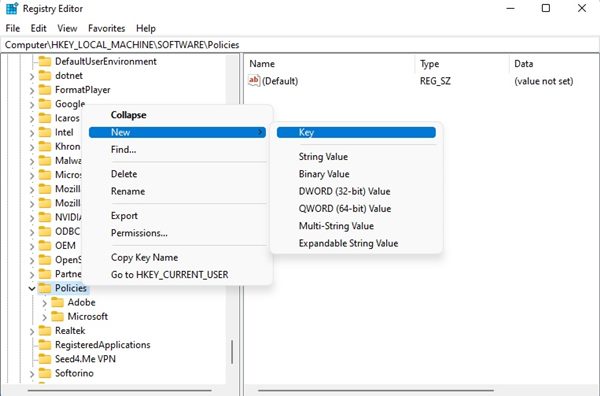
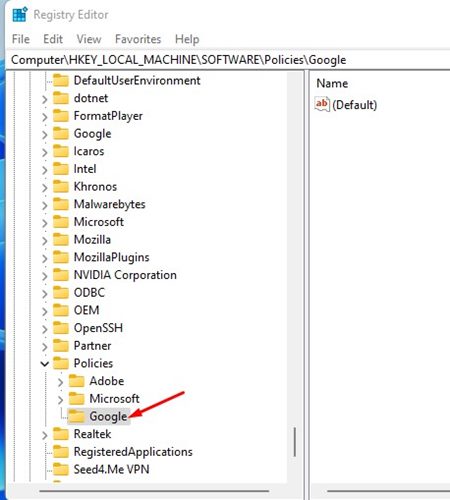
5. Name the new key Google.
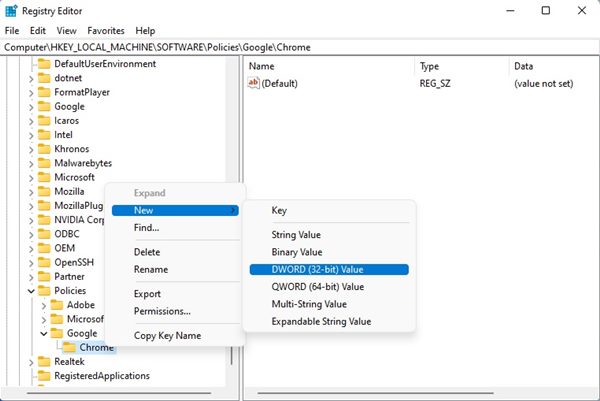
6. Now right click on the Google Key and select New > Key.
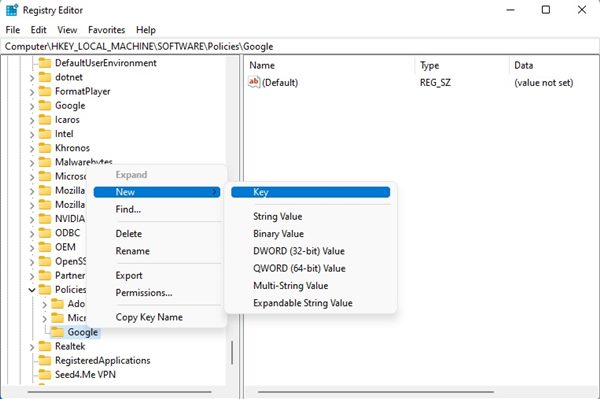
7. Rename the new key to Chrome. Right-click on Chrome and select New > DWORD (32-bit) Value.
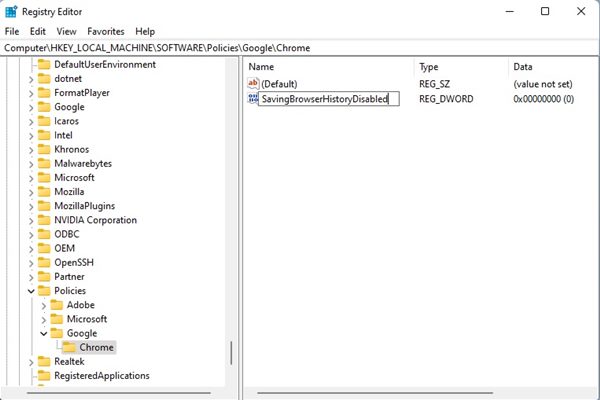
8. Now, you need to rename the newly created DWORD value as SavingBrowserHistoryDisabled
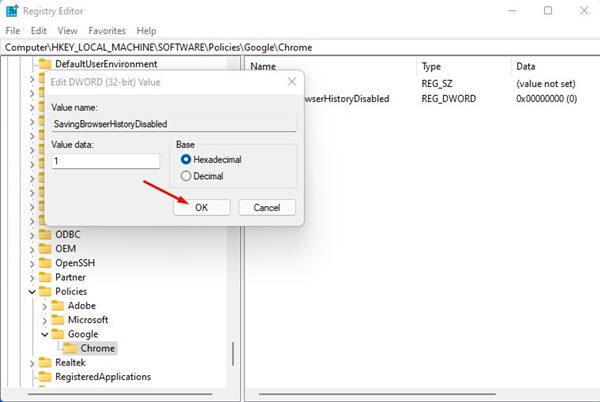
9. Now double-click on the SavingBrowserHistoryDisabled key. Next, on the Value data field, enter 1 and click on the Ok button.
That’s it! You are done. Now close the Registry Editor and use the Google Chrome web browser. The web browser will not save your browsing history.
How to Enable the Browser History?
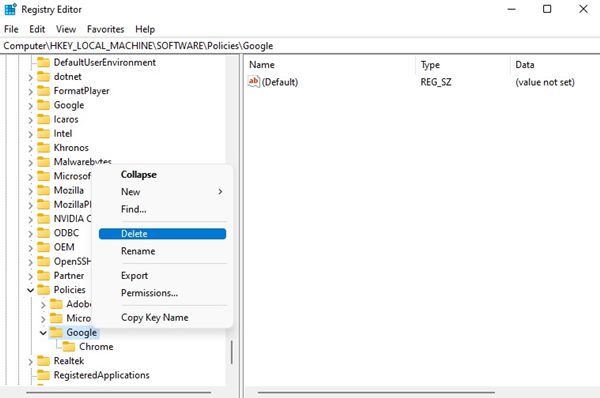
Well, if you wish to enable the Browser history, you need to enter ‘0’ on the Value Data field on Step 9. Once done, delete the Google Key you have created on Step 5. After making the changes, restart your PC, and Google Chrome will start to save the browser history on your device.
Also Read: How to Disable Browsing History in Microsoft Edge Browser
So, this is a detailed guide on preventing Chrome browser from saving browsing history on your Windows 11 PC. I hope this article helped you! Please share it with your friends also. If you have any doubts related to this, let us know in the comment box below.

