Microsoft launched its new desktop operating system a few months ago. While the new operating system is excellent and introduced many visual changes, Microsoft has also increased the system requirements to run it.
Windows 11 needs a 64-bit processor and TPM version 2.0 to run. The processor part is okay, but many users don’t have a Trusted Platform Module OR TPM 2.0 hardware chip on their device. This is the only reason users search for installing Windows 11 on an unsupported PC.
We have already shared a detailed guide on running Windows 11 on unsupported computers, and the method still works today. However, Microsoft is now testing a new desktop watermark for unsupported PCs.
System requirements not met Watermark on Windows 11
Since Microsoft knows its Windows 11 is not very stable and might create problems if run on an incompatible device, it has decided to add a desktop watermark. The watermark may not be visible immediately if you are using Windows 11 on an incompatible device, as it is rolling out slowly to incompatible devices.
It will appear exactly where the ‘Windows is not activated’ watermark used to appear: above the taskbar clock. The watermark will appear on the desktop screen, but it won’t affect apps, windows, or web browsers.

The desktop watermark will state ‘System requirements not met’ in small text size, which may irritate many users. So, if the watermark is appearing on your desktop screen, and if it is irritating you, you are on the right page.
Steps to Remove ‘System Requirements Not Met’ Watermark on Windows 11
In this article, we will share a step-by-step guide on how to remove system requirements not met watermark on Windows 11 operating system. Let’s check out.
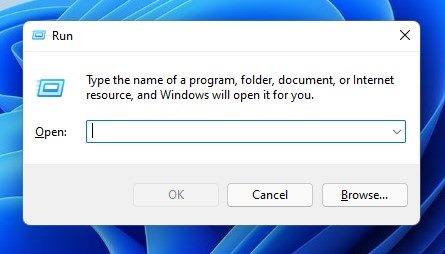
1. First of all, press the Windows Key + R button on your keyboard. This will open the RUN dialog box.
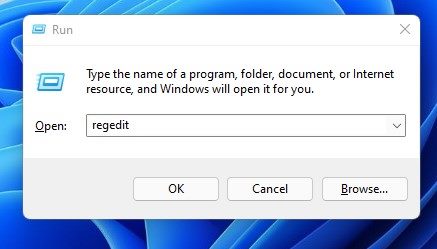
2. On the RUN dialog box, enter regedit and hit the Enter button.
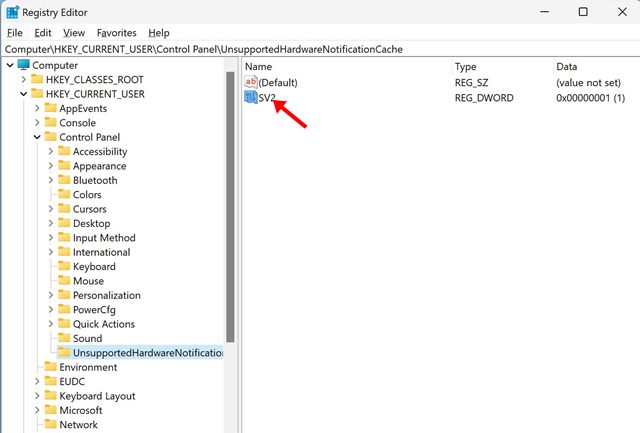
3. Now, on the Registry Editor, navigate to the following path:
HKEY_CURRENT_USER\Control Panel\UnsupportedHardwareNotificationCache

4. Now, on the right pane, double click on the SV2 REG_DWORD key to open it.
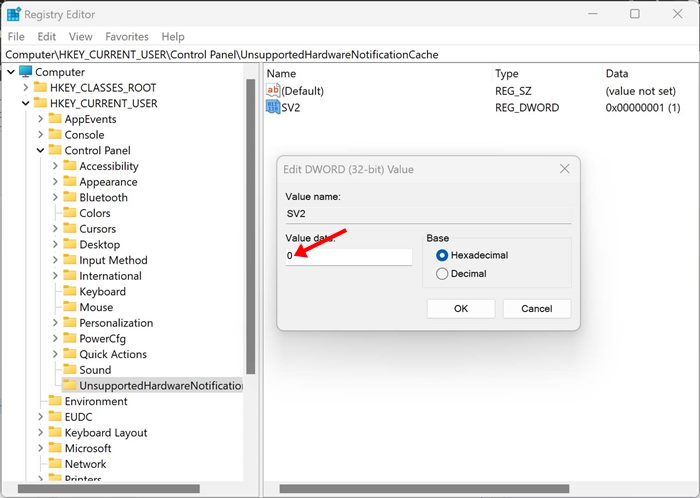
5. On the value data field, enter 0 and click on the Ok button.
That’s it! You are done. After making the changes, restart your Windows 11 operating system. After the restart, you will not see the system requirement not met the watermark on the desktop screen.
The method we have shared will surely help you eliminate the desktop watermark. However, you should avoid running Windows 11 on incompatible devices. I hope this article helped you! Please share it with your friends also. If you have any doubts related to this, let us know in the comment box below.

