Due to the recent WhatsApp Policy update, users have already started to switch to Signal. Signal right now seems to be the best WhatsApp alternative. It offers everything that WhatsApp does, and it takes security & privacy very seriously.
For a list of best Signal features, please check out the article 5 Best Features of Signal Private Messenger You Should Know. Yesterday, we shared an article on run Signal Private Messenger on Windows 10. After publishing the article, we received multiple messages from MacOS users asking the same.
In this article, we will share a detailed guide on how to download & install Signal Private Messenger on Mac operating system. So, let’s check out.
Before following the steps, it’s best to know the features of Signal. So, that you can use Signal at its fullest after installing the application on PC. Here are some of the best features of Signal Private Messenger.
Features of Signal Private Messenger
- Signal supports all forms of communication, like Messaging, Voice, and video calls.
- Every form of communication was super secure. This is because every communication is end-to-end encrypted.
- Compared to other instant messaging apps, Signal provides more security features.
- It has some excellent security features like Screen Lock, Screenshot protection, Incognito protection, etc.
- You can even create a Signal group with up to 150 participants.
Steps to Install & Run Signal On MAC
First of all, please note that Signal has a standalone app for macOS. That means that users don’t need to rely on Emulators to run the PC’s mobile app. To run Signal on MacOS, follow some of the simple steps given below.
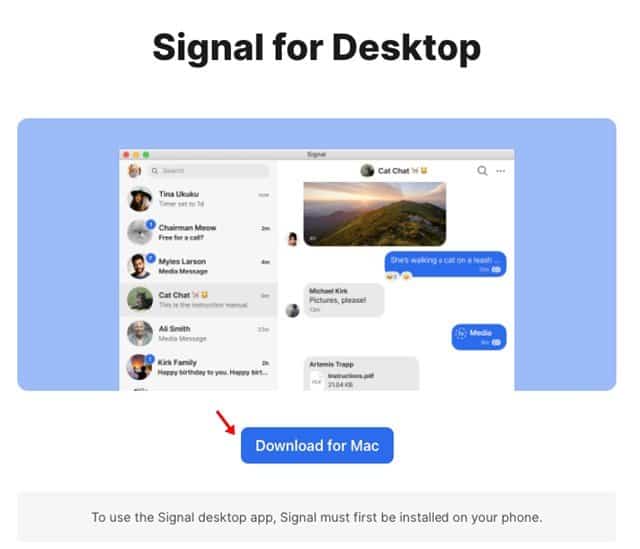
Step 1. First of all, download the Signal app for macOS. Once downloaded, install it and open the app.
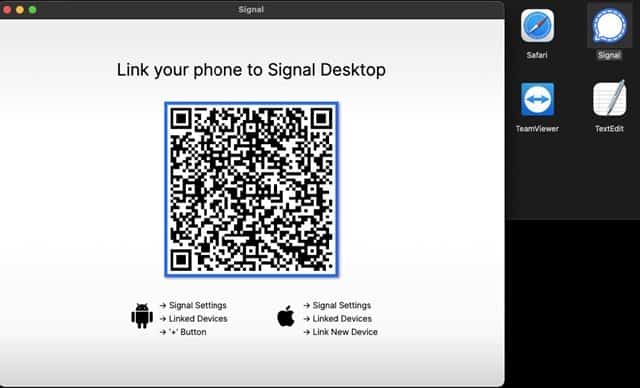
Step 2. Now you would be asked to link your phone to the Signal desktop app.
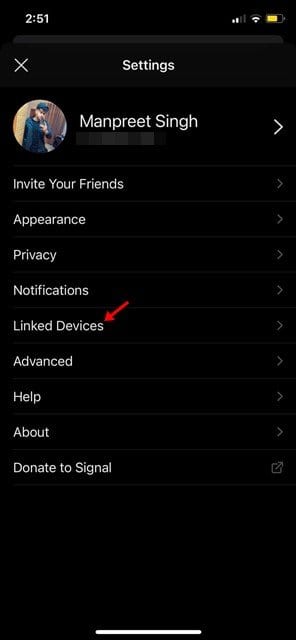
Step 3. Now open the mobile Signal app and tap on the Settings. On the Settings page, tap on the ‘Linked Devices’ option.
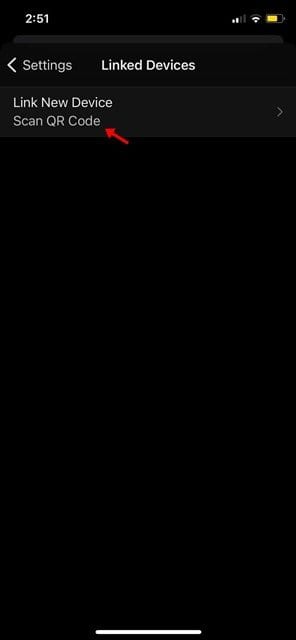
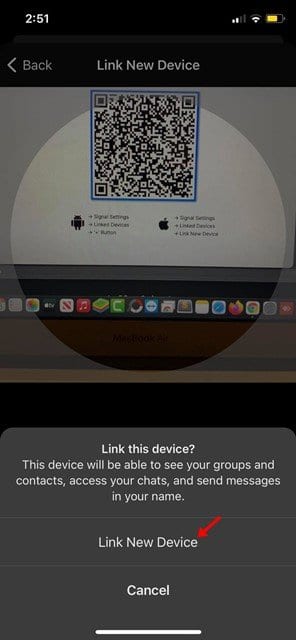
Step 4. On the next page, tap on the ‘Scan QR Code’ option.
Step 5. Now use the mobile app to scan the QR code displayed on the Signal desktop app.
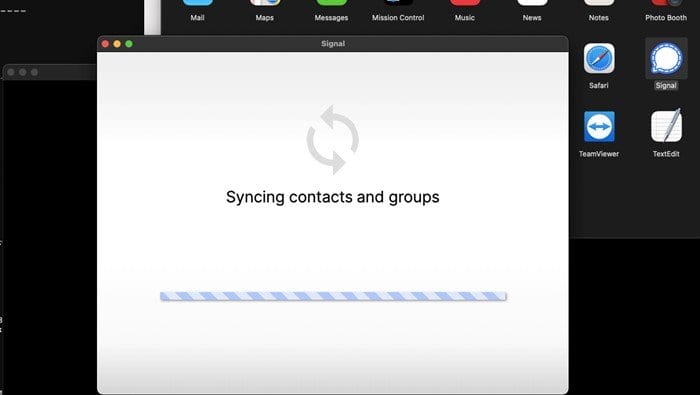
Step 6. Once scanned, wait until the Signal desktop app syncs contacts and groups.
Step 7. Once done, you will be able to use the Signal app on macOS.
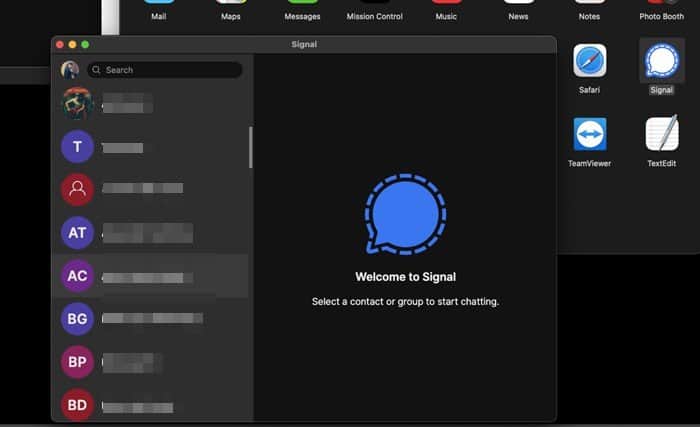
That’s it! You are done. These are the easy steps to download & install Signal on MacOS. You can now exchange text messages, make voice/video calls, etc., from the comfort of your PC.
So, this article is all about how to download & install Signal on MacOS. I hope this article helped you! Please share it with your friends also. If you have any doubts related to this, let us know in the comment box below.


