Both Windows 10 and Windows 11 operating system offers you many security options. According to Microsoft, Windows 11 is more secure than Windows 10, but it’s still under testing.
When it comes to security features, Windows 11 allows you to set up a Pin on your PC. Not only PIN but Microsoft’s Windows 11 also offers you many other ways to protect your PC.
In this article, we are going to talk about PIN protection on Windows 11. If you are using the latest preview build of Windows 11, you can easily set up a PIN to protect your PC.
Also read: How To Reinstall Windows Without Losing Data
Steps to Set Up a PIN on Your Windows 11 PC
So, if you are interested in setting up a PIN to sign in to your Windows 11 PC, you are reading the right guide. Here we have shared a step-by-step guide on how to set up a PIN on Windows 11 PC.
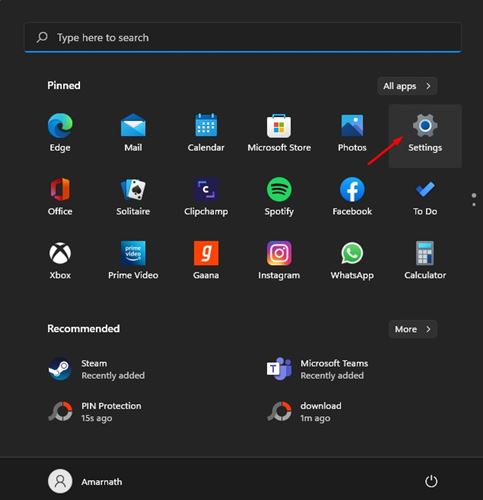
1. First of all, click on the Windows start button and click on the Settings.
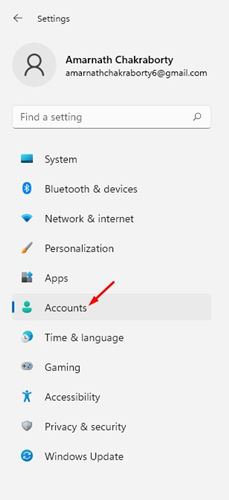
2. On the Settings page, click on the Accounts option.
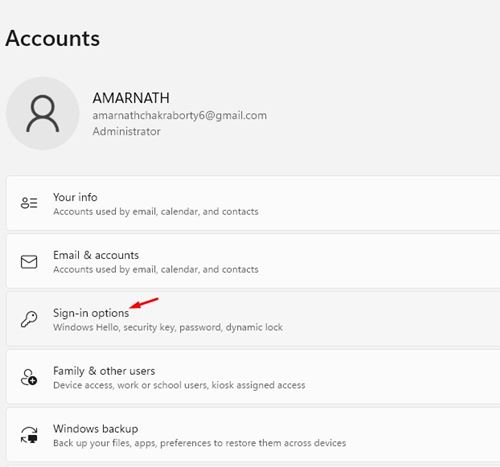
3. On the right pane, click on the Sign in options.
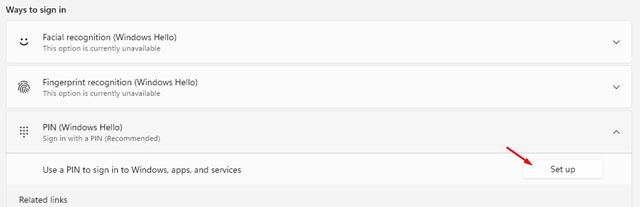
4. On the next screen, click on the Setup button on the PIN (Windows Hello) section.
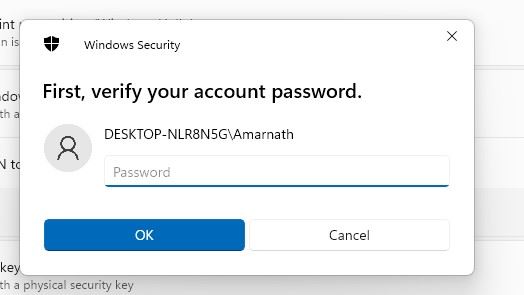
5. Now, you will be asked to verify your account password. Enter the current password and click on the OK button.
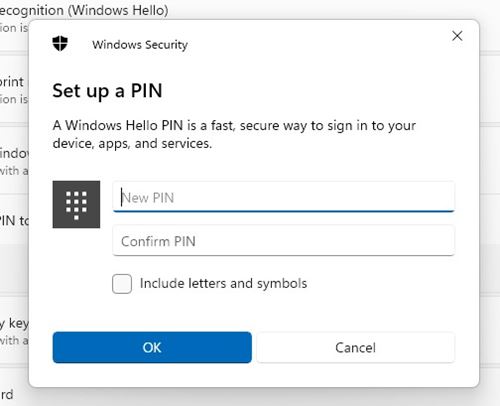
6. On the next page, enter a New PIN and Confirm it. Once done, click on the OK button.
That’s it! You are done. Now press Windows Key + L button to lock your PC. You can now use your PIN to sign in to the Windows 11 PC.
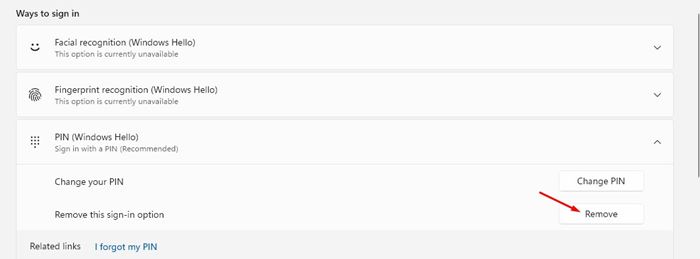
To remove the PIN, head to the Settings > Accounts > Sign-in Options > PIN. Under the PIN, click on the Remove button.
So, this guide is all about how to set up a PIN on your Windows 11 PC. I hope this article helped you! Please share it with your friends also. If you have any doubts related to this, let us know in the comment box below.


The option of starting with a PIN is no longer available. How do I enable this option?
Thanks.