If you have ever used Windows, you might know that it’s relatively easy to transfer files between devices. You can use apps like Airdroid, ApowerMirror, etc., to share files between Windows to Android or from Android to Windows. However, file sharing becomes difficult when it comes to Windows and MAC.
If you have just purchased a new Mac, you might want to transfer the files stored on your existing Windows 10 pc to the new MAC pc. However, transferring files between Windows and MAC is not easy; you might need to rely on a WiFi connection to exchange files between the two.
Also Read: How to Get macOS Type Spotlight Search On Windows 10
Steps to Transfer Files from Windows PC to MAC
The good thing is that you don’t need to install any additional app either on your Windows 10 or MAC pc to transfer files. This article will share some of the best and easy methods to share files between Windows and MAC. So, let’s check out.
1. Using Windows File Sharing Utility
The easiest way to transfer files from Windows to MAC is by using the built-in functions that both operating systems offer. However, the method will only work if your Windows and MAC are on the same local network. If they aren’t, then it’s better to skip this method.
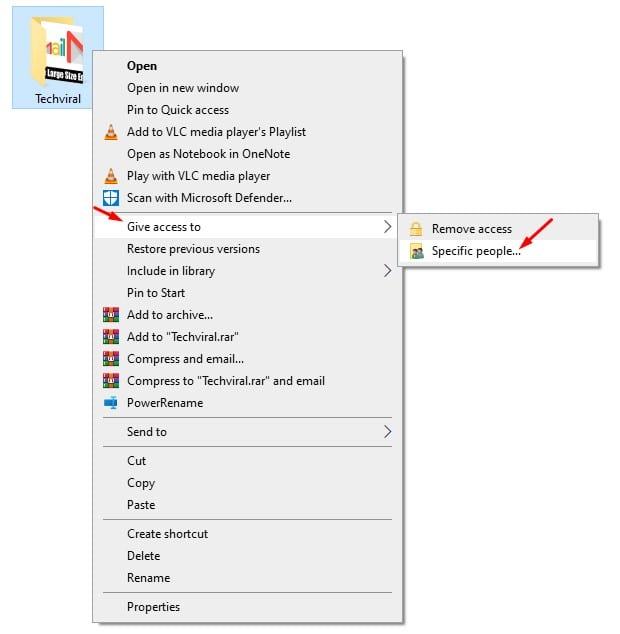
1. On your Windows 10 PC, select the file or folder you want to share. Next, right-click on the folder and select Give Access To > Specific People.
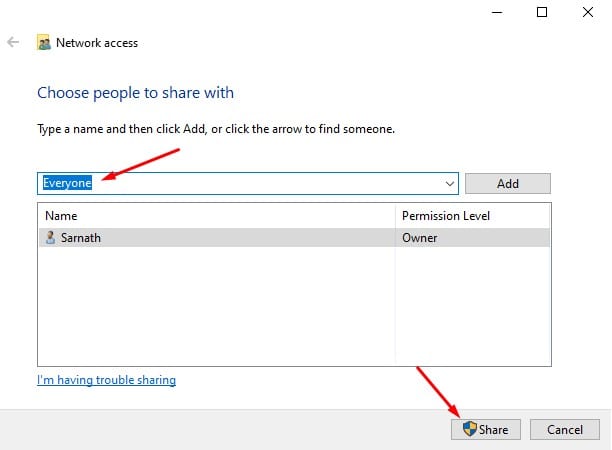
2. On the file-sharing Window, select ‘Everyone‘ and click on the Share button.
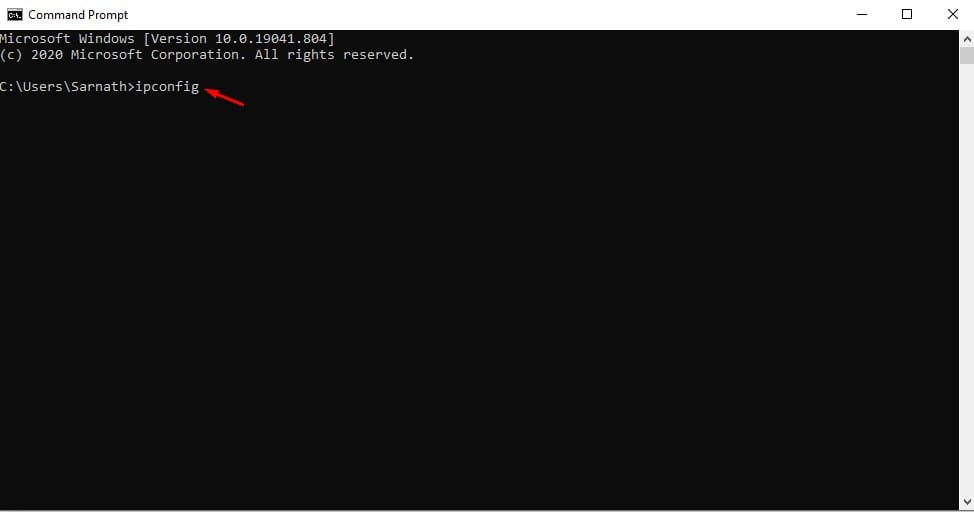
3. Now open Command Prompt on your computer, and type in ‘ipconfig’
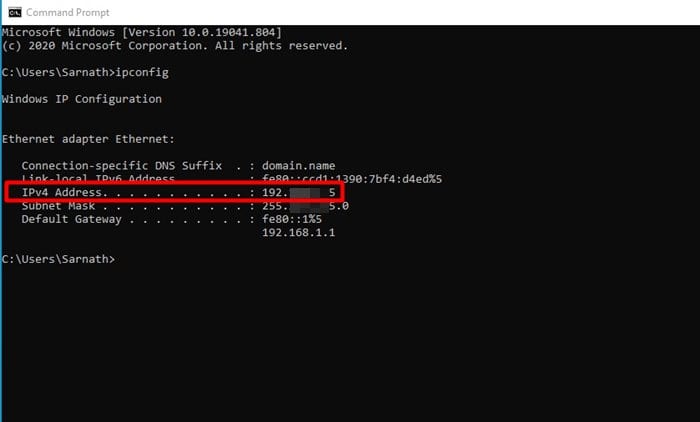
4. Note down the IPv4 address.
5. Now on your MAC, click on Finder > Go > Connect to Server. Here you need to type 'smb://' followed by the IP Address of your PC. For example, smb://123.456.7.89 Once done, click on the ‘Connect’ button.
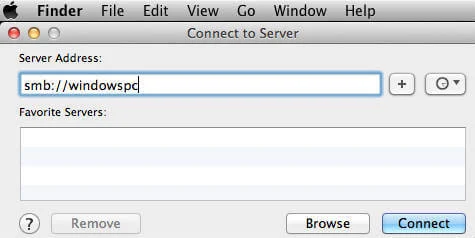
Note: Make sure to replace windowspc with the IP Address of your Windows computer.
6. Next, log in with the username and password of your PC. Once done, select the folder that you want to access and click on ‘Ok’
That’s it! You are done. Once mounted, you can access all of the shared folders on your MAC.
2. Using Migration Assistant
Migration Assistant is an official app from Apple that allows you to move data from a Windows PC to Mac. Here’s how to use it.
Important: Make sure that your PC and MAC are connected to the same WiFi network.
1. First of all, download & install the Windows Migration Assistant on your PC based on the version of macOS on your MAC.
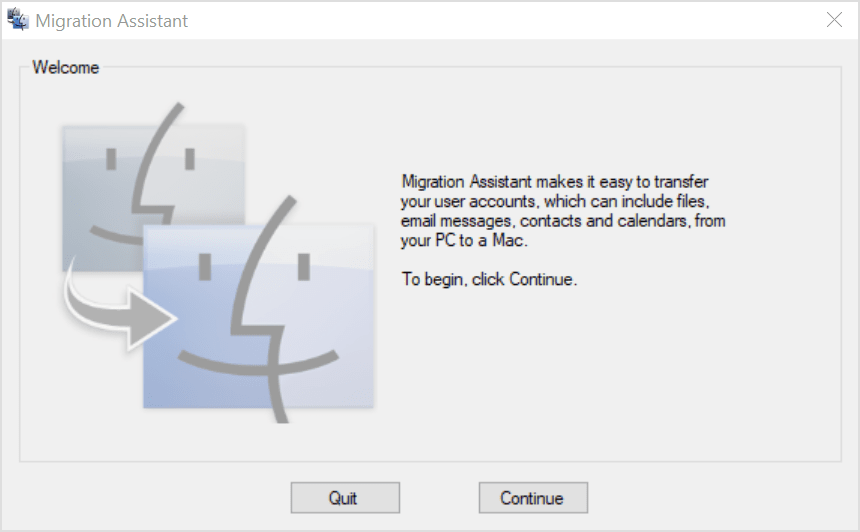
2. Once installed, open Windows Migration Assistant and click on the Continue button.
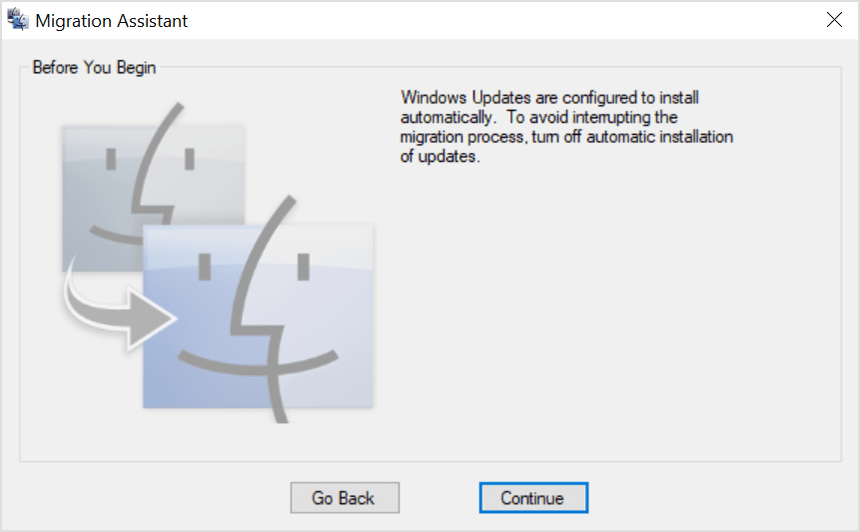
3. On the Before You Begin screen, click the Continue button again.
4. Now, on your Mac, open the Migration Assistant from the Utilities folder.
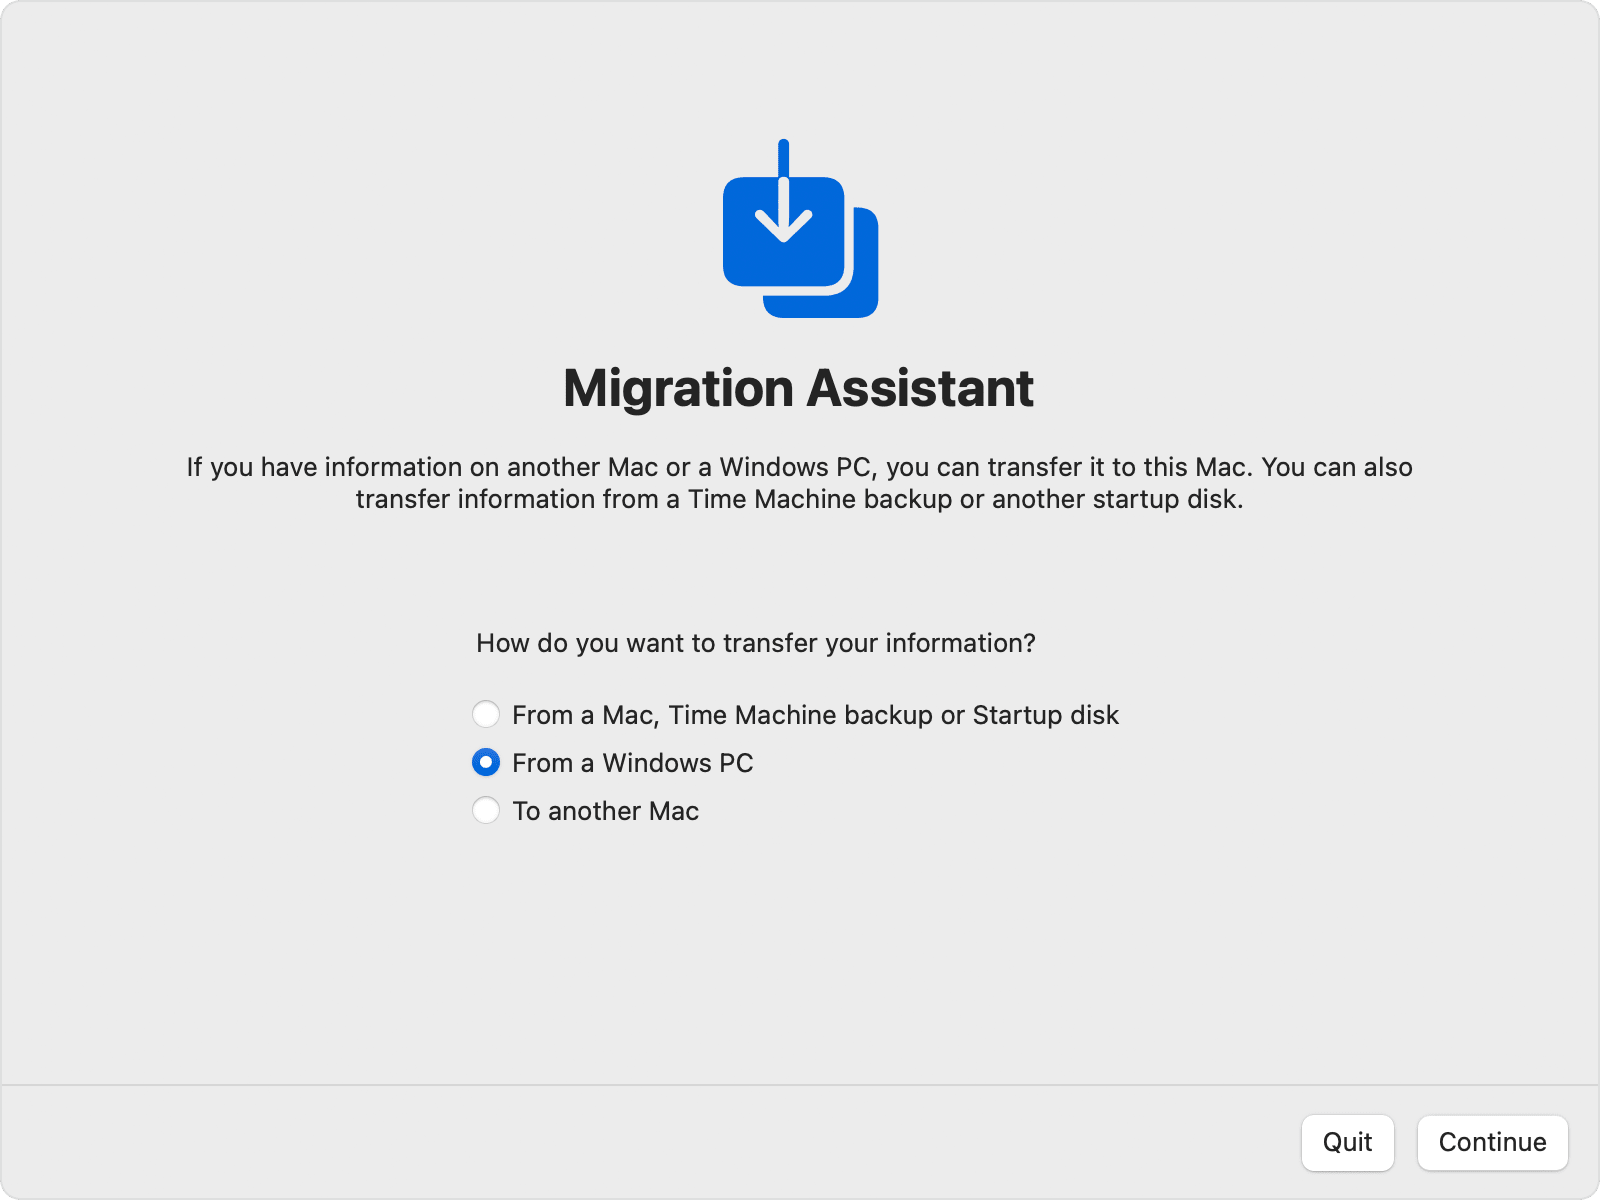
5. On the Migration Assistant on MAC, select the ‘From a Windows PC’ option and click on the Continue button.
6. On the next screen, select the icon representing your PC. Once done, click on the Continue button.

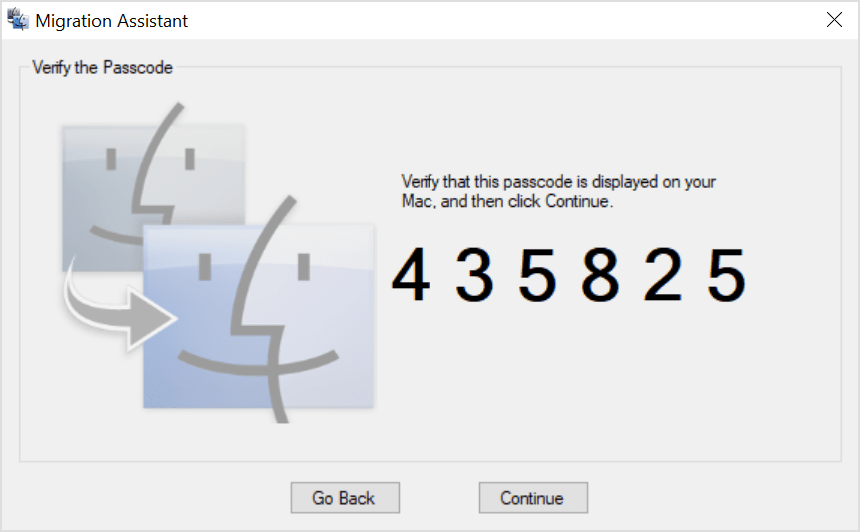
7. Now, you will see a passcode on your PC and MAC. Make sure that both of the systems show the same passcode. Once done, click on the Continue button.
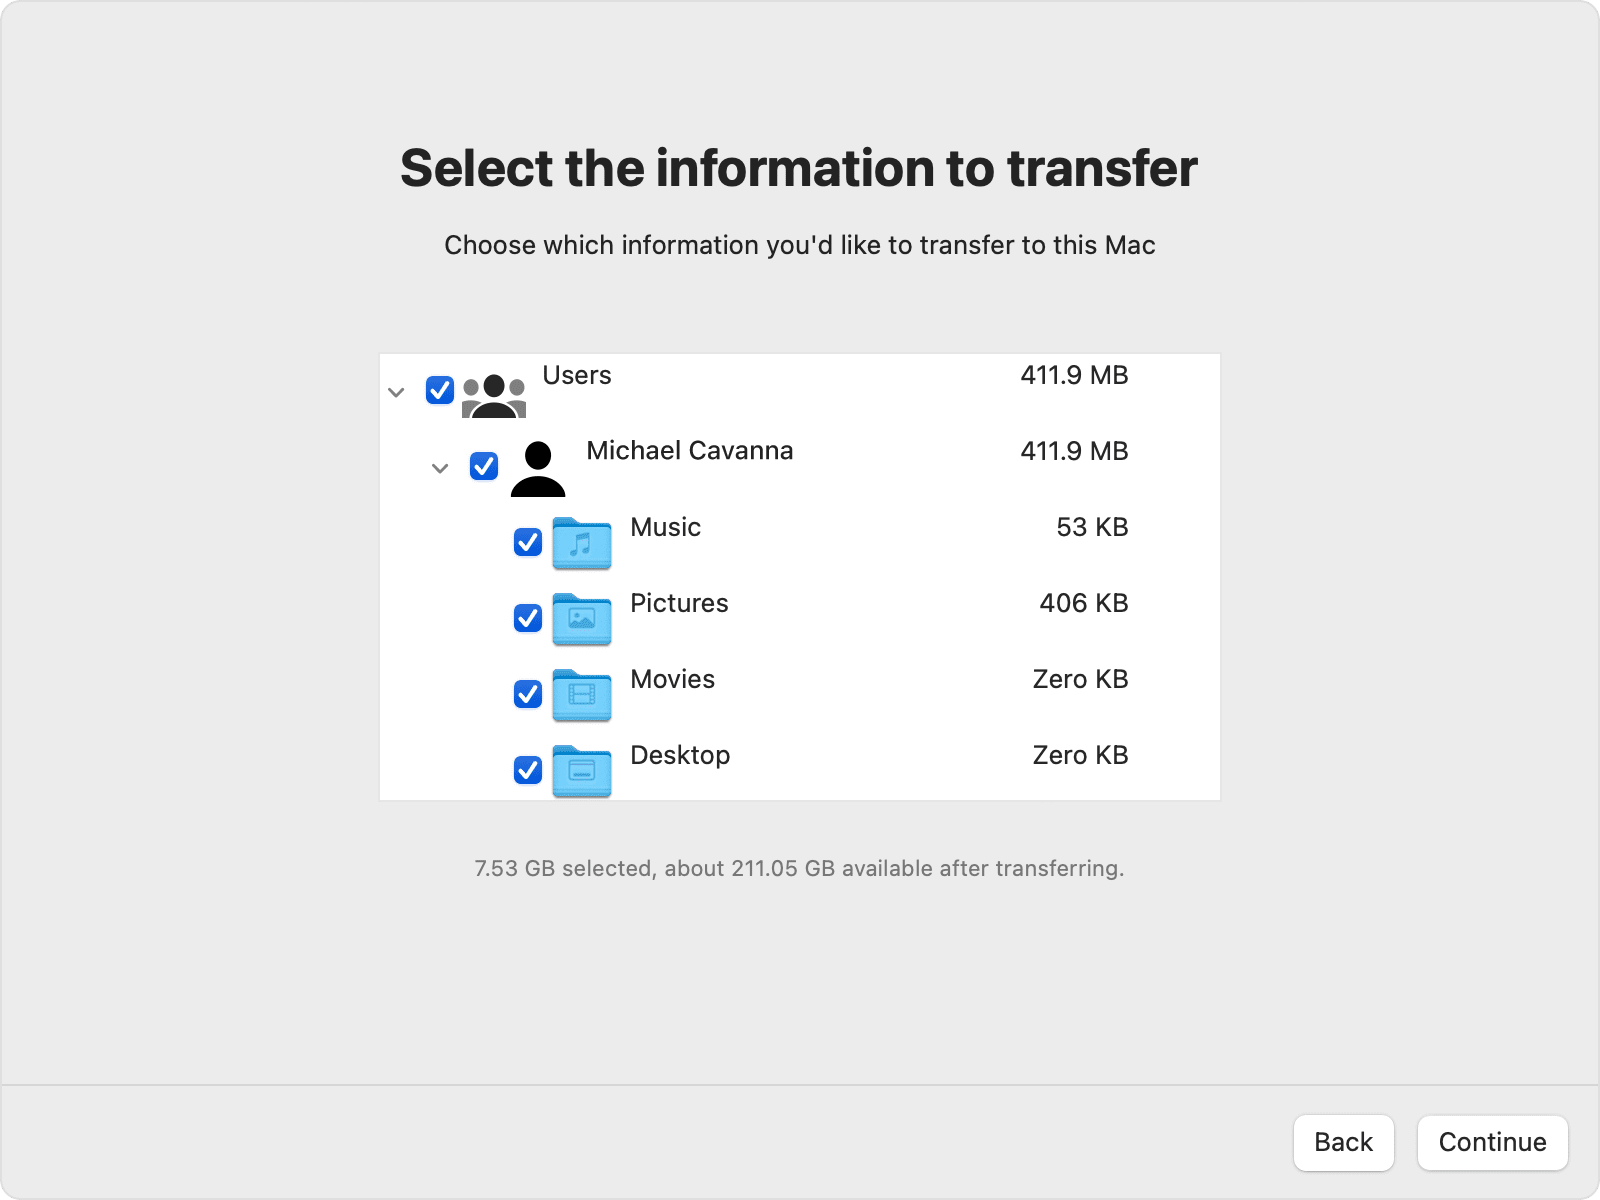
8. Now, MAC will scan the files on your PC. Once scanned, you need to select the data you want to transfer to your Mac. Once done, click on the Continue button to start the transfer process.
That’s it! You are done. This is how you can use Migration Assistant to transfer files from a Windows PC to a MAC.
3. Using Cloud Services

As of now, there are hundreds of free cloud services available on the internet. You can use any of them to transfer files between Windows and MAC. Cloud storage services like Google Drive, Skydrive, OneDrive, Dropbox, etc., are available for both the MAC and PC. You can utilize its desktop apps on the respective platform to transfer files between the devices.
Install the cloud application and upload files from your hard disk (Windows) to the cloud drive to transfer files between Windows and MAC. Once uploaded, the files will be synced to the second system (Mac). To access the file, open the MAC client for the cloud service and access the files.
However, if you have limited internet bandwidth, it’s best to rely on other methods. For a list of the best cloud storage services, check out the article – Best Cloud File Storage and Backup Services You Need to Know
4. Using USB flash drives to transfer files
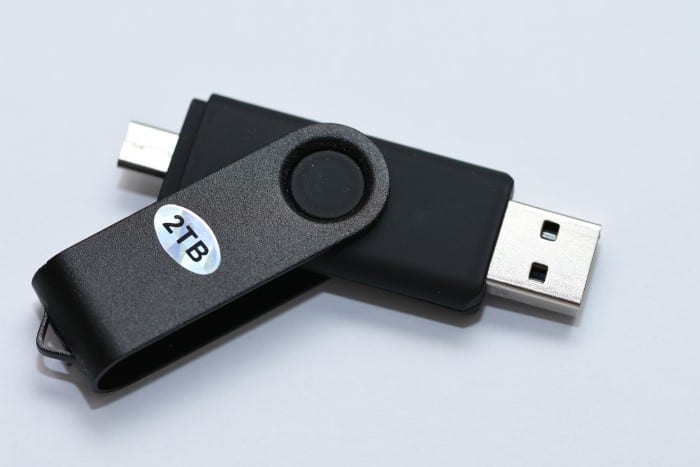
USB Flash drives are portable storage tools mostly used to transfer and store data. What’s useful is that flash drives are available in different sizes like 16GB, 32GB, 256GB. Compared to portable hard disk drives, USB flash drives are cheaper and easy to carry. However, to use a USB drive in Windows and MAC, you need to format it into FAT32.
The only drawback of the FAT32 format is that it’s more prone to disk errors and offers no security. Another thing is that files larger than 4GB can’t be stored on a FAT32 volume.
5. Using Portable Hard Disk Drives
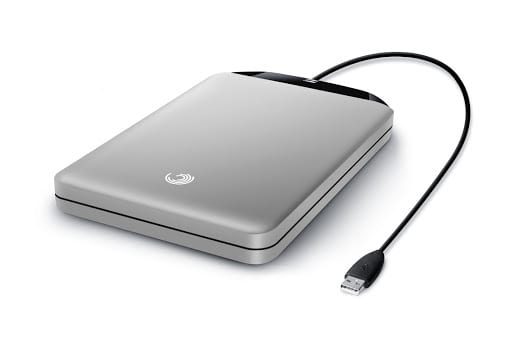
Like USB flash drives, you can even rely on Portable hard disk drives to transfer files from Windows to MAC or from MAC to Windows. Nowadays, Portable disk drives are available in different storage capacities. You can get anything between 256GB to 1TB to transfer large files. Portable hard disk drives are a one-time investment, and they are as fast as internal hard drives.
Portable SSDs are even faster than a regular hard drive. However, please make sure to format the disk drive in FAT32 format, compatible with MAC and Windows 10.
Transfering data between Windows & Mac is pretty easy; you just need to use the right tools. I hope this article helped you! Please share it with your friends also. If you have any doubts related to this, let us know in the comment box below.


