While most of Windows 11’s issues can be easily fixed, one thing that may frustrate you is WiFi problems. WiFi problems in Windows 11 are not new, but troubleshooting them can be complicated.
Users have claimed that WiFi frequently gets disconnected on Windows 11, even when the network is in range. If you are dealing with the same problem, continue reading the article.
Why Does My WiFi Keep Disconnecting in Windows 11?
WiFi disconnecting on its own is a sign of outdated network adapter drivers, corrupted system files, incorrect WiFi settings, etc. Below, we have listed the common reasons why WiFi keeps disconnecting.
- Outdated WiFi drivers
- System level bugs & glitches.
- Corrupted system files.
- Incorrect Power Management settings.
- WLAN AutoConfig is disabled.
- Incorrect network settings.
- Faulty WiFi card or device.
1. Restart your Windows 11 computer

Before you move towards the complicated methods, it’s best to start with a simple one – Restart your computer. Restarting Windows 11 takes no time and can prevent many problems.
If WiFi automatically disconnects on your Windows 11 computer, click the Start Button > Power Menu and select Restart. After the restart, connect to the WiFi network again.
2. Turn on/off the Airplane Mode
If WiFi disconnects after the restart, you can try to enable/disable your computer’s Airplane/Flight mode.
Turning on the flight mode will turn off all radio devices on your devices, like WiFi, BlueTooth, etc. Once disabled, you need to enable it again to restore the WiFi connectivity.
1. Press the Windows Key + A button on your keyboard to open the Action Center.
2. Now, find and click on the Flight Mode. This will enable the Flight mode on your computer.
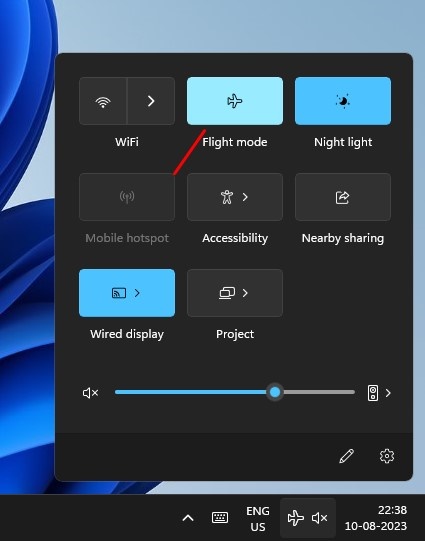
3. Now, wait for a few seconds. After that, click the Flight Mode option to restore all connectivity options.
3. Forget & Reconnect to the WiFi Network
If only a specific WiFi network is disconnecting on your Windows 11, you can forget it and then reconnect again. Doing so will rule out incorrect WiFi network profile configuration issues. Here’s what you need to do.
1. Connect to the WiFi network you want to forget. Next, press the Windows Key + A button.
2. Now, besides the WiFi, click on the arrow icon.
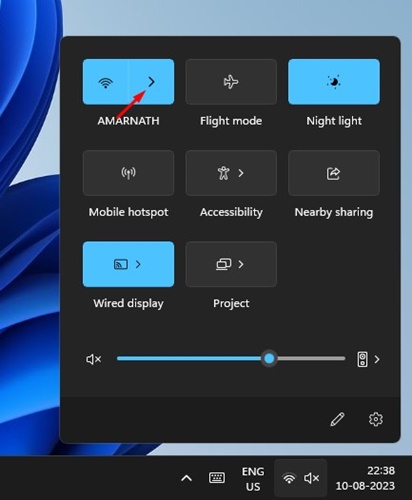
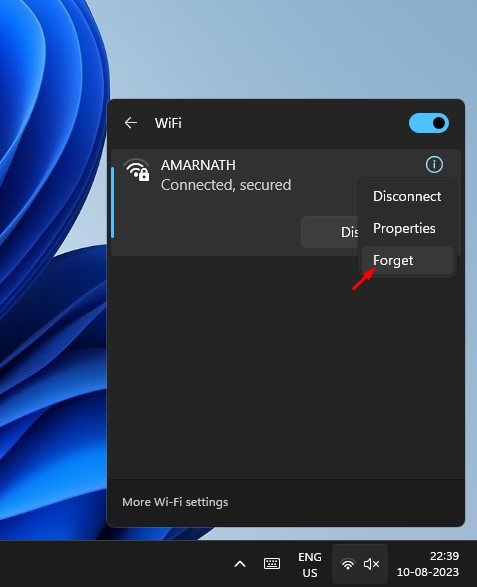
3. Now, you will see all saved network profiles. Right-click on the connected WiFi network and select Forget.
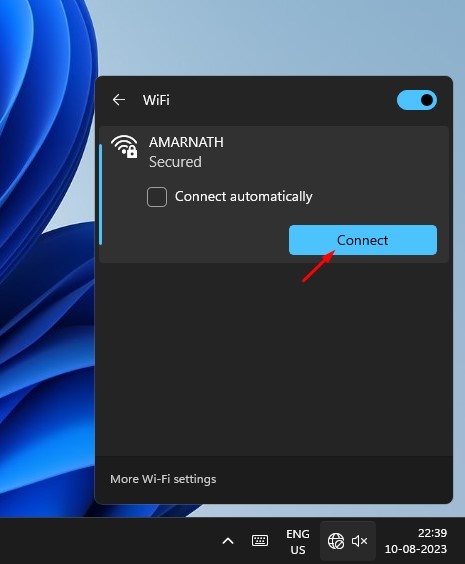
4. Now, wait a few seconds and scan for available WiFi networks again. The WiFi network you’ve forgotten will appear in the list; reconnect.
4. Connect Automatically to the WiFi Network
If the Automatic connection to a particular WiFi network is disabled, Windows 11 won’t connect with it even when the network is in range. So, you need to ensure that your WiFi network’s automatic connection setting is enabled.
1. Press the Windows Key + A button to open the Action Center.
2. Now click on the Arrow icon beside your WiFi.
3. Right-click on the problematic WiFi and select Properties.
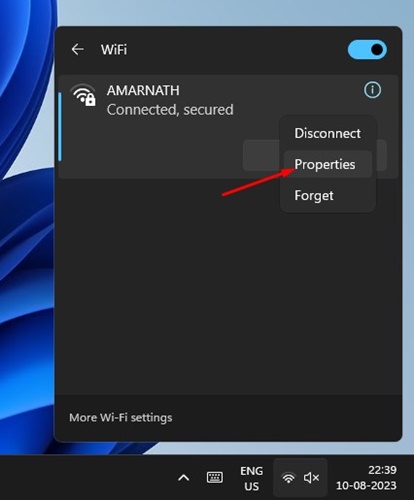
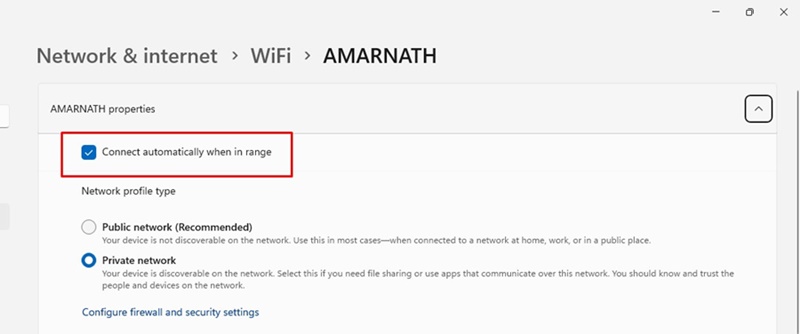
4. On the WiFi Properties screen, check the Connect automatically when in the range option.
After making the changes, turn off and enable the WiFi network again. Then, find the WiFi network and connect with it.
5. Update the WiFi Driver
Outdated WiFi drivers are another prominent reason WiFi keeps disconnecting Windows 11 problem. Hence, you can try updating your existing WiFi network drivers to resolve the issue.
1. Click on Windows 11 Search and type in Device Manager. Then, open the Device Manager app from the list.

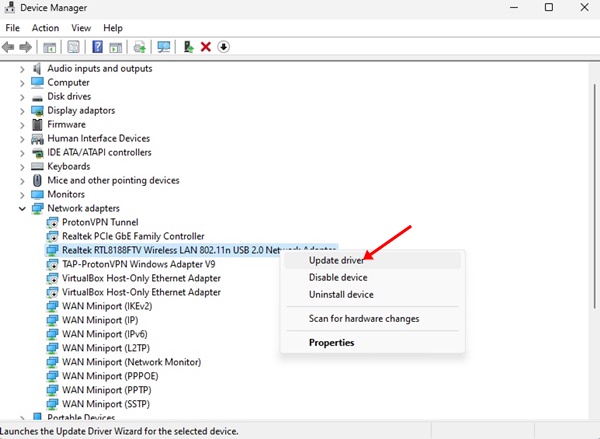
2. When the Device Manager opens, expand the Network adapters.

3. Now right-click on your WiFi card and select Update Driver.
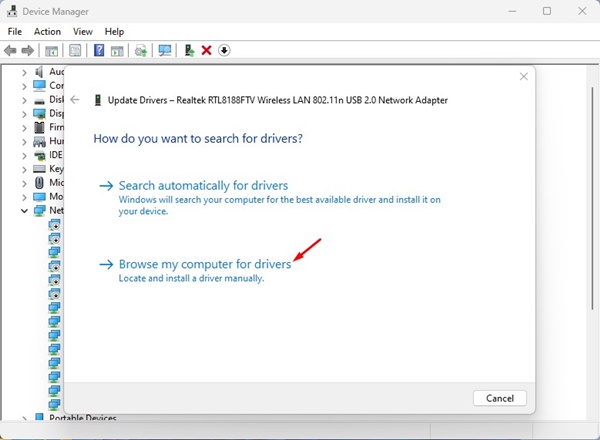
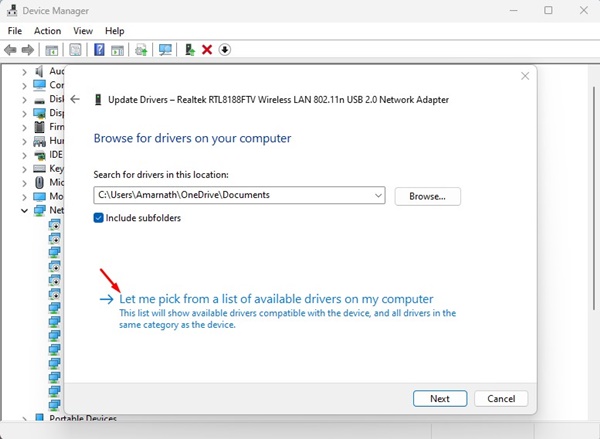
4. On the Update Drivers prompt, select Browse my computer for drivers option.
5. Now select Let me pick from a list of available drivers on my computer.
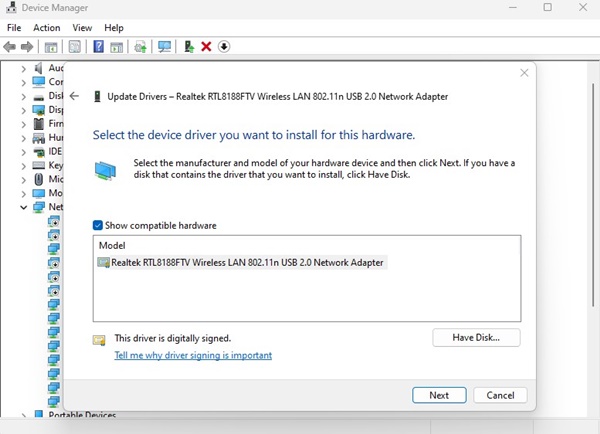
6. Check the Show compatible hardware and select the most relevant WiFi driver.
That’s it! You can also select Search automatically for drivers on Step 4 to find the latest WiFi drivers from the web.
6. Make Changes to the WiFi Power Management
Both Windows 10/11 operating systems have a feature that disables connected devices to preserve power. So, chances are that WiFi disconnecting is a sign of Windows 11 turning off the WiFi device to save power. You can modify the settings on WiFi Power Management to resolve this issue.
1. Click on the Windows 11 Search and type Device Manager. Open the Device Manager app from the list.
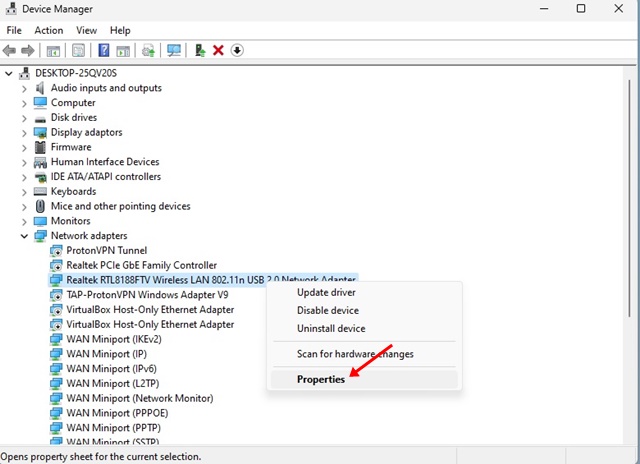
2. When the Device Manager opens, expand the Network Adapters.
3. Right-click on your WiFi adapter and select Properties.
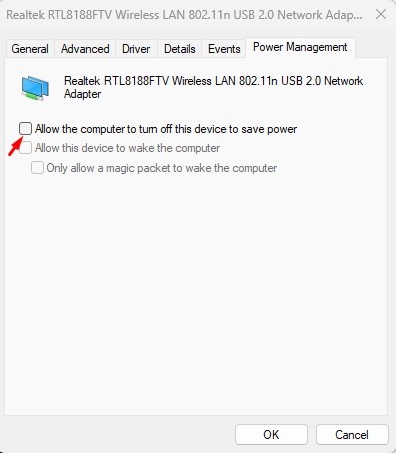
4. On the WiFi Adapter Properties, switch to the Power Management tab.
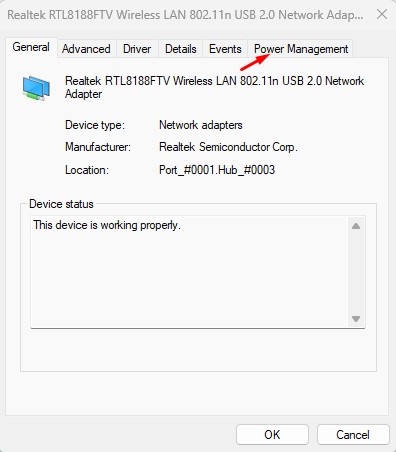
5. Now uncheck the Allow the computer to turn off this device to save power option and click OK.
After making the changes, restart your Windows 11 computer. This should fix WiFi disconnecting automatically on Windows 11 problem.
7. Modify the Windows Power Plan
You can also make a few changes to the Power Plan Settings of Windows 11 to fix WiFi keeps disconnecting problem. Here’s what you need to do.
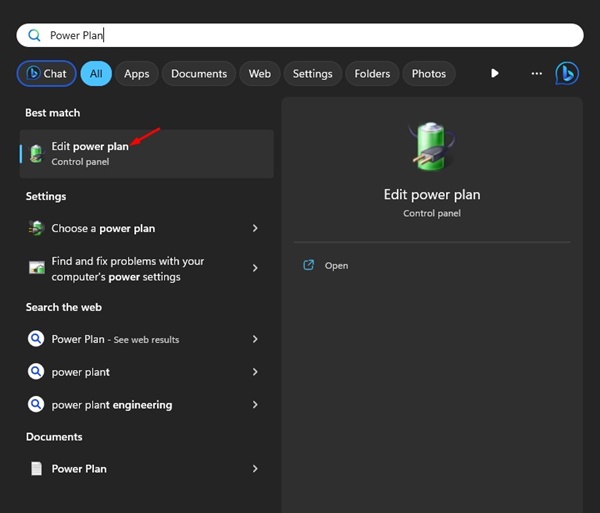
1. Click on Windows 11 Search and type in Power Plan. Open the Edit Power Plan app from the list.
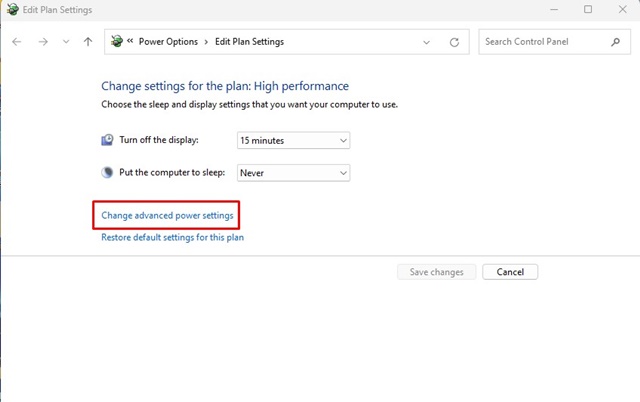
2. On the Power Plan Settings, click on the Change Advanced power settings option.
3. Now expand the Wireless Adapter Settings.
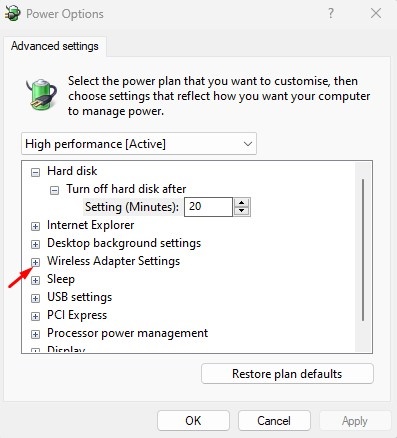
4. On the Power Saving Mode, set Maximum Performance for On Battery and Plugged in.
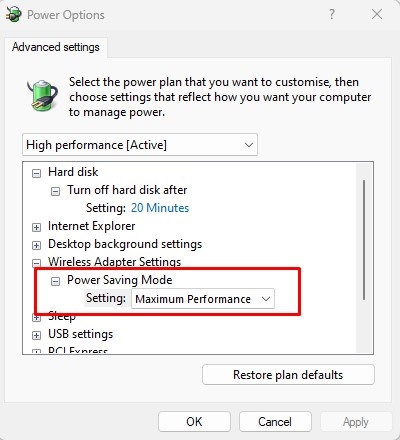
5. Once done, click on the Apply button and then on OK.
After making the changes, make sure to restart your computer.
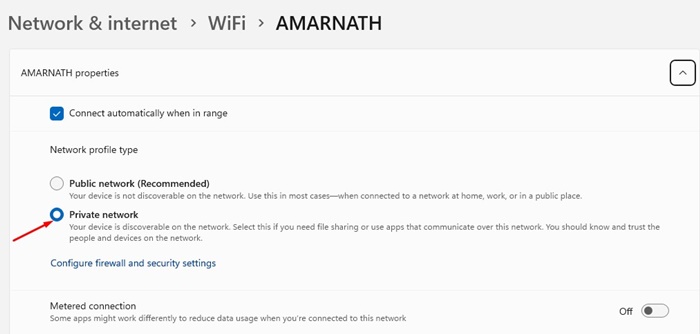
8. Set Your WiFi Network to Private
Many Windows 11 users have claimed to fix WiFi disconnecting automatically by setting their WiFi network profile to private. Hence, you can also try doing it, especially if the problem has not been fixed yet.
1. Click on the Windows Key + A button on your keyboard. Click the forward arrow button beside the connected WiFi network on the Action Center.
2. Now right-click on the WiFi network and select Properties.
3. On the WiFi Properties, select Private Network on the Network Profile type.
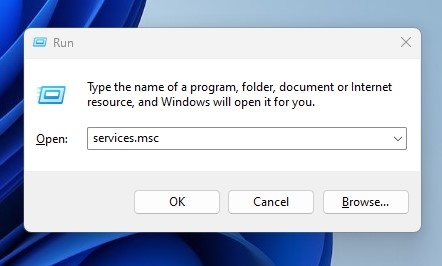
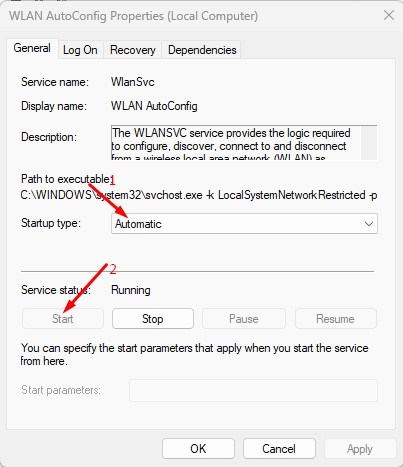
9. Enable WLAN AutoConfig Service
WLAN AutoConfig is a very important service of Windows 11 that’s responsible for handling all WiFi networks. If this service is set to Automatic (Delayed) or Disabled, you will face many WiFi issues; one of them is WiFi keeps disconnecting.
So, in this method, we would have to ensure that the WLAN AutoConfig service on Windows 11 is enabled. Here’s what you need to do.
1. Click on the Windows Key + R button to open the RUN dialog box. On the Run Window, type services.msc and press Enter.
2. This will open the Windows Services app. Now, find and double-click on the WLAN AutoConfig.
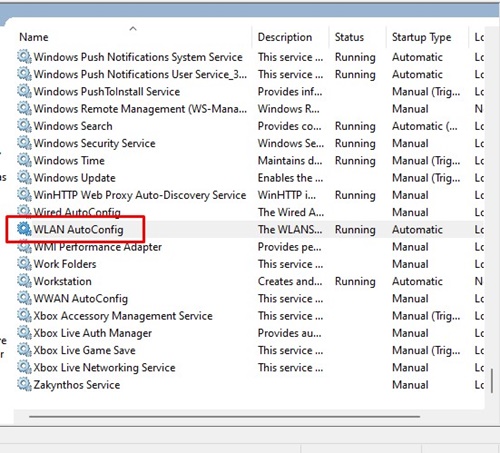
3. On the WLAN AutoConfig Properties, select Automatic on the Startup type. Once selected, click on Start on the Service Status and click on the OK button.
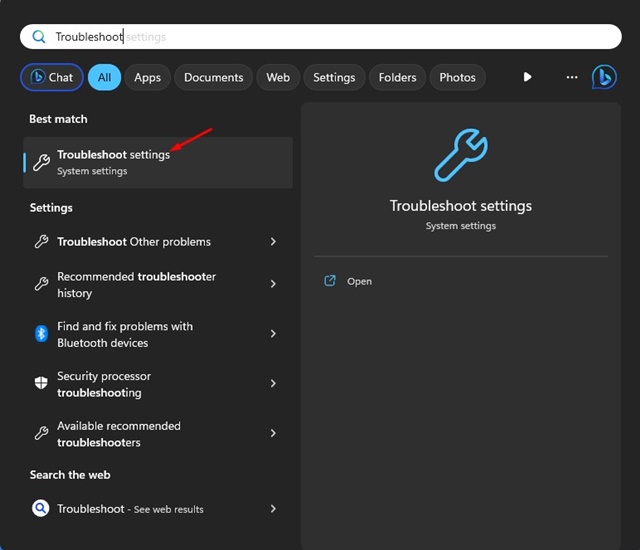
10. Run the Network Troubleshooter
Windows 11 has an Internet Connection troubleshooter that attempts to resolve all network-related problems. Hence, if the WiFi network issue is still not fixed, you can try running that troubleshooter on your computer. Here’s what you need to do.
1. Click on the Windows 11 Search and type Troubleshoot. Select the Troubleshoot Settings from the list of matching results.
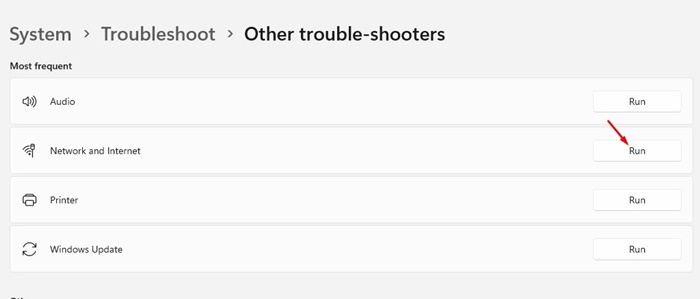
2. On the Troubleshoot screen, select Other trouble-shooters.

3. Now click on the Run button beside Network & Internet.
4. Now wait for a few seconds until the Network & Internet troubleshooter finds & fixes the problem.
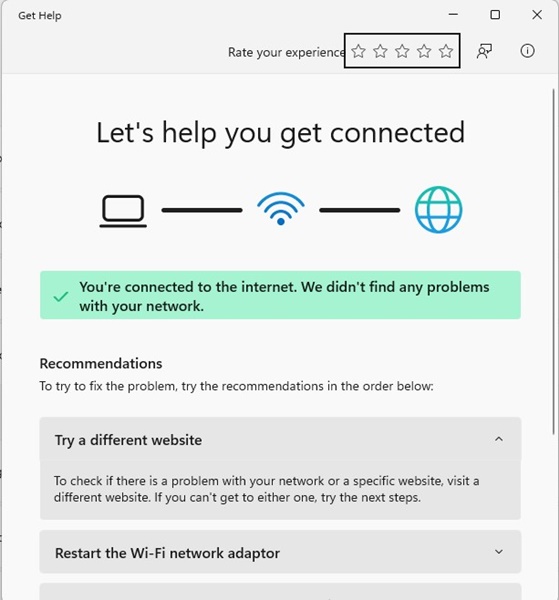
Once the problem is fixed, restart your Windows 11 computer.
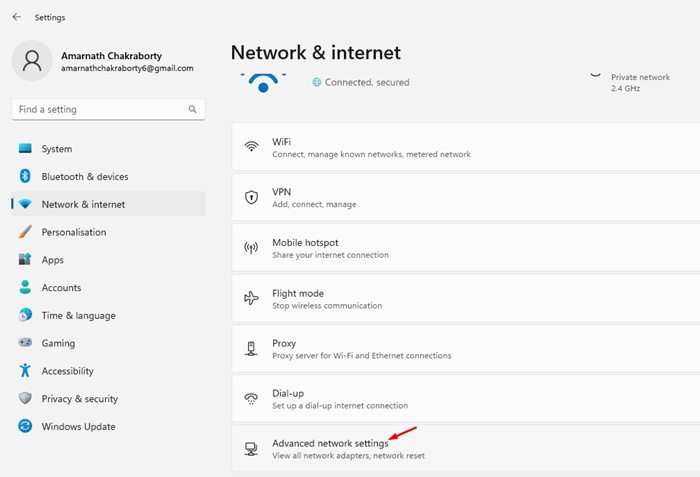
11. Reset Network Settings on Windows 11
Resetting the Network Settings is another option you have to resolve the issue. However, you should reset the Network settings only if all other methods fail to resolve the problem. Here’s how to reset Network Settings on Windows 11.
1. Click the Windows 11 Start button and select Settings > Network & Internet > Advanced Network Settings.
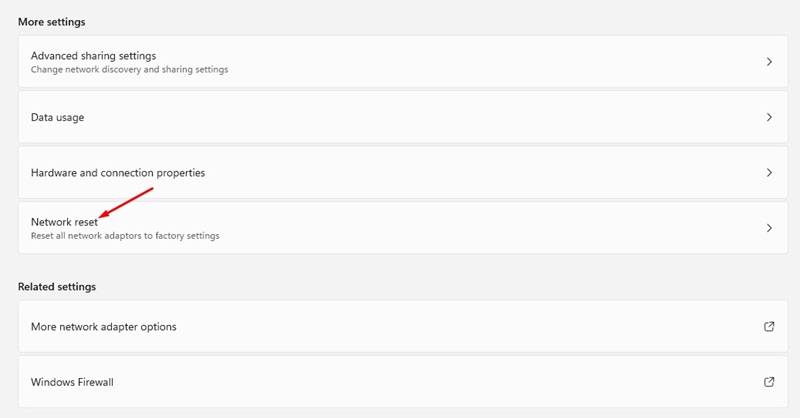
2. On the right side, scroll to More Settings and click on Network Reset.
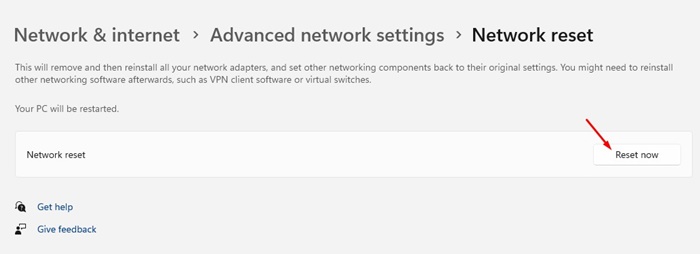
3. Now, just beside the Network Reset, click the Reset Now button.
12. Check for faulty WiFi Device/Card
If you are still experiencing the WiFi disconnecting problem, even after following all methods, there is a higher probability of having a faulty WiFi Device or card.
You can replug the WiFi Device on the USB port, or if you’re using a laptop, you can take your device to a local technician and ask them to check the WiFi card.
The goal is to confirm whether your WiFi network card is working properly. If it’s not working, you need to get it repaired or replaced.
These are the few best and working methods for Windows 11 wifi keeps disappearing/disconnecting issues. You should follow all these methods one by one until the problem is fixed. These methods will also help you rule out Windows 11 WiFi internet stopped working issues.


